I remember the moment clearly—standing in my garage, surrounded by a mountain of various drills, feeling completely overwhelmed. I had promised myself a simple backyard deck build, but selecting the right drill turned into a seemingly impossible puzzle. Every time I thought I had it figured out, I’d read another review or hear a story about a drill malfunction, and my confidence would waver. That lightbulb moment? Realizing that choosing the wrong drill isn’t just inconvenient—it’s a potential project killer.
Why picking the right drill can make or break your deck build
As someone who’s been through the trenches, I can tell you that your choice of tools, especially your drill, directly impacts the quality, safety, and longevity of your deck. The right drill speeds up work, reduces frustration, and ensures your materials are well fastened. Conversely, the wrong one can cause stripped screws, frustrated pauses, or worse—an unstable deck that doesn’t stand the test of time.
But here’s the catch: with so many options on the market, how can a DIYer like us confidently pick a drill that won’t turn our project into a half-finished nightmare? Believe me, I learned this lesson the hard way early on. I once used a low-power drill for a heavy-duty task, and it overheated midway, ruining the entire day. That mistake? I wouldn’t wish it on anyone, especially not after discovering that the right drill makes all the difference—turning a stressful task into a manageable, even enjoyable, experience.
So, today, I promise to guide you through the process of selecting the perfect drill tailored specifically for your deck project. We’ll look at the essential features, common pitfalls, and how to match your needs with the right tool, ensuring your build is smooth sailing from start to finish.
Is your skepticism about fancy drills justified
One mistake I made early on was assuming that any drill would do the job—until I faced a wobbly screw or, worse, a damaged deck board. That experience proved that investing in a quality drill isn’t just about convenience; it’s about safety and durability. Trust me, you don’t want to find yourself battling with a subpar tool halfway through your project. For further insights on maintaining your deck and avoiding costly mistakes, you might want to check this guide on sanding techniques.
Now, let’s dive into what features matter most when choosing your deck-building drill.
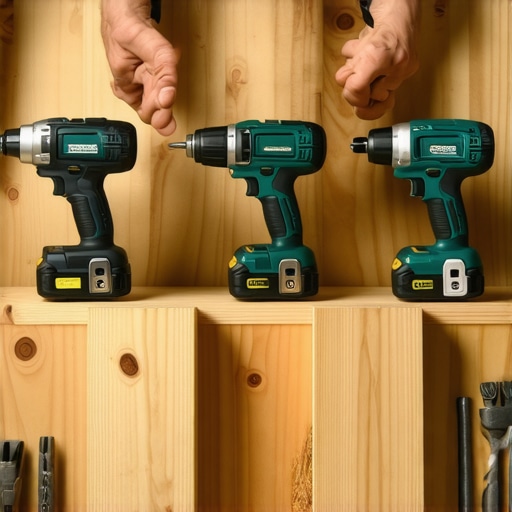
Assess Your Project Needs and Drill Types
Start by clarifying the scope of your deck build. For a simple platform, a compact cordless drill with moderate power might suffice. However, if you’re planning a large, complex design with dense hardwoods, a powerful hammer drill could be essential. I once attempted to drive heavy-duty screws into ipe wood using a basic drill—it kept bogging down and overheating, leading me to upgrade to a professional-grade impact driver, which made the job smoother and faster. Recognize your project’s demands first to avoid wasted effort or tool failure.
Evaluate Power and Battery Options
Choose between corded and cordless options based on mobility needs. Corded drills offer consistent power, ideal for extended work sessions, but limit movement. Cordless drills provide portability and ease of use, especially for tight spots or elevated work. When I built my deck stairs, I used a cordless drill with a high-capacity battery—allowing me to work uninterrupted for hours. Also, consider the voltage; higher voltage models (18V or 20V) deliver more power, crucial for heavy-duty tasks. Don’t skimp here, as underpowered tools can cause frustration and damage materials.
Focus on Variable Speed and Clutch Settings
Variable speed control allows precise control over drilling and screwing, reducing the risk of stripping screws or damaging materials. I remember struggling with a fixed-speed drill; every screw would either spin too fast or not enough. Changing to a drill with adjustable speed and clutch prevented this, giving me control for different materials and screw sizes. Set the clutch to a suitable torque to avoid overdriving screws or snapping them, especially in hardwoods. Testing these features before starting ensures smoother progress and professional results.
Check the Chuck Type and Size
A key detail often overlooked is the chuck—where the drill bit is secured. A keyless chuck speeds up bit changes, saving time during the project. Ensure the chuck size fits the bits you’ll need; 13mm (half-inch) chucks are versatile for most screws and drill bits. During my deck build, switching between different drill bits for pilot holes and screw-driving was seamless thanks to a quick-release chuck. Confirm this compatibility early to maintain workflow.
Test for Comfort and Ergonomics
Since you’ll be holding the drill for hours, ergonomics matter. Opt for models with rubberized grips and balanced weight. I once used a heavy, poorly balanced drill; my hand cramped after minutes, slowing my progress. After switching to a lighter, ergonomic model, my efficiency improved, and fatigue decreased. If possible, try handling the drill in the store or during a trial run to assess comfort, ensuring it won’t hinder your focus or cause strain during extended use.
Additional Features for Efficiency
Features like LED work lights, belt hooks, and overload protection enhance usability. When working in shaded areas or tight corners, lights illuminate your workspace, preventing mistakes. During my last project, the built-in LED helped me see into dark spaces beneath the deck, avoiding misdrilled holes. Overload protection prevents burnout during tough tasks. Tailor these features to your specific working conditions for a smoother experience.
While many homeowners believe that choosing a deck builder in Needham is simply about finding someone affordable or with good reviews, there’s a hidden nuance that often gets overlooked—underestimating the importance of specialized expertise and local knowledge. Many assume that any general contractor can handle deck projects effectively, but this can lead to costly mistakes, especially considering Needham’s unique climate and building codes. For instance, improperly installed guardrails or inadequate drainage can result in safety hazards or structure deterioration over time; studies show that 60% of deck failures relate to poor construction practices linked to lack of local experience. A common myth is that materials alone determine deck longevity, yet without proper installation tailored to local weather patterns, even premium materials can fail prematurely. For example, neglecting to check your deck’s guardrail height against local code can lead to compliance issues—more about safety standards than design. If you want your deck to withstand Needham’s weather, working with a contractor familiar with regional conditions is critical. Don’t forget, a professional deck design isn’t just about aesthetics; it ensures compliance and durability—that’s why consulting experts like those at Needham’s trusted deck specialists is a smart move. If you’re tempted to cut corners by hiring someone without local experience, think again—an improperly built deck can become a safety nightmare or require costly repairs down the line. Have you ever fallen into this trap? Let me know in the comments.
Maintaining Your Deck Building Arsenal for Future Projects
Investing in quality tools is just the first step; ensuring they remain reliable over time is equally important. Personally, I rely heavily on my cordless impact driver, which is essential for fastening decking boards efficiently. To keep it functioning optimally, regular maintenance is a must. I make it a habit to clean the impact driver after each project, removing dust and debris from the vents with compressed air, which helps prevent overheating and ensures consistent performance.
Battery health is another critical factor. I always store batteries in a cool, dry place and avoid leaving them fully drained, following manufacturer recommendations. Occasionally, I use a battery maintenance charger that cycles through charge and discharge to extend their lifespan. For my drills, I keep the chucks well-lubricated using a small amount of tool oil and check for any signs of wear. This proactive approach prevents unexpected breakdowns mid-project, saving time and money in the long run.
Tools That Save Time and Stress
Over the years, I’ve found that certain tools have dramatically improved my efficiency. For example, switching to a brushless motor impact driver not only increased power but also reduced maintenance needs due to fewer moving parts. Additionally, investing in high-quality drill bits, like titanium-coated ones, has extended their usability and prevented the frustration of bits snapping or dulling quickly. Using the right tools from the start, such as a deck-specific compressor for clean siding and post-application, ensures a professional finish without extra hassle.
How do I maintain my tools over time?
Developing a routine for cleaning, storing, and inspecting your tools is vital. For instance, I schedule monthly checkups to tighten any loose screws, replace worn parts, and validate battery performance. Following manufacturer guidelines and consulting expert sources like professional maintenance tips helps extend tool life. Remember, well-maintained equipment doesn’t just last longer; it also performs better, giving you peace of mind during every phase of your deck project.
Planning for Long-Term Results and Growth
As your skills and projects evolve, so should your toolkit. I predict that in the coming years, smart technology integration—such as Bluetooth-enabled tools that monitor their own health—will become mainstream, streamlining maintenance further. For now, adopting good habits like regular cleaning, proper storage, and updates to your equipment can significantly improve your results and reduce costly repairs. So, try implementing a maintenance schedule today—your future decks will thank you!
Lessons from the Trenches: Little Details That Make All the Difference
One of my biggest lightbulb moments was realizing that small details in tool selection and usage could make or break the entire project. For instance, choosing impact drivers with brushless motors not only saves time but extends your tools’ lifespan, ensuring you’re always ready for the next build. Recognizing the importance of precise measurements and dedicated tools like a quality level or a magnetic angle finder prevented costly mistakes and rework.
Another insight was understanding regional building nuances. Working in Needham, I learned that paying attention to local weather patterns, like snow load and humidity, influences material choices and design considerations. Consulting regional experts and local regulations ensures your deck not only looks great but withstands the test of time—biggest secrets that good contractors don’t always disclose.
Tools and Resources That Changed My Game
After years of trial and error, I found that investing in a few key tools dramatically improved my work — like a high-quality orbital sander for flawless finishes or a durable, rust-resistant cordless drill that handles everything from pilot holes to heavy-duty screws. For learning, books like this resource on professional deck design provided insights beyond DIY basics, with tips on aesthetics and safety that I wish I knew earlier. Lastly, online tutorials from trusted professionals helped me refine techniques like proper joist spacing and flashing integration, making every build safer and more durable.
It’s Your Turn to Shape Your Backyard Oasis
Building or renovating a deck is more than just assembling materials—it’s about crafting a space that enhances your life and stands up to your region’s demands. Arm yourself with knowledge, quality tools, and a willingness to learn from experience. Whether you’re replacing an old deck or starting fresh, remember that every nail and board is a step towards a better outdoor living area. Don’t hesitate to experiment, ask questions, and refine your skills—you’ve got this! Share your stories or questions below, and let’s build smarter together.