It was a sunny Saturday afternoon when I finally decided to tackle the neglected, splintered corners of my Needham cedar deck. As I grabbed my sander, I couldn’t help but remember the last time I tried buffing the surface—what I thought would be a quick refresh turned into a weekend nightmare. The wood was gouged, uneven, and I was left wondering if I had just doomed my beautiful deck.
Why Proper Sanding Matters More Than You Think
Over-sanding or using the wrong technique can do more harm than good. I learned this the hard way early on, making a common mistake of applying too much pressure and letting the sander do all the work. Not only did I ruin sections of my cedar, but I also created a need for costly repairs later. This lightbulb moment made me realize that sanding isn’t just a superficial task; it’s an art that requires patience, technique, and the right tools.
If you’re like me, you’ve probably faced the frustration of trying to restore your deck’s beauty without causing more damage. But don’t worry—after years of trial, error, and some solid research, I can guide you through the process so you’ll avoid the mistakes I made. Today, we’ll explore how to sand your Needham wood deck effectively, preserving its integrity and prolonging its lifespan.
Is the Hype About Sanding Your Deck Actually Justified?
When I first started, I thought, “Why not just go at it and get it over with?” Turns out, rushing actually costs more time and money in the long run. I once tried to speed up the process by skipping essential steps, which ended up creating rough patches and uneven surfaces. This is a mistake many homeowners make, believing quick fixes are enough. Trust me, taking the time to do it right pays off.
Choosing the wrong sandpaper grit, for example, can easily sand away more than you bargained for, especially with delicate cedar. To learn more about selecting the right materials, check out this comprehensive guide on selecting the right cedar for your deck. Remember, patience and proper preparation are the keys to a flawless finish—so let’s dive into the practical steps you’ll want to follow.
Prepare Your Workspace with Precision
Start by clearing your deck thoroughly, removing all furniture, plants, and debris to ensure unrestricted access. Wear safety glasses and a dust mask, especially when working with cedar, which releases fine particles. Think of this step as setting the stage before a performance—everything needs to be in place for a smooth process.
Select the Correct Sandpaper Grit
Choose a medium grit (around 80-100) for initial smoothing, then switch to a finer grit (150-180) for finishing. I once made the mistake of jumping straight to fine grit, leaving uneven patches. Remember, starting with too fine a grit can make removal of old finish difficult, while too coarse can damage the wood. For cedar decks, avoid very coarse grits to prevent gouging—consult a guide like this resource for details.
Master the Sanding Technique
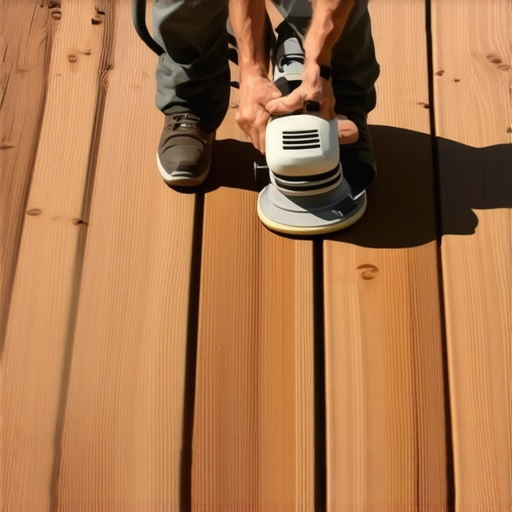
Hold the sander firmly but not so tight that you restrict its movement. Keep the sander moving in long, overlapping strokes along the grain to prevent uneven sanding. I once tried to rush by holding the sander in one spot—resulting in burnt patches that required re-sanding. Think of it like painting: consistent, fluid motion yields the best results. Use a square or triangle sander for edges and corners for uniformity.
Understand Pressure Matters
Applying gentle, consistent pressure allows the sander to do its job seamlessly. Too much pressure can gouge the cedar, creating ridges and damaging the surface. I learned this after pressing too hard on a stubborn area, which ended up needing extra filling and sanding. Let the sander do the work—your goal is to remove old finish and smooth the surface, not to press it flat.
Manage Dust and Debris Effectively
Attach a vacuum port or use a dust collection system to keep the work area clean. Dust acts like a shadow that hides imperfections, so vacuum frequently during sanding. I remember working late into the evening, thinking the deck looked good, only to notice dust settling into the grain during inspection—disappointing, to say the least. Cleanliness ensures a better finish when applying stain or sealant afterwards.
Inspect and Address Imperfections
After initial sanding, run your hand over the surface to identify rough patches or gouges. Sand these spots lightly with fine grit paper to blend imperfections. Be vigilant—missing these areas can ruin the overall look when stained. This hands-on check is similar to a quality control step in woodworking that ensures longevity and appearance.
Focus on Edges and Hard-to-Reach Areas
Use detail sanders or hand sanders for edges and corners, where larger tools can’t reach effectively. I once overlooked the edges, leading to uneven staining, which was hard to correct later. Think of these spots as the finishing touches that make the entire deck cohesive—don’t skip them.
Many homeowners assume that choosing a deck builder in Needham is a straightforward task, but the reality is far more nuanced. A common misconception is that all local contractors offer comparable quality; however, the differences in experience, materials, and craftsmanship can significantly impact your project’s outcome. Relying solely on price quotes without vetting credentials often leads to subpar results and hidden costs. It’s crucial to look beyond surface-level impressions and delve into a builder’s portfolio, reviews, and certifications. For instance, some contractors may promote inexpensive wood options like pressure-treated lumber, but they might overlook the importance of considering cedar or mahogany for durability and aesthetic appeal. This oversight can result in decks that decay faster or require costly maintenance. To ensure you’re making an informed choice, check out our detailed guide on selecting the right cedar for your deck. Additionally, many homeowners underestimate the importance of proper zoning and permit regulations in Needham, which can cause delays or legal issues if overlooked. Engaging a seasoned local builder familiar with the town’s codes helps prevent these pitfalls. Another hidden nuance is the impact of seasonal timing on deck construction; working with professionals who understand the optimal season for installation can save you money and ensure quality. Moreover, beware of contractors who cut corners on safety standards or expertise, as this can compromise your home’s integrity. Investing in experienced, licensed, and insured builders ensures your project stands the test of time. Remember, a well-constructed deck isn’t just about aesthetics—it’s a long-term investment that, if done right, increases your property’s value and enjoyment. So, have you ever fallen into this trap of choosing an underqualified deck builder? Let me know in the comments, and stay sharp with your decisions.
Keep Your Deck in Prime Condition with the Right Maintenance Tools
Maintaining a Needham deck requires more than just occasional cleaning; it demands the right tools that ensure longevity and a pristine appearance. Personally, I rely on a high-quality orbital sander with variable speed settings. This tool allows me to gently remove old finishes and smooth out the surface without damaging delicate cedar or cedar alternatives. For routine cleaning, a power washer equipped with a fan spray nozzle is indispensable, as it effectively removes dirt and grime without eroding the wood if used correctly. Additionally, I’ve found that a detail scrub brush with stiff bristles helps tackle hard-to-reach corners and edges, ensuring a consistent finish—particularly important when planning to re-stain or seal the surface. Investing in these specific tools has saved me time and minimized mistakes, but knowing when and how to use them is equally vital.
Monitoring and Addressing Long-Term Wear
Over time, even the most meticulously maintained decks can show signs of wear. Regular inspections—especially after harsh seasons—are crucial. Look for uneven fading, loose fasteners, or small cracks. For addressing minor issues early, I recommend a sealant applicator brush and a power drill with screwdrivers designed for quick fastener replacements. These tools enable you to fix loose boards or replace damaged sections swiftly, avoiding costly repairs later. Incorporating a seasonal maintenance schedule—perhaps in early spring and late fall—helps catch problems before they escalate. Moreover, applying a protective finish like a solid stain or a weatherproof sealer enhances the wood’s resistance to moisture and UV damage, significantly extending its lifespan. For further insights into sealing options, check out our guide on why solid stain benefits aging decks.
Tools for Safer, More Effective Scaling of Your Deck
If your Needham deck starts to look a bit outdated or uneven, scaling it up might be the next step. For this, a modular scaffold system with adjustable heights and sturdy guardrails is essential. I personally use a lightweight aluminum scaffold with locking wheels—it provides stability without the bulk of traditional scaffolding, making it easier to maneuver along the deck’s surface. For larger expansion projects, a laser level helps ensure even elevation and symmetry across multiple levels or extensions, saving misalignment headaches. Remember, safety always comes first—regularly inspecting your existing structure before scaling ensures that you’re not building on flawed foundations. Plus, understanding the local zoning laws, such as those outlined in Needham’s deck zoning laws, is critical before starting any expansion.
How Do I Maintain External Hardware Safely Over Time?
External hardware—fasteners, railings, brackets—are exposed to the elements and prone to corrosion. I recommend using marine-grade stainless steel fasteners and finishing any metal components with rust-inhibiting paint or sealant. Regularly inspecting these parts and applying a protective coat—say, annually—maintains structural integrity. For a comprehensive approach, consider using a silicone-based lubricant for moving parts like hinges or adjustable railings, which reduces wear and prevents seizing. Stay proactive—small maintenance steps like these keep your deck functional and beautiful for years to come.
Looking ahead, emerging smart maintenance technologies, such as IoT-enabled sensors that monitor moisture levels and structural stress, are beginning to enter the market. These innovations could revolutionize how we care for outdoor structures, providing real-time alerts before problems become severe. While still in their infancy, integrating such technology could be a game-changer for meticulous homeowners or professional contractors aiming for long-term quality. For now, following a disciplined maintenance routine with proven tools will ensure your Needham deck remains a safe, attractive space for years to come. Why not try out a high-grade orbital sander on your next project and experience firsthand how precise control can elevate your deck’s upkeep?
The Hidden Traps I Fell Into When Caring for My Needham Deck
One of the most valuable lessons I learned was that patience truly pays off in deck maintenance. Rushing through sanding or applying stain without proper prep only led to more work later. That realization pushed me to develop a meticulous routine, which not only enhanced my deck’s appearance but also extended its life. For anyone serious about maintaining their Needham deck, understanding these pitfalls can save you time and money in the long run.
How I Learned to Trust Quality Over Cuts
Initially, I believed that cutting corners—like opting for cheaper tools or skipping prep steps—would be a quick fix. But every shortcut I took ended up costing me more. Now, I invest in reliable tools, like a high-quality orbital sander, which has become my go-to for smooth finishes. This shift in approach has transformed my deck from a faded surface to a vibrant outdoor oasis.
Tools that Changed my Deck Game
Beyond the basic sander and stain, I swear by a few resources that have made my project smoother: a laser level for even scaling, marine-grade stainless steel fasteners for durability, and a good dust collection system to keep the workspace clean. These weren’t expensive additions but their impact is priceless. Check out local experts’ insights to see how quality tools complement professional craftsmanship.
Keep the Deck Love Alive
Your Needham deck is more than just wood—it’s a space for memories and relaxation. Regular maintenance, right tools, and a dash of patience turn it into an heirloom that can be enjoyed for generations. If you’re feeling overwhelmed, remember that each small step builds toward a stunning, long-lasting result. Ready to take action? Start today, and your future self will thank you for the effort!