I’ll never forget the moment I stepped onto my once-beautiful cedar deck and was hit with a wave of disappointment. The vibrant, warm tone had faded into dull gray, and the wood felt rough beneath my feet. It was a lightbulb moment—my deck was crying out for some love and attention. Like many Needham homeowners, I learned that neglecting regular maintenance can turn a stunning outdoor space into a weathered eyesore.
Why Restoring Your Cedar Deck Matters Right Now
In Needham, our climate—characterized by hot summers and icy winters—takes a toll on wooden decks. If you’re like me, you want your outdoor space to be inviting and safe, not an accident waiting to happen due to rot or splinters. Restaining not only enhances your home’s curb appeal but also protects the wood from moisture, UV damage, and pests. Plus, a well-maintained deck can significantly boost your property value. Based on my experience, investing a little time into sanding and restaining can save you money in the long run—and extend the life of your deck.
Is the Cost and Effort Worth It for Your Needham Deck?
Admittedly, I was skeptical at first. The idea of stripping, sanding, and staining seemed overwhelming, especially with our busy schedules. I wondered if it was worth the effort or just a temporary fix. Early on, I made the mistake of rushing through the prep work—skipping thorough cleaning and choosing the wrong stain, which led to uneven coloring. That lesson taught me the importance of proper preparation. If you’re concerned about the time and cost, know that this DIY project can be manageable, especially if you follow the right steps. And remember, a properly restored deck can last for years—making the effort well worth it. Curious about the best sealants for our climate? Check out this guide to Needham’s top deck sealants.
Now, let’s get into the practical side—how to sand and restain your cedar deck so it looks fantastic and withstands the elements for years to come. Ready to transform your outdoor space? Let’s dive in and make your deck the envy of your neighborhood!
,
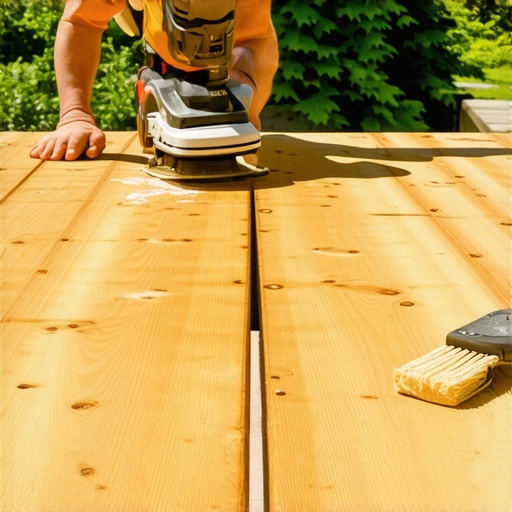
Prepare Your Workspace and Gather Materials
Before starting, clear the deck of furniture, plants, and any loose items. Wear protective gear like gloves and safety glasses. You’ll need a wood cleaner, a power washer or scrubbing brush, sandpaper or a handheld sander, high-quality stain suitable for cedar, brushes or rollers, and painter’s tape. I once neglected this prep phase and ended up with uneven stain application, which took extra time to fix.
Thoroughly Clean the Deck Surface
Use a deck cleaner formulated for cedar and a power washer set to a low-pressure setting. Focus on removing dirt, mold, and old stains. Let the surface dry completely, which can take 24-48 hours depending on weather. Skipping this step led me to the stain not adhering properly, resulting in peeling within months.
Note
For stubborn stains or mold, apply a cleaning solution and scrub gently. Allow proper drying time before proceeding.
Sand the Deck to Reveal Fresh Wood
Light sanding smooths out splinters and opens the wood pores for better stain absorption. Use a handheld sander with medium-grit sandpaper. Think of it as sanding a rough sculpture into a smooth masterpiece. Once, I started sanding without checking the wood’s moisture, leading to uneven patches—checking moisture levels now helps me plan my sanding effectively.
Tip
Focus on areas with peeling or old stain, and sand in the direction of the wood grain. Afterwards, sweep away dust with a brush or vacuum.
Apply Painter’s Tape and Protect Adjacent Areas
Use painter’s tape along railings and edges to ensure clean lines. Cover nearby plants or furniture with tarps. Skipping this meant hours of cleaning stain off unintended surfaces, which is easily avoided with proper taping.
Stain the Deck with Precision
Use a brush or roller to apply the cedar stain evenly, working in manageable sections. Start from one corner and work outward to prevent overlaps drying inconsistently. I found that working in the shade prevents the stain from drying too quickly, which can cause streaks. Use a high-quality stain to ensure durability, especially considering Needham’s weather variability. For guidance on choosing the best sealants, you can check out this top sealant guide.
Avoid
Overapplication or uneven strokes can cause blotchiness. Follow the product instructions carefully, and reapply as needed for uniform coverage.
Allow Sufficient Drying Time and Final Inspection
Let the stain cure for at least 24-48 hours before foot traffic. During this time, avoid rain or heavy dew, which can ruin the finish. Inspect the deck for missed spots or uneven areas, touching up if necessary. I once missed a small patch, which darkened over time and became quite noticeable. Regular maintenance now involves quick inspections and touch-ups, extending the deck’s lifespan.
Following these steps methodically will give your cedar deck a fresh, long-lasting look while protecting it against the elements. Remember, patience in preparation and application yields the best results, so take your time with each phase. Need guidance on deck foundation options before you begin? Check out this comparison of foundation types for Needham homes.
 Many homeowners in Needham believe that choosing a deck builder is simply about finding the lowest bid or the quickest turnaround. However, this misconception can lead to costly mistakes and subpar results. In my experience working with Needham deck professionals, a critical but often overlooked nuance is the importance of understanding the builder’s expertise in local climate challenges, such as frost heave or humidity-related warping. Relying solely on price can ignore these vital factors and result in a deck that deteriorates long before its expected lifespan.
Another common myth is that all materials are equally durable. Everyone says that composite decking requires no maintenance, but in reality, not all composites perform well in freezing temperatures or humid summers like ours. A deeper understanding of material science, supported by studies such as those from the University of Maine’s Cooperative Extension, reveals nuanced differences in long-term durability and safety, like slip resistance and mold resistance. For example, some composites tend to develop mold more easily in shaded, damp areas, which is a frequent issue in the Needham landscape.
Is Hidden Fastening Worth the Extra Cost in Needham?
Many believe that hidden fastening systems are just a luxury for high-end decks; in fact, they can significantly impact safety and longevity. Using exposed nails or screws can create stress points that lead to cracking or loosening over time. Hidden fasteners distribute material stress more evenly, reducing the risk of board movement and squeaking. Plus, they give your deck a sleek, continuous surface, which enhances aesthetics and safety—especially important in areas with frequent foot traffic or potential for debris accumulation. Opting for the right fastening system is an advanced detail that distinguishes a professionally built deck from a DIY patchwork.
That said, it’s crucial to understand the potential traps during construction. For instance, improper foundation installation, such as ignoring frost heave considerations, can cause serious structural damage over time. Reading this step-by-step inspection checklist can help identify issues early before they become costly repairs, especially since frost heaving is a known risk in Needham’s cold snaps. Regular maintenance plans are essential to catch problems like loosened fasteners or rot in their infancy, rather than waiting until costly fixes are inevitable.
In short, understanding the layered nuances of deck construction—bicking down to how fasteners, materials, and foundations interact with local conditions—can save you money and extend your deck’s lifespan. Dive into advanced topics like frost-resistant foundations or the latest in slip-resistant coatings to elevate your project beyond the basics. Have you ever fallen into this trap? Let me know in the comments.
Keeping Your Decks in Top Shape with the Right Tools
Maintaining a durable and attractive deck requires more than just the right materials; it hinges on using precise tools designed for the job. Personally, I swear by a variable-speed orbital sander. Its ability to adjust sanding grit allows me to gently smooth cedar surfaces without gouging, which is vital for prepping the wood before applying sealants. For cleaning, a deck-specific pressure washer set to low pressure helps remove stubborn dirt and mold without damaging the wood fibers—trust me, using a high-powered setting can cause splintering, ultimately costing more in repairs.
Why I Trust Cordless Power Tools
When working on decks, cordless drills equipped with decking bit attachments make tasks like screwing fasteners or installing railings quicker and less cumbersome. They give me mobility, particularly when working on larger surfaces, and reduce setup time. For drain and water management, I rely on a digital moisture meter from Makita. Monitoring the wood’s moisture content ensures optimal stain absorption, prolonging the lifespan of your finish. With climate variations in Needham, understanding and controlling moisture is crucial—this tool saves time and prevents costly mistakes.
Future Trends in Deck Maintenance
Advancements like automated moisture sensors linked to smartphone apps are on the horizon, promising real-time data that can guide maintenance schedules. These innovations will help homeowners detect early signs of rot or warping, ensuring repairs are timely and less invasive. Staying ahead means embracing technology like smart detectors and eco-friendly sealants, as discussed in recent industry reports. To keep your deck thriving, I recommend adopting a combination of traditional tools and emerging tech—start with a quality orbital sander and a moisture meter to see immediate benefits.
How do I keep my deck functioning over time?
Regular inspections are your first line of defense. Check for loose fasteners, signs of rot, or mold growth—refer to the inspection checklist for comprehensive guidance. Applying high-quality sealants from the best sealants for Needham’s climate is equally essential; reapply every 2-3 years, depending on exposure. I also recommend periodic sanding of rough spots to maintain smoothness and prevent splinters, especially in high-traffic areas. Over time, these simple steps preserve your deck’s structural integrity and aesthetic appeal, preventing minor issues from escalating into costly repairs.
If you’re serious about extending your deck’s lifespan, consider scheduling a professional assessment at least once every five years. Experts can identify early signs of hidden issues, like frost heave effects, which can be mitigated with proper foundation adjustments, as explained in this detailed guide. Taking proactive measures now ensures your deck remains a safe and inviting space for years to come. Ready to upgrade your maintenance routine? Try integrating a moisture meter into your inspections—I guarantee you’ll notice a difference!

Image: A homeowner using a digital moisture meter on a cedar deck, with tools like a cordless drill and orbital sander nearby, demonstrating a comprehensive maintenance approach. Alt text: Homeowner inspects cedar deck with moisture meter and power tools. Title: Essential Tools for Deck Maintenance in Needham.
The Hardest Lesson I Learnt About Repairing Needham Decks
Patience is everything. I once rushed the entire process, skipping crucial steps like thorough cleaning and proper sanding, which resulted in uneven stain application and a shorter deck lifespan. Taking my time taught me that genuine care ensures lasting beauty and protection.
3 Myths About Needham Deck Maintenance That Led Me Astray
I believed that sealing the deck once was enough, that composite materials never require upkeep, and that DIY efforts could replace professional inspections. Busting these myths showed me the importance of regular maintenance, understanding material nuances, and seeking expert advice to preserve my deck’s integrity.
What Contractors Won’t Tell You About Needham Deck Restorations
Many overlook the impact of local climate specifics like frost heave on foundation stability. My experience highlighted that choosing a contractor knowledgeable about Needham’s unique conditions—such as frost-resistant foundations—can save significant headaches and costs in the future. Deep understanding of these factors is what separates a good job from a great one.
My Go-To Gear for Deck Maintenance Success
The right tools make all the difference. A variable-speed orbital sander, a deck-specific pressure washer, and a reliable moisture meter have become my trusted companions. Investing in quality equipment, like the inspection checklist and a durable sander, helps me maintain my deck efficiently and effectively over the years.
Embrace Your Deck’s Future with Confidence
Deciding to restore and care for your Needham deck is an empowering choice. With patience, proper tools, and a bit of insider knowledge, you can craft an outdoor space that not only looks stunning but also stands strong against our climate. Your journey begins today—don’t wait for issues to appear; start protecting your precious outdoor retreat now.