It was a warm spring morning when I stepped out onto my deck and immediately noticed something was off—the wood at the far corner felt spongy under my feet. My heart sank. I’d always prided myself on keeping my outdoor space in top shape, but this? It was a wake-up call. That realization hit me hard: my ledger board, the crucial connection between my house and deck, was rotting away, and if left unchecked, it could spell disaster. I knew I had to act fast, but the thought of tearing down my entire deck was downright overwhelming.
Why a Rotten Ledger Board Can Turn Into a Nightmare
This experience drove home a simple truth: your ledger board is more than just a structural element; it’s your home’s first line of defense against water damage and board failures. If it’s compromised, your entire deck’s safety could be at risk. I soon learned that replacing a rotted ledger isn’t necessarily about tearing everything apart. With the right know-how, you can often swap out just the affected section—saving time, money, and a lot of stress.
Replacing a ledger board without a full tear-down might sound ambitious, but it’s doable—especially if caught early. The secret lies in understanding your deck’s current condition, preparing properly, and executing the replacement with care. I’ll walk you through how I figured it out and what you can do if you find yourself facing a similar dilemma.
But first, let’s address a common concern I had from the start.
Is Repairing Your Ledger Worth the Trouble?
This was my biggest worry: Would patching or partial replacement really hold up? I was skeptical at first, having made a few rookie mistakes early on (like ignoring minor water stains). I thought, is attempting a repair just a temporary fix? Well, I found that with proper inspection—checking for signs of hidden rot and water intrusion—and using quality materials, you can extend the life of your deck significantly. For a thorough safety check, I recommend reviewing this helpful guide on your deck’s framing safety.
Trust me, taking the time to do it right can save you thousands in the long run.
Now that we’ve broken the ice on why this matters, let’s explore how I learned to do it without tearing everything down—and how you can, too.
Assessing the Damage and Planning Your Repair
Start by visually inspecting your ledger board for signs of rot, water stains, or rusted screws. Use a pry bar to gently test for softness—if it moves or crumbles, it’s time to act. I once found a section with no obvious rot but a loose board, which told me water had seeped behind, creating hidden damage. Document the affected area with photos for reference.
Check Your Deck’s Structural Integrity
Use the quick test from this guide to ensure your deck’s connection points are sound. Look for sagging, uneven planks, or wobbly railings. Immediate reinforcement might be necessary before proceeding with ledger replacement.
Gather Tools and Materials
You’ll need a power drill, reciprocating saw, pry bar, hammer, new ledger board, joist hangers, lag bolts, flashing, sealant, and protective gear. Opt for pressure-treated wood compatible with your existing deck, and consider rust-resistant hardware to withstand exposure. I recommend choosing quality materials to prolong the repair’s lifespan.
Remove the Damaged Ledger Board
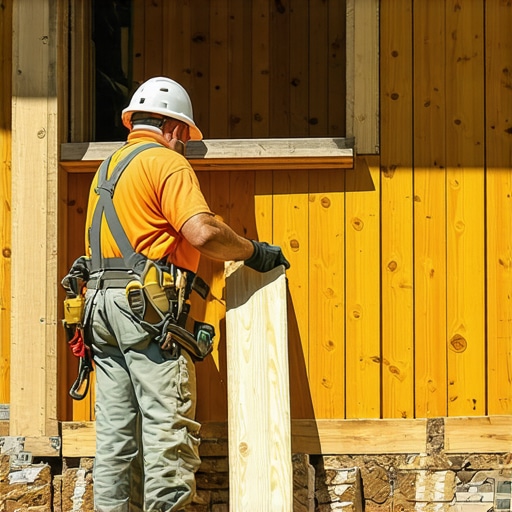
Cut the rotted ledger from the structure carefully with a reciprocating saw. Take your time to avoid damaging surrounding framing. Use a pry bar to lift and detach the remaining sections. Remember, safety first—wear gloves and eye protection. During my repair, I had to replace a 6-foot section, which took about an hour but saved me from tearing the entire deck apart.
Implement Water and Pest Barriers
Install a new flashing strip beneath the ledger to direct water away. Apply sealant along the top edge to prevent water infiltration. Make sure the flashing extends over the ledger’s top edge for optimal protection. This step is crucial to prevent future rot, a tip I learned the hard way.
Install the New Ledger Board
Position the new board and secure it with lag bolts through pre-drilled holes. Use joist hangers to attach the rim joists securely to the ledger. Make sure the ledger is level and flush with the existing framing. I found that marking the positions beforehand and double-checking level alignments saved me headaches during installation.
Seal and Finish
Once installed, apply a high-quality, water-repellent stain or sealer designed for outdoor wood to protect against moisture. For added durability, consider using composite or rot-resistant species like cedar or ipe, especially in Water-prone areas. Proper sealing made a visible difference in how my deck weathered the spring rains.
Inspect and Reinforce the Entire Deck
After replacing the ledger, review all connection points. Tighten loose screws, replace corroded hardware, and verify joist stability. Use this resource to explore reinforcement options if necessary. A sturdy foundation is key to a safe, long-lasting deck, just as I discovered when a small issue elsewhere threatened to compromise my entire project.Many homeowners assume that choosing a deck builder in Needham is as simple as finding the lowest quote or the most visible advertisement. However, this misconception overlooks the nuances of quality craftsmanship and long-term durability. In my experience, a common myth is that all deck builders are equal, but the reality is quite different. Skilled professionals understand the subtle differences in wood treatment, fastener choices, and building codes, which can significantly impact the lifespan of your deck. For example, not all rust-resistant hardware is created equal—cheaper options may corrode quickly, leading to safety issues over time. It’s essential to verify a builder’s familiarity with the latest standards, such as hidden fastening techniques, which are now considered a safety essential in 2026.
Another prevalent mistake is underestimating the importance of structural inspections. Many rely solely on surface-level checks, but issues like compromised joists or leaning posts often hide beneath the surface. Regularly reviewing your deck’s connection points can prevent costly repairs later.
Let’s also challenge the assumption that DIY repairs or partial fixes are sufficient. While they may seem cost-effective initially, they often fail to address underlying problems, leading to recurring issues. Such approaches ignore the critical nuances of materials compatibility and load stress, which a seasoned professional considers in their work. This aligns with expert advice from structural engineers emphasizing comprehensive assessments for lasting repairs.
Are you aware of the potential pitfalls surrounding deck safety and construction in Needham? Recognizing these advanced nuances can save you money and prevent accidents. Have you ever fallen into this trap? Let me know in the comments.
Maintaining your deck’s longevity isn’t just about periodic inspections; it requires the right tools and consistent care. Over the years, I’ve refined my toolkit to ensure every repair and upgrade stands the test of time. One of my most relied-upon pieces of equipment is a high-quality digital moisture meter. This device helps me detect hidden water intrusion behind deck boards or ledger tiles, catching issues early before they escalate into costly repairs. I personally recommend the Extech MO257 for its accuracy and durability, especially in humid climates like Needham’s.
Another indispensable tool is a cordless impact driver. When securing new ledger boards or replacing joists, the impact driver, coupled with rust-resistant fasteners, allows quick, firm screwing without stripping heads or damaging wood. I opt for the DeWalt DCF887 because of its balanced weight and powerful torque, making long sessions less tiring. Using quality tools like these reduces the risk of careless mistakes, especially when working with structural components.
Ensuring your deck remains resilient involves not just manual tools but also software applications. I regularly use the visual inspection checklist app to record observations during routine checks. Combining digital records with physical inspections streamlines maintenance routines and helps trace patterns of wear or water damage, enabling proactive interventions.
Looking ahead, I believe the trend toward integrating smart sensors into deck structures will grow. These sensors can monitor moisture levels, wood stress, and even temperature fluctuations, providing real-time alerts before a problem becomes apparent. Such innovations could revolutionize deck maintenance, making it more predictive and less reactive.
So, how do I maintain decks over time? The key is regular inspection combined with strategic upgrades. For example, applying a top-quality 2026-approved deck stain not only enhances appearance but also seals the wood against water ingress. Pair this with routine checks of connection points, which you can do following the detailed guide provided here. This combined approach secures your deck’s structural health for years to come.
Don’t hesitate to try adapting advanced tools like moisture meters or impact drivers in your project. Precision and proper technique can make all the difference, especially when managing formative or ongoing repairs. Remember, staying ahead of issues isn’t just about fixing problems—they’re about preventing them. Keep your tools sharp, your inspection routine consistent, and you’ll enjoy a safe, beautiful deck season after season.

What I Still Wish I Knew Before Starting My Repair Journey
– I underestimated the importance of moisture management; installing proper flashing made a massive difference.
– The smallest signs of water intrusion can hide major rot; early detection is your best defense.
– Quality tools and materials aren’t just a luxury—they’re essential for lasting repairs.
– It takes patience and meticulous planning; rushing can lead to more damage and higher costs.
– Never ignore structural clues like wobbly beams or uneven surfaces; these are often the first signs of deeper issues.
My Toolbox for a Long-Lasting Deck Fix
– A digital moisture meter, like the Extech MO257, helps spot hidden water problems before they escalate.
– A cordless impact driver, such as the DeWalt DCF887, speeds up fastening tasks while ensuring durability.
– An inspection checklist app for tracking conditions over time streamlines maintenance and anticipates repairs.
– Rust-resistant fasteners and high-quality sealants are non-negotiables for enduring repairs.
– For ongoing education, I rely on resources like the comprehensive guides on deck inspection and quick upgrades to stay sharp.