It was a Saturday afternoon when I looked out at my weathered, dull deck—cracks, stains, and all—and realized I had underestimated just how much a simple project could derail my weekend plans. The sun was high, kids were already asking about swimming, and I was stuck choosing between more Netflix or finally giving my outdoor space a facelift. That lightbulb moment? When I decided enough was enough. If you’re reading this, chances are you’ve faced that same frustration: a deck that needs love but feels overwhelming to tackle.
Why Staining Your Deck Should Never Feel Like a Nightmare
Here’s the truth: your deck’s appearance isn’t just about looks. Properly stained and maintained wood extends its lifespan, helps prevent costly repairs down the line, and keeps your space inviting for friends and family. But it’s easy to fall into the trap of thinking it’s a multi-day marathon. Believe me, I’ve been there.
Early on, I made the mistake of trying to rush through the process, skipping vital prep steps that led to streaks and uneven color. Did you know that inadequate cleaning or skipping the right weather conditions can ruin your efforts? According to seasoned professionals, making sure your deck is squeaky clean and dry is crucial. In fact, a study from the Fine Homebuilding article emphasizes that proper surface prep can double the lifespan of your stain.
So, if you’re like me, eager to enjoy a fresh-looking deck without sacrificing your entire weekend, let’s dive into a realistic plan. We’ll cover all the essential steps, from prep to finishing touches, so you can confidently tackle this project in a single weekend.
Will I really get it done in just one weekend?
Many folks worry that staining their deck is a weeks-long ordeal. My advice? Break it down into manageable steps. With the right tools and techniques, completed during optimal weather conditions, you can have your deck transformed in just a day or two. Curious about how? Let’s get started!
,
Prepare Your Materials and Environment
Start by gathering all your supplies: high-quality deck stain, brushes, rollers, a power washer, sandpaper, and protective gear. Clear your deck of furniture, plants, and accessories. Inspect the weather forecast—ideal conditions are a clear, dry day with temperatures between 50°F and 85°F. I once tried staining during a light drizzle, resulting in streaks and blotches that took me multiple touch-ups.
Thoroughly Clean and Sand the Surface
The key to a flawless finish is a clean, smooth surface. Use a power washer to remove dirt, mold, and old stain—be careful not to gouge the wood. After drying, lightly sand stubborn rough spots with fine-grit sandpaper to open the grain for better stain absorption. I learned this lesson the hard way when neglecting this step led to uneven color. For cedar decks, consider referencing restaining tips.
Protect Surrounding Areas and Choose the Right Time
Use tapes and plastic sheets to shield adjacent surfaces. The optimal window for staining is when no rain is forecasted for at least 24 hours, and the temperature is stable. Trying to rush this step results in imperfections similar to what I encountered during a recent summer project when a sudden thunderstorm forced me to pause mid-job—costing time and quality.
Apply the Stain Consistently and Smartly
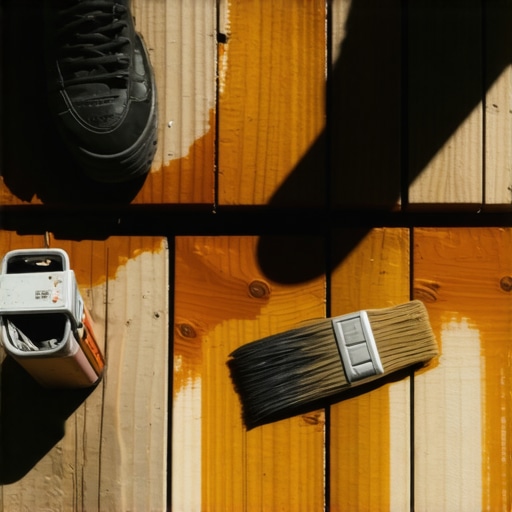
Begin at the farthest corner and work towards the exit, avoiding stepping on wet stain. Use a brush for edges and detailed areas, and a roller or sprayer for larger surfaces—just ensure even coats. My first attempt involved inconsistent strokes that left visible lines; switching to a high-quality brush improved my results significantly. For decks with complex features, utilize hidden fasteners to achieve a clean look.
Allow Adequate Drying and Final Inspection
Wait at least 24 hours before walking on or replacing furniture. Examine your work for thin spots or drips, and touch them up immediately. If you notice areas that absorbed less stain, lightly sand and reapply the stain only to those spots. This meticulous step ensures a uniform finish, much like the time I noticed my deck’s edge was lighter and re-stained it for a balanced appearance. Remember, patience here preserves your effort and appearance.
Inspect Critical Connections After Staining
Once dry, check the integrity of joist hangers, fasteners, and ledger boards—especially if your deck has been exposed to harsh weather. Proper maintenance now prevents issues down the road. For example, I found some rusted joist hangers that needed replacing, which I did in tandem with my staining project for a comprehensive upgrade. Explore joist inspection techniques to keep your deck sturdy in the long run.

Another trap is neglecting the importance of proper inspection and maintenance. Many overlook the significance of monitoring components such as joist hangers; rusted or damaged fasteners can compromise safety long after installation. Some believe that once the deck is built, there’s no need for further attention, but regular inspections are vital—especially after harsh weather. For ultimate durability, consider using joist tape to prevent moisture ingress. Overlooking these details can lead to costly repairs down the line.
Now, here’s a question that often trips up even seasoned diy-ers: Should I choose composite decking or go with natural wood for my Needham project? While composite options like Ipe or Mahogany are popular, they require specific installation techniques and maintenance practices, which I detail in my guides. Selecting the right materials and fastening systems, like hidden fasteners, can drastically improve the finished look and longevity of your deck.
Remember, the devil is in the details. By understanding these nuanced differences and avoiding common myths, you set yourself up for a beautiful, long-lasting outdoor space. Have you ever fallen into this trap? Let me know in the comments.
Keep Your Deck Running Smoothly with the Right Tools
Maintaining a deck isn’t just about fixing issues when they arise; it’s about proactive care that extends its lifespan and keeps it looking pristine. Over the years, I’ve developed a set of specialized tools that make routine inspections and minor repairs efficient and effective. One indispensable item is a digital moisture meter, which allows me to assess the wood’s moisture content accurately—crucial for determining the right time to stain or seal. I personally rely on the Extech MO55 because of its precision and ease of use. Additionally, a sturdy cordless power drill with a set of impact bits helps me tighten loose fasteners or replace corroded ones swiftly, preventing safety hazards.
For inspecting structural integrity, I use a telescoping inspection mirror and a moisture probe, which together help detect hidden issues like rusted joist hangers or rot before they become major problems. Regularly checking these components using specialized tools saves money and time, especially compared to ignoring small signs of deterioration.
Automation and Tech That Enhance Maintenance
Beyond handheld tools, there’s a wave of technology simplifying long-term deck care. For example, smart monitoring systems now exist that can be installed under the deck, providing real-time data on moisture levels and temperature fluctuations. These sensors can alert you to potential issues before visible damage occurs, making maintenance more targeted and less burdensome. While still emerging, the trend points toward fully integrated deck management systems—think of them as the fitness trackers of outdoor spaces.
Furthermore, software for planning and documenting maintenance schedules can keep track of inspection dates, stain reapplication, and replacement timelines. I recommend the Decks.com maintenance planner, which helps visualize long-term care strategies tailored for Needham’s climate.
How do I maintain my deck over time?
Consistent effort using the right tools is key. Regular inspections with a moisture meter and impact drill can catch problems early, saving you from costly repairs. Applying protective coatings like penetrating sealers complemented by annual cleanings with biodegradable deck cleaners keep your surface healthy. Don’t forget that inspecting critical connections periodically—like ledger boards and joist hangers—is vital for safety and stability. For especially vulnerable areas, I suggest installing joist tape to prevent moisture ingress and corrosion.
Stay ahead of potential issues by integrating technology such as moisture sensors, and keep a detailed maintenance log. These practices are future-proof investments that will make your deck last decades longer, no matter the weather. I encourage you to try employing a digital moisture meter combined with a maintenance schedule app—these small steps can transform how you care for your outdoor haven.

The Hardest Lesson I Learned About Deck Builders Needham
One of the most valuable lessons I discovered was the significance of thorough surface prep. Missing this step led to uneven staining and premature wear, teaching me that investing time in cleaning and sanding makes all the difference in the longevity of your deck. I also realized that choosing high-quality fasteners, like hidden clips, can save you headaches down the line, avoiding loose boards and uneven surfaces. These insights came from real-world mistakes but became pivotal in achieving professional-quality results.
My Essential Toolkit for Deck Maintenance and Improvement
I swear by a few key tools: a digital moisture meter helps me assess when to stain, ensuring optimal absorption; impact bits streamline fastening repairs; and an extension mirror lets me peek into hard-to-inspect areas. These tools have empowered me to stay ahead of issues, saving both time and money. Additionally, I rely on resources such as joist tape to prevent moisture damage, extending my deck’s lifespan without costly repairs.
Your Turn to Try bringing your outdoor space to life
Remember, transforming your deck isn’t just about aesthetics — it’s about creating a safe, inviting space for years to come. With the right techniques, tools, and a dash of patience, you can achieve stunning results faster than you imagined. Start today, and don’t hesitate to share your progress or ask questions below. Your dream deck in Needham is well within reach—take the first step now!