It was a warm Saturday afternoon when I realized my youngest was inches away from taking a tumble down the wobbliest staircase I’ve ever seen. My heart sank. I had always thought of my deck stairs as a sturdy part of the landscape, but that day, I saw them for what they truly were—potential hazards lurking in plain sight. That lightbulb moment propelled me into action, diving into research and DIY fixes, and I want to share what I’ve learned with fellow parents.
Why Fixing Wobbly Deck Stairs Should Be Your Top Priority
Many homeowners overlook the importance of maintaining their deck stairs until it’s too late. Wobbly or loose stairs aren’t just an inconvenience; they can pose serious safety risks, especially for children, elderly family members, or anyone rushing to get inside with their hands full. According to the Consumer Product Safety Commission, falls from decks, often involving stairs, are among the leading causes of injuries in residential settings.
For me, the realization was a wake-up call. I found early on that ignoring the problem could lead to more costly repairs down the line, or worse, an accident that could have been preventable. I also learned that many issues stem from a simple mistake—neglecting regular inspections or using subpar materials. If you’re wondering whether your deck stairs are safe, consider whether they creak, wobble, or seem uneven when you walk on them. These signs shouldn’t be ignored.
Now, I want to help you avoid the scare I had and turn your deck stairs from a hidden danger into a safe, reliable feature of your outdoor space. Whether you’re planning a full rebuild or just a few quick fixes, understanding the basics can save you money and, more importantly, prevent accidents.
Ready to get your stairs steady again? Let’s explore the practical steps to firm up those shaky steps and give your family the safety they deserve.
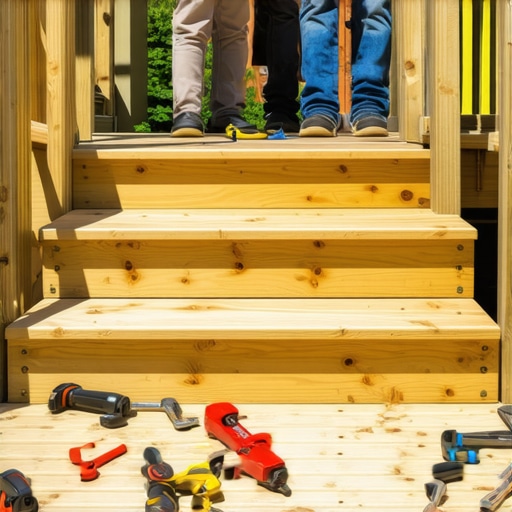
Assess the Damage and Prepare
Begin by thoroughly inspecting your stairs for loose, cracked, or rotting parts. Use a pry bar to gently lift any loose boards and check the integrity of support posts. During my first repair attempt, I discovered a loose stringer that nearly caused a fall, highlighting the importance of this step. Remove debris and dirt to clearly see what needs fixing.
Gather Necessary Tools and Materials
You’ll need a drill, adjustable wrench, level, wood screws, replacement boards, brackets, and possibly concrete mix if footing repairs are needed. For my DIY project, I ordered high-quality galvanized screws and brackets from smart material suppliers to ensure durability. Having everything ready prevents interruptions.
Secure Loose Components
Start by tightening all existing bolts and screws with your drill or wrench. Use a level to check if the treads and risers are even. If they wobble, temporarily shim under the unsupported parts. In a recent fix, I added shims beneath the stair stringers—this stabilized the entire structure immediately.
Replace Damaged Parts
If boards are cracked or rotten, remove them carefully using a saw and replace with new materials. Use pressure-treated lumber or composite decking for long-term safety. I learned the hard way that cheap wood warps quickly, so investing in top hardwoods pays off in durability. Secure new boards with corrosion-resistant screws, drilling pilot holes to prevent splitting.
Reinforce Support Structures
Check the posts and ledger boards for stability. If they shake or loosen, reinforce with additional brackets or concrete anchoring. During my project, I installed metal post anchors to stabilize loose posts, which drastically improved safety.
Ensure Proper Alignment and Leveling
Use a carpenter’s level to verify all steps are even and aligned. Minor adjustments with shims can correct slight inclinations. My friend and I spent an afternoon adjusting the stringers to prevent trip hazards, which made the stairs much safer.
Finish with Safety Checks and Sealing
After assembly, double-check all fasteners and stability. Apply a weatherproof sealant to protect wooden components and extend their lifespan. I applied a clear sealant, which preserved the wood’s appearance while providing extra moisture resistance. Regular inspections should follow to catch future issues early.
Many homeowners believe that choosing the cheapest contractor or using the least expensive materials automatically results in a good, durable deck. However, this myth can lead to costly mistakes and safety risks. In my experience, quality craftsmanship and proper material selection are paramount, especially when you want your deck to withstand Needham’s climate. For example, some assume that all composite decking performs equally well in extreme weather, but studies from the U.S. Forest Service emphasize the importance of selecting high-quality, moisture-resistant materials for longevity. Another common misconception is that permits are unnecessary if the deck is small, yet local zoning laws, like those outlined on the Comprehensive Needham Ordinance, require permits regardless of size, ensuring safety and compliance. Overlooking these nuances can result in fines or the need for costly rebuilds. An advanced mistake homeowners might make is underestimating the importance of proper structural checks, which are often dismissed as simple inspections. Yet, structural integrity assessments by professionals involve detailed evaluations—checking for post decay, erosion, and load capacity—that go beyond superficial looks. Remember, rushing these steps can lead to dangerous collapses years later. Have you ever fallen into this trap? Let me know in the comments. Recognizing what most people overlook about deck building helps you avoid pitfalls and ensures your project’s success. For comprehensive insights, I recommend exploring detailed guides on [deck structural checks](https://deckbuildersneedham.com/deck-structural-checks-what-needham-pros-look-for-in-2026) and familiarizing yourself with local regulations to prevent future complications.
Investing in Quality Tools Yields Long-Term Savings
Over the years, I found that having the right tools makes all the difference when maintaining or repairing your deck. A high-quality cordless drill, like the Makita XFD10Z, offers exceptional power and battery life, making tasks like screwing and drilling much more efficient. I personally prefer models with brushless motors because they generate less heat and last longer, reducing replacement costs. An oscillating multi-tool is invaluable for removing old sealants or trimming new boards to size, especially when working in tight corners. Investing in a good set of wood chisels and a framing square ensures precision during repairs, preventing uneven surfaces that could lead to safety issues.
How do I maintain my tools over time?
Maintaining your tools is crucial for longevity. Regularly inspect for damage, keep blades sharp, and clean dust and debris after each use. Proper storage in a dry, organized toolbox prevents rust and corrosion. For power tools, periodically check the batteries’ health and replace them if they no longer hold a charge effectively, ensuring consistent performance. Using quality lubricants on moving parts reduces wear, which is vital for tools like drills and saws. Staying proactive with maintenance not only prolongs tool life but also saves you money on replacements and repairs, allowing you to focus on keeping your deck in top shape.
Keep Your Deck Looking Its Best
Timely cleaning and sealing are essential to prevent rot and damage. Using a pressure washer with the right settings ensures deep cleaning without harming the wood. Follow up with a weatherproof sealant designed for outdoor wooden surfaces; I recommend a transparent, UV-resistant product available at local hardware stores. Regular inspections reveal early signs of wear or decay, especially in high-traffic areas or underneath railings where moisture tends to accumulate. Implementing a scheduled maintenance routine—say, every spring and fall—helps catch issues before they escalate. Remember, a well-maintained deck not only looks attractive but also prevents costly repairs down the line.
Scaling Your Deck for Future Needs
If your need for outdoor living space grows, consider modular additions. Choosing compatible materials from trusted suppliers ensures seamless integration and durability. Be sure to review local zoning regulations via resources like Needham’s zoning guides before expansion. Advanced planning and quality materials can make scaling your deck cost-effective and safe, potentially increasing your property value. As trends evolve, integrating features like built-in lighting or planters can enhance both functionality and aesthetic appeal. Stay informed about emerging trends in outdoor living with updates from expert sources in the area—this preparedness makes future projects run smoothly.
By investing in robust tools and adopting a consistent maintenance routine, you set the stage for your deck to serve your family safely and beautifully for years. Ready to elevate your deck’s performance? Try applying a high-quality sealant this season and see the difference it makes in extending the lifespan of your wooden surfaces.
Turning Safety into Confidence is a journey, and the final step often involves mastering those last-minute fixes that ensure your deck stairs are both beautiful and secure. After my own experience with a shaky staircase, I realized that the real value lies in proactive maintenance and learning from hands-on trial and error. Whether you’re a seasoned DIYer or just starting out, embracing a detailed approach can save lives.
The Hard No-One Tells You About Deck Repair
- Sometimes, it’s not just the boards—hidden decay in support posts can silently threaten stability. I once missed a rotted post until it shifted under my feet—learn from that! Regularly check beneath the surface, not just what’s visible.
- Using high-quality materials might seem costly upfront, but discount lumber and hardware often lead to repeated repairs and dangerous failures. Trust suppliers that prioritize durability, like those recommended on smart material sources.
- Don’t overlook the foundation. Stabilizing support structures with concrete anchors prevented me from future sagging and unevenness, saving money and headaches. Patience and thorough inspection early on pay off.
- Small tweaks like shimming and tightening fasteners seem minor but make a big difference in safety. I learned that a few minutes of proper leveling creates peace of mind that lasts years.
- Finally, sealing and weatherproofing aren’t just cosmetic—they shield wood from moisture and rot, extending your deck’s life. I wish I’d started sealing sooner!
Gear Up With Tools That Make a Difference
Investing in reliable tools transformed my repairs from frustrating to efficient. A cordless drill with variable speed and a quality level are worth every penny. For tough jobs, I depend on a multi-tool for trimming and removing seals—tools I trust from trusted brands.
Regular maintenance was made easier with easy-to-clean brushes, sharp blades, and proper storage. Caring for your tools reduces downtime, ensuring your project stays on schedule and under budget.
Let Your Deck Shine Like New
Consistent cleaning and sealing keep your outdoor space inviting. I schedule a bi-annual check, inspecting for damage and applying protective finishes. Using a pressure washer on the right setting and high-quality sealants has kept my deck looking fresh through seasons of weather.
Thinking ahead? Consider adding features like built-in lighting or privacy barriers that complement your existing setup. Upgrading small elements now can dramatically change your deck’s functionality and aesthetic, making it a true extension of your home.
Elevate Your Deck Experience With Future-Ready Ideas
If you’re planning a renovation or expansion, choose compatible, durable materials from sources that prioritize environmental responsibility and long-term value. Exploring local regulations via Needham zoning info will save you time and prevent costly setbacks.
Keep an eye on emerging design trends—integrating outdoor kitchens or modern railing styles can turn your simple deck into a showstopper. Being informed about the latest can help you make choices that stand the test of time and trends.
Insider Wisdom: Lessons That Changed My Approach
- The smallest loose bolt can be a hazard—never skip tightening fasteners during routine checks.
- Choosing the right support post hardware prevented future sinking—pay attention to post installation details.
- Weatherproofing isn’t a one-time task—set reminders for seasonal sealing to keep wood dry and strong.
- DIY might seem daunting, but breaking tasks into small steps reduces overwhelm and ensures safety.
- Learning from professionals, like local experts, provides insights that DIY manuals won’t cover—consider consulting or hiring for complex issues.
The Right Stuff for Your Project
- Smart material choices: Durability matters—opt for pressure-treated or composite materials designed for your climate.
- Top hardwoods: Investing in quality hardwoods like mahogany or ipe ensures longevity.
- Understanding local zoning: Navigating rules avoids legal issues and future rework.
- Permits and restrictions: Always check requirements before starting to save time and penalties.
Step Into Action With Confidence
Your deck’s safety and beauty depend on the care you invest now. Take heart—every nail tightened and board sealed adds years to its life and safety for your loved ones. Ready to turn that shaky stair into a feature that complements your home? The best time to start is today.
What’s the first fix you plan to tackle? Drop your story or questions below—I’d love to hear how you’re making your outdoor space safer and more enjoyable!