You know that sinking feeling when you step onto your deck, only to realize your neighbors are a little *too* close for comfort? Last summer, I had one of those lightbulb moments—my backyard felt more like a fishbowl than a retreat. Despite countless weekends spent cleaning, planting, and sprucing up the space, the lack of privacy dampened the vibe. I was frustrated, but then I found a solution that changed everything: building a privacy wall using composite slats.
Creating Your Own Privacy Oasis: Why It Matters Today
In recent times, homeowners are increasingly valuing outdoor spaces as extensions of their living areas. Privacy isn’t just a luxury; it’s a necessity, especially when you want to unwind without feeling exposed. Installing a privacy wall using composite slats is a fantastic way to enhance your backyard’s seclusion and style without the ongoing maintenance that traditional wood provides. Plus, with the right approach, this can be a rewarding DIY project rather than a costly contractor job.
Building such a wall can seem daunting at first. I remember the initial hesitation—will it hold up over time? Will it look professional? I made a few mistakes early on, like choosing the wrong materials, which led to unnecessary expenses and headaches. That’s why I want to walk you through the process, so you can create a beautiful, durable privacy wall that suits your needs.
Did you ever face a situation where your privacy was compromised, or maybe you hesitated to start a project because it all seemed overwhelming? If yes, you’re not alone. There’s something empowering about taking matters into your own hands and transforming your outdoor space into a true sanctuary.
Is Building with Composite Slats Actually Worth the Effort?
Many skeptics doubt if composite slats are a good investment for privacy walls. My own experience proved otherwise—they’re incredibly weather-resistant, require minimal upkeep, and last much longer than traditional wood. That said, not all composite materials are created equal. Choosing quality brands and proper installation techniques makes all the difference. For further insights, you might want to explore [Why Modern Deck Builders Use Lasers for Perfect Leveling](https://deckbuildersneedham.com/why-modern-deck-builders-use-lasers-for-perfect-leveling) to understand the importance of precision in DIY projects.
Starting this journey might seem intimidating, but once you understand the basic steps and avoid common pitfalls, you’ll be on your way to crafting a private, stylish barrier that enhances your backyard retreat. Ready to dive into the details? Let’s get started with selecting the right materials and tools for your project.
Preparing Your Site for the Privacy Wall
Start by choosing a level, stable location away from obstacles like trees and power lines. Clear the area of debris, and mark the desired dimensions of your wall using stakes and string. Use a line level to ensure your markings are even, preventing future unevenness that can compromise durability. I’ve learned from my own messy first attempt that skipping this step often led to a wobbly final product. Carefully measure and double-check your layout before proceeding.
Gathering the Right Materials and Tools
Opt for high-quality composite slats known for weather resistance and low maintenance. Brands like TimberTech and Azek offer durable options that withstand Massachusetts’ freeze-thaw cycles. You will also need concrete for footing, galvanized screws or clips, post anchors, a level, a saw suitable for composite material, and a post-hole digger. I once tried cutting composite with a standard wood saw, which resulted in splintered edges—costly and frustrating. Using the right blade ensures clean cuts and saves time.
Installing the Foundation Posts
Dig holes approximately 24 inches deep using a post-hole digger. Place post sleeves into the holes, and pour concrete around them, ensuring they stay plumb using a level. Allow the concrete to cure for at least 24-48 hours. Remember, proper foundation is key to a long-lasting wall. I made the mistake of rushing this step, which caused the entire structure to lean over time. Adequate curing and careful alignment upfront prevent headaches down the road.
Attaching the Composite Slats
Once the posts are secure, attach the mounting brackets or clips to the posts according to the manufacturer’s instructions. Then, slide the composite slats into place, ensuring each is level. Use a spirit level frequently during installation to maintain uniformity. I found that pre-drilling holes minimized the risk of cracking the composite panels. Hidden clip systems, like those discussed in this guide, offer a sleeker look and easier installation.
Handling Size and Spacing of Slats
Measure carefully to determine the optimal width of each slat, allowing for expansion gaps of about 1/8 inch to accommodate thermal movement. Spacing is critical for privacy and ventilation; typically, 1/4 inch gaps work well. During my first project, I underestimated the expansion space, which led to buckling during summer heat. Paying close attention to these details ensures a professional-looking finish.
Final Touches for a Professional Finish
Sand any rough edges for safety and appearance. Consider adding post caps with built-in lighting, like in this article, to enhance safety and ambiance at night. Seal the composite surfaces with a cleaner designed for stain removal if needed. And always double-check all fasteners for tightness after a few weeks, especially in climate zones with significant temperature swings. I once missed this step, which resulted in loose panels after one winter season, but catching it early saved me future repairs.
Even seasoned DIY enthusiasts in Needham often believe that choosing the most affordable materials guarantees a long-lasting deck. However, in my experience, this can be a costly mistake. Many think that standard pressure-treated wood is enough for durability, but neglecting the importance of proper sealing and maintenance—like I discuss in this article—can significantly shorten your deck’s lifespan. Another misconception involves the belief that any composite board will suffice; the reality is, not all composites are created equal in weather resistance and color stability, as highlighted by this guide.
Maintaining a durable and visually appealing privacy wall built with composite slats in Needham requires more than just proper installation—it demands the right tools and ongoing care. Personally, I rely on a combination of precision equipment and smart maintenance routines to ensure my outdoor structures stand the test of time. Investing in quality tools like a miter saw with a fine-tooth blade specifically designed for composite materials guarantees clean cuts and reduces material waste. Using a dust extractor during cutting sessions minimizes debris infiltration into adjacent areas, keeping your workspace clean and your projects professional-looking.
For fastening, I’ve adopted the use of pneumatic nail guns with adjustable settings. This not only speeds up the assembly process but also ensures consistent fastener depth, which is crucial for a sleek finish. I prefer galvanized and stainless-steel fasteners because they resist corrosion—an essential factor considering Massachusetts’ variable climate. Regularly inspecting and tightening fasteners during routine maintenance sessions helps prevent loosening over time, especially after harsh winters.
To keep the composite slats looking their best, I recommend a gentle pressure washer with a low-pressure nozzle and a wide fan spray. Personal experience has shown that high-pressure washers can cause surface damage, leading to premature aging. Applying a cleaner formulated for composite materials, like those from trusted brands recommended by industry professionals, is effective in removing dirt, algae, and staining. Consulting technical guides like the one from the American Wood Protection Association provides detailed advice on cleaning and preserving composite surfaces.
### How do I maintain my privacy wall over time?
To extend the life of your privacy wall, schedule annual inspections that focus on fastener integrity, post stability, and surface condition. Address any signs of corrosion or material degradation promptly. Reapplying a non-slip, UV-resistant sealant designed for composite decking can replenish protective barriers and prevent fading. Keep an eye out for expansion gaps and adjust slat placement if you notice warping or buckling, which can be caused by temperature fluctuations—a common phenomenon in Needham.
Looking forward, as technology advances, I believe integration of smart monitoring systems into outdoor structures may become widespread. Sensors that detect movement, structural shifts, or moisture levels could provide real-time alerts, making maintenance more proactive than reactive. Incorporating such innovations could revolutionize long-term property management and significantly reduce repair costs.
By equipping yourself with the right tools and a disciplined maintenance plan, you’re paving the way for a stunning, enduring privacy wall. For those ready to take it a step further, I suggest trying out a high-quality composite cleaning system combined with periodic fastener checks. These small but effective steps will ensure your backyard retreat remains private and picturesque for years. To explore more about maintaining your deck’s safety and longevity, check out this comprehensive guide.
The Hardest Lesson I Learned About Deck Builders Needham
One of my most significant realizations was that selecting the right materials upfront can save you countless headaches later. Initially, I thought any composite slats would do — but the difference in weather resistance and longevity proved that quality truly matters. Skimping on materials led to early warping and fading, reminding me that investing in top-tier products pays off in the long run.
3 Myths About Deck Builders Needham That Held Me Back
I used to believe that DIY projects were always cheaper and easier than hiring experts. While this can be true with proper knowledge, I found that understanding the nuances — like proper foundation setup and material selection — is crucial. Relying solely on online tutorials without firsthand experience can lead to mistakes, so I recommend consulting trusted resources and experts when in doubt. For trusted guidance, visiting this article on hiring the right deck contractor was a game-changer for me.
What Experts Won’t Tell You About Deck Builders Needham
Many seasoned professionals keep quiet about the importance of precise measurements and installation techniques—worth knowing if you want a flawless privacy wall. For example, I learned that tiny expansion gaps can prevent buckling and warping, especially in climates with significant temperature swings. These little details made a huge difference in my project’s durability. To dive deeper into installation best practices, checking out this guide on laser leveling provided invaluable insights.
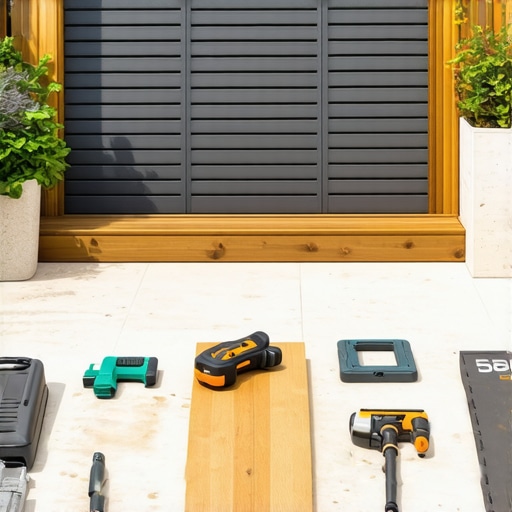
My Essential Toolkit for Creating Seclusion
Having the right tools can make or break your project. I trust a high-quality miter saw with a fine-tooth blade for clean cuts on composite materials. A durable level helps ensure everything stays plumb, minimizing gaps and unevenness. Glove your project with galvanized fasteners to resist corrosion, especially during harsh New England winters. A power washer with low-pressure settings keeps the composite slats looking fresh without damage. These tools, combined with proper preparation, create a stress-free building experience.
Your Next Step in Outdoor Privacy
The journey to a secluded backyard isn’t just about materials—it’s about personal growth and confidence. Take your time, gather the right tools, and remember that each challenge is a learning opportunity. Whether you’re replacing an old fence or building anew, establishing a sturdy foundation and paying attention to details like expansion gaps will pay dividends. I encourage you to start today—your outdoor sanctuary awaits. What step are you most excited to tackle first? Let me know below!
,