It was a sunny Saturday afternoon when I finally realized the full extent of what I’d overlooked in my backyard. My toddler was happily crawling around, but my heart was pounding because I hadn’t yet installed a proper safety gate on the deck. Suddenly, I saw her inching toward the edge, and I froze. That moment was my lightbulb moment—parents everywhere know how fleeting safety can be.
If you’ve ever watched a little explorer inch closer to the edge of your deck and felt that panic, you’re not alone. The good news? Installing a deck gate isn’t just about buying a product and hoping for the best. It’s about understanding what works, how to do it properly, and how to ensure it keeps your child safe for years to come.
In this guide, I’ll walk you through the proven steps to install a deck gate that provides peace of mind. No shortcuts, no worries—just reliable safety you can trust.
Why Your Child’s Safety Is Too Important to Skip The Right Gate Installation
Choosing and installing the right deck gate isn’t simply an aesthetic decision; it’s a crucial safety measure. According to the Consumer Product Safety Commission, thousands of children are injured on decks every year, many of which could have been prevented with a properly installed gate. An improperly fitted gate can fail, leaving your little one vulnerable to falls or worse.
Early in my own journey, I made a common mistake—failing to secure the gate tightly enough—leading to an embarrassing and frightening moment for my child. That taught me that a one-size-fits-all approach doesn’t work. You need a gate that fits your deck’s structure and your child’s size perfectly.
But how do you ensure your gate’s installation is foolproof? That’s what I’ll cover next. We’ll dive into the details, from choosing the right hardware to making sure your gate withstands the test of both time and toddler curiosity.
If you’ve ever been faced with the question, “Is this really safe enough?”—know that a well-installed safety gate is worth every effort. Ready to become a deck gate expert? Let’s get started with the key steps to making your deck a safer place for your little adventurer.
Choose the Right Location and Measure Carefully
Start by deciding where you’ll install the gate, typically at the top of your stairs or the deck entry point. Measure the opening’s width accurately, accounting for any uneven surfaces. Remember, a well-measured gate fits snugly—think of it as tailoring a suit; precision ensures safety and durability.
Select the Appropriate Gate and Hardware
Pick a gate designed for child safety, with features like self-closing hinges and secure latches. Match it with hardware that suits your deck material—whether wood, composite, or aluminum. When I installed mine, I opted for a metal frame gate with adjustable tension hardware, which proved to be sturdy and adaptable to my deck’s slightly uneven surface. Consult local building codes if you’re unsure about compliance.
Gather the Tools and Prepare the Workspace
You’ll need a drill, screwdriver, level, tape measure, and possibly a saw. Clear the area of furniture or obstacles. Think of your workspace as a clean canvas—free of clutter, allowing for precise installation. Wear safety goggles and gloves to protect yourself during the process.
Position and Mark the Mounting Points
Hold the gate in the desired position, ensuring it’s level and plumb. Use a level tool—like a carpenter’s level—to verify its position. Mark the screw holes with a pencil. In my experience, marking with painter’s tape helped visualize the placement and kept the drill from slipping. Fixing the gate slightly tighter than you think necessary prevents any sagging over time.
Install the Mounting Brackets Securely
Pre-drill holes at your marked points to prevent wood splitting. Attach the brackets using appropriate fasteners—preferably stainless steel screws resistant to rust. For decks in coastal areas, I recommend deck fasteners rated for saltwater exposure, such as those explained in this guide. Tighten the screws firmly, but avoid overtightening, which can crack the material.
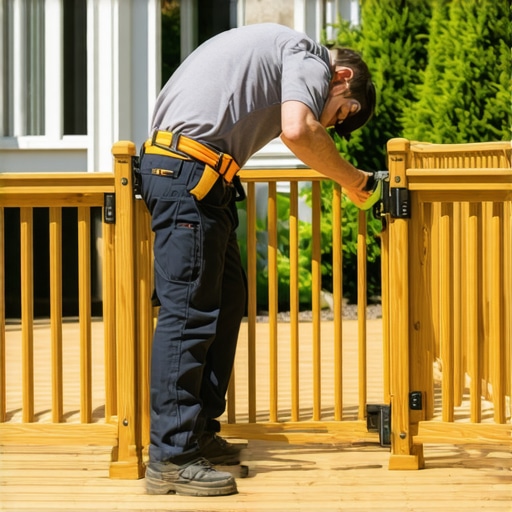
Attach the Gate and Test Its Security
Hang the gate on the mounted brackets, ensuring it swings smoothly without gaps. Test the latch with gentle pressure—if it pops open easily or feels loose, readjust the hardware. I once installed mine slightly off, causing it to close with a loud bang—highlighting the importance of alignment. Use a level to double-check the gate’s vertical and horizontal planes after installation.
Final Inspection and Safety Checks
Review the entire installation: are all screws tight? Is the gate securely mounted? Does the latch operate without sticking? Inspect the surrounding area for any sharp edges or protrusions. For added safety, consider applying a protective sealant to prevent weather-related deterioration.
Regularly check the gate’s hardware, especially after severe weather or if you notice any loosening. Proper maintenance ensures your child’s safety remains uncompromised over time. By following these steps meticulously, you’ll create a safe, reliable barrier, giving you peace of mind as your little one explores the outdoors.
When it comes to hiring a deck builder in Needham, many homeowners fall prey to misconceptions that can compromise the quality and longevity of their project. Contrary to popular belief, not all deck builders are created equal, and understanding these nuances can save you time, money, and headaches. One widespread myth is that choosing a cheaper contractor guarantees savings, but in reality, cutting costs often results in subpar workmanship and future repairs. For example, proper fastening techniques, like using the best deck fasteners for coastal-like weather, are crucial for durability, yet often overlooked by amateurs.
A common oops is underestimating the importance of a detailed, professional layout plan. Skilled contractors understand that precise measurements and tailored designs, considering factors like building codes, weather conditions, and your aesthetic preferences, are essential for a long-lasting deck. Skipping this step can lead to structural issues, such as unlevel surfaces or compromised safety. To avoid this, always verify your contractor’s familiarity with local regulations by visiting their understanding of Needham’s building codes.
Additionally, many assume that DIY techniques or quick fixes can substitute professional expertise. This is especially risky when inspecting existing structures; for instance, checking your deck post brackets for signs of failure is vital before proceeding with upgrades or repairs. Neglecting this can result in serious safety hazards, as outlined in this guide.
Consider the advanced question: How can a homeowner identify subtle signs of structural weakness that might escape a routine inspection? Often, small discrepancies like slight deflections in railings or tiny cracks in support posts may seem insignificant but are telltale signs of underlying issues. Experts recommend regular, detailed evaluations—ideally annually—to catch these early symptoms and ensure your deck’s integrity.
Remember, the key to a successful deck project isn’t just flashy design or low price; it’s about working with professionals who understand the complexities and hidden pitfalls. By avoiding common myths and recognizing nuanced details—like proper foundation checks and adherence to building specifics—you’ll safeguard your investment and family’s safety.
Have you ever fallen into this trap? Let me know in the comments!”
,
The Essential Tools for Deck Maintenance
Maintaining a durable and beautiful deck in Needham requires the right equipment. I personally swear by a high-quality power washer with adjustable pressure settings, such as the Simpson MS60763 MegaShot. It allows me to remove dirt, algae, and old sealant safely without damaging the wood. For scrubbing stubborn stains or textured surfaces, I recommend a stiff-bristled brush with a long handle—my go-to is the SpiralPRO Deck Scrubbing Brush, which reaches all corners and helps preserve the wood fibers.
When it comes to sealing and treatments, a pump sprayer like the Chapin 20000 is invaluable. It ensures even application of sealants or stains, reducing waste and mess. For detailed inspections, a good flashlight coupled with a mirror helps identify hidden issues, especially in shaded or hard-to-see areas. Remember, catching problems early—like cracked joists or loose fasteners—can save significant repair costs down the line.
Software and Methods to Simplify Upkeep
Beyond physical tools, scheduling software such as Trello or Asana helps organize regular maintenance cycles—think quarterly inspections or annual sealing. I keep a digital log with reminders set months in advance to check for loose fasteners or signs of decay, referencing this guide. Utilizing a moisture meter like the Moisture Meter PD600 makes it easier to determine the ideal timing for sealing, especially after heavy rain or snow melts, preventing moisture build-up that can promote rot.
How do I maintain my deck over time?
Consistency is key. Regular visual inspections and prompt repairs will extend your deck’s lifespan. Applying a high-quality sealant every 2-3 years—particularly one with UV protection—preserves the wood’s appearance and structural integrity. Additionally, cleaning your deck with oxygen bleach, as explained here, effectively removes moss and grime without harming the environment or your plants. Staying proactive with these maintenance actions ensures your outdoor space remains inviting and safe for family and friends.
The Future of Deck Maintenance: Smarter, Safer, Easier
Advancements in coating technologies and smart maintenance systems, like IoT moisture sensors, are poised to revolutionize how we care for decks. Imagine receiving alerts on your phone when moisture levels threaten your sealant or when a fastener becomes loose—these innovations will make maintenance more precise and less guesswork. Experts predict that integrating these tools will become standard practice within the next few years, helping homeowners prevent costly repairs before issues escalate.
By adopting high-quality tools and proven methods today, you set your deck on a path toward longevity and safety. I recommend trying a comprehensive maintenance kit that includes a power washer, a moisture meter, and sealant applicators. This simple investment streamlines upkeep and boosts confidence in your ability to keep your deck in top condition for years to come.
Lessons I Wish I Knew About Deck Safety Beforehand
One of the most profound lessons I learned was that even a small oversight during installation can lead to significant safety hazards over time. I once thought a quick fix with fewer fasteners would suffice, but it resulted in loose panels and an unsafe environment for my family. The importance of meticulous hardware selection and thorough inspection became crystal clear after that experience.
Another insight was realizing how critical regular maintenance is, especially in New England’s weather. Instead of waiting for visible damage, proactive checks—like inspecting for tiny cracks or loose railings—would have saved me from costly repairs. It’s often the small signs that reveal bigger issues if you know where to look.
Finally, engaging with professional builders who understand local codes and climate conditions made a world of difference. I learned that DIY shortcuts often compromise safety and longevity. Trusting experts and investing in quality materials—such as the best deck fasteners for coastal weather—ensured my deck’s durability for years to come.
Tools and Resources That Kept Me Ahead of Deck Dilemmas
My go-to toolkit includes a reliable moisture meter, like the PD600, to monitor wood health post-installation, especially after harsh seasons. A power washer such as the Simpson MS60763 helps keep the surface clean without damage, preserving both appearance and safety. For detailed inspections, a good flashlight and a mirror are invaluable for hard-to-see areas, alerting me to issues before they escalate.
Additionally, I rely on online guides from local experts, like checking your deck post brackets for signs of failure or understanding Needham’s building codes, to ensure compliance and safety. These resources empower me to make informed decisions and maintain my deck effectively.
For future upgrades, I plan to incorporate smart sensors that notify me of moisture levels or loose fasteners, aligning with emerging innovations in deck maintenance. Staying ahead with the right tools and knowledge keeps my outdoor space safe and beautiful—something I highly recommend for every Needham homeowner.
Get Moving and Keep Your Deck Safe
Your deck is more than just an outdoor feature; it’s a space for family memories and gatherings. Prioritize safety, stay proactive in maintenance, and don’t hesitate to seek expert guidance. The more you invest in proper installation and regular checks, the longer your deck—and your peace of mind—will last. Remember, a well-maintained deck isn’t just about aesthetics; it’s about protecting what matters most.
Have you ever discovered a hidden issue during routine deck maintenance? Share your story or ask questions below—I’d love to hear your experiences and help you stay safe.