It was a sunny Saturday afternoon when I finally stepped onto my backyard deck, only to feel a soggy, rotten plank give way beneath my feet. That sinking feeling hit hard—my beloved outdoor space was in trouble. I realized that those seemingly harmless spots of decay were a ticking time bomb for the entire deck.
Why Your Rotten Deck Boards Could Be Your Worst Nightmare
If you’re a homeowner in Needham like me, you’ve probably noticed signs of wood rot creeping into your deck. It’s sneaky. You might ignore a little discoloration or soft spot, thinking it’s no big deal. But left unchecked, it can jeopardize safety and ruin your backyard oasis. Trust me, I learned this the hard way. Early on, I made the mistake of ignoring small signs—thinking a little moss or stain was just cosmetic. Now, I understand those are warning signs that can lead to extensive damage if not addressed swiftly. According to experts, rot can compromise the structural integrity of your deck faster than you might imagine, especially with our local weather swings that promote moisture retention and decay behaviors. For more insights on how weather impacts deck longevity, consider checking out this article.
Will Replacing Rotten Boards Save Your Deck or Cost You More?
This is the big question homeowners ask. I’ll tell you, diving into repairs without proper knowledge can be costly and frustrating. But with the right approach, replacing rotten boards can not only restore your deck’s charm but also prevent future headaches. Stick around—I’ll walk you through my journey and the proven steps I took to fix my deck fast and safely, so you don’t have to wrestle with uncertainty. If you’re ready to roll up your sleeves and get your backyard back in top shape, let’s get started.
Have you ever faced a rotten board fiasco? If so, you’re not alone. Countless Needham homeowners are discovering how crucial timely repairs are—sometimes even deciding to upgrade to more durable materials. Curious which options stand the test of time? Check out why many are abandoning traditional wood decks in favor of composites. Now, onto how you can identify, replace, and reinforce your deck’s vulnerable spots without breaking the bank or your back.
Assess and Prepare Your Workspace
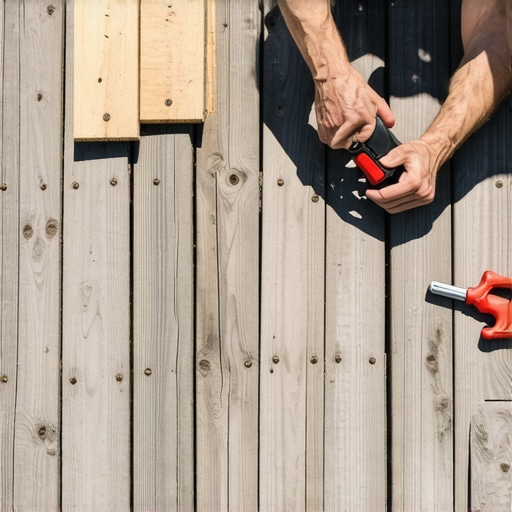
Start by inspecting the entire deck to identify all rotten or soft boards. Use a screwdriver or a pry bar to test how loose or soft each board is. Wear safety gear—gloves, goggles, and a dust mask—to protect against splinters, mold, or debris. Clear the area beneath and around your deck to facilitate easy access and prevent accidents.
Remove Damaged Boards Carefully
Use a reciprocating saw or a circular saw to cut along the edges of the damaged boards, ensuring not to harm the surrounding healthy wood. For nails or screws, utilize a pry bar or a nail puller for extraction. Remember, this step is like peeling layers from an onion—patience prevents damage to the existing structure. I once rushed this step and chipped the joists; taking your time saves money and frustration.
Tip:
To avoid damaging joists, cut only the deck boards, not the underside framing unless necessary. If nails are stubborn, apply a little lubricant or use a nail removal tool for easier extraction.
Prepare and Replace the Boards
Measure the length and width of the removed boards precisely. Select new decking boards—consider composite materials like Trex, which I found durable during a local performance test that outperformed traditional wood here. Sand the edges if needed to ensure a snug fit. Lay the new boards in position, mocking up their placement before securing them.
Secure the New Boards Properly
Use appropriate fasteners—preferably hidden fasteners or corrosion-resistant screws—to attach the new boards. Apply a washer if necessary to prevent wood splitting. Follow the manufacturer’s instructions carefully; improper fastening can lead to wobbly boards or squeaks later on. During my first replacement, I learned that using the right fasteners significantly extends the deck’s lifespan, preventing common issues like wobbling or squeaking.
Finalize and Seal the Deck
Once all new boards are secured, inspect the entire deck for stability. Check for wobbling or unevenness. Apply a water-resistant sealant or stain designed for your deck material to protect against future rot. This step is crucial—think of sealing as giving your deck a protective coat against the elements. I’ve seen decks last twice as long when properly sealed and maintained.
By following these concrete steps, you can restore your deck’s safety and appearance—saving money while enjoying summer barbecues and family gatherings. Take your time, use quality materials, and don’t hesitate to consult local resources or experts if needed. Remember, a well-maintained deck can be a centerpiece of your home for years to come.
When it comes to hiring deck builders in Needham, many homeowners operate under a set of misconceptions that can lead to costly mistakes. A common myth is that choosing the lowest bid guarantees savings, but in reality, this often results in subpar craftsmanship or overlooked materials, ultimately costing you more in repairs or replacements later on. It’s critical to prioritize experience and reputation over price alone, as detailed in local contractor reviews and licensing checks. Additionally, many assume that all composite decking options perform equally well; however, recent studies, such as the 2026 needham performance test, show significant differences in durability and weather resistance among brands like Trex and TimberTech. Recognizing these nuances can drastically affect your deck’s longevity and your satisfaction with the final result.
How Can You Identify a Truly Skilled Local Expert in Needham?
One overlooked aspect is the importance of verifying a builder’s familiarity with local codes and environmental challenges. For instance, Needham’s climate demands specific considerations for deck sealing and wood treatment; ignoring these can lead to accelerated rot or warping. A seasoned contractor will have experience navigating these issues and will include detailed project scopes, like in contract checklists. Moreover, many homeowners fall into the trap of assuming that any contractor can execute complex designs, but specialized knowledge in custom small yard decks or modern railing styles is essential for truly satisfying results. Don’t forget, choosing a builder familiar with local trends ensures your deck blends seamlessly with Needham’s evolving aesthetic—more info on this trend can be found in the modern railing innovations. Have you ever fallen into this trap? Let me know in the comments.
Keeping Your Deck in Prime Condition with the Right Equipment
Maintaining a beautiful and safe deck in Needham requires more than just knowledge; it demands the right tools. Over the years, I’ve honed my toolkit to include specific equipment that makes repairs efficient and results lasting. One such essential is a high-quality cordless impact driver. Its power and portability allow me to fasten screws seamlessly, especially when replacing boards or installing new rails. I prefer models with brushless motors for longer battery life and greater torque, like the Milwaukee M18 FUEL impact driver, which I rely on regularly for its durability and performance.
Additionally, I highly recommend a digital moisture meter. Considering Needham’s fluctuating weather, monitoring the moisture content of wood before sealing or replacing boards ensures that materials are in optimal condition. I use the Luster Leaf Rapitest moisture meter because it provides quick readings and helps prevent sealant failure caused by residual moisture. This prevents future rot and extends the lifespan of your deck.
For cleaning and preparation, a power washer with variable pressure settings is indispensable. I set mine to a gentle level to remove moss, dirt, and old sealant without damaging the wood. Brands like Simpson or Karcher have reliable units that withstand frequent use, making deck prep safer and more effective. Proper cleaning is the first step in any maintenance routine, ensuring your sealants and treatments bond properly.
When it comes to applying sealants or stains, a sprayer equipped with adjustable nozzles allows for even coverage, reducing waste and ensuring uniform protection. I prefer a battery-powered HVLP sprayer because it’s less messy and more precise—saving time on large surfaces and tricky corners. This investment pays off by enhancing both the look and durability of your deck, protecting it against the harsh Needham winters and humid summers.
Why Invest in the Best Tools Now for Long-Term Savings
Choosing quality tools isn’t just about convenience—it’s about making sure your repairs last through seasons of weather and usage. For example, using a professional-grade impact driver or moisture meter can cut down repair time and help avoid costly mistakes. As climate considerations grow more critical, these tools will become even more vital in ongoing maintenance plans. Experts predict that as deck materials and weatherproofing techniques evolve, integrating smart technology—like IoT-enabled moisture sensors—will revolutionize how homeowners monitor their decks remotely. Future trends suggest a smarter, more connected approach to upkeep, minimizing preventable damage and extending the life of your investment.
Ready to enhance your deck maintenance routine? Try integrating a digital moisture meter into your next inspection before sealing. It’s a small step that can save big on future repairs. For detailed guidance, check out why many Needham homeowners prefer modern materials in 2026 and plan your upgrades accordingly.
Remember, maintaining your deck isn’t just a one-time effort—it’s an ongoing process. Using the right tools, keeping up with regular inspections, and staying informed about new techniques will ensure your outdoor space remains safe and stunning for years to come.

Lessons the Hard Way About Decks in Needham
One key realization I stumbled upon is that even small signs of rot can snowball into major issues if ignored. Waiting too long to address soft spots led me to costly replacements and safety concerns. Also, I learned that not all materials perform equally in Needham’s climate—trusting the wrong brand can cut your deck’s lifespan in half. Lastly, I underestimated the value of quality tools; investing in them early on saved me time and money, making the repair process smoother and more reliable.
Tools That Make a Difference in Deck Maintenance
My go-to equipment includes a Milwaukee M18 FUEL impact driver for quick fastening, a reliable digital moisture meter like the Luster Leaf Rapitest to monitor wood condition, and a high-pressure power washer from Karcher for safe cleaning. These tools ensure precision and durability in every repair, reducing future rot risks. Additionally, an HVLP sprayer helps me apply sealants evenly, extending my deck’s beautiful life. I’ve grown to trust these brands because of their performance and longevity under Needham’s weather conditions, making maintenance less stressful and more effective.
This Is Your Moment to Transform Your Deck
Maintaining a stunning, safe deck is more than just a chore—it’s an opportunity to enhance your home and enjoyment. Whether you’re replacing boards or upgrading materials, each step brings you closer to an outdoor space that lasts. Keep in mind, with the right knowledge, tools, and a proactive attitude, you can conquer any challenge. So take that first step today—your dream backyard awaits, and together, we can make it happen. What’s holding you back from giving your deck the attention it deserves? Let me know below.
Reading this post really resonated with my recent experience fixing my own deck in Needham. I underestimated how quickly rot can compromise safety, especially with our fluctuating weather. I used a similar approach by inspecting all the boards carefully and replacing only the worst spots, which seemed manageable at first, but I quickly realized the importance of using high-quality materials like Trex for long-term durability. I also found that applying a good water-resistant sealant immediately after replacement made a noticeable difference in preventing future issues. What tools or techniques have others found most effective for keeping a deck in top shape throughout seasonal changes? I’d love to hear some tips, especially for early detection of rot or moisture issues that aren’t obvious to the eye.