Just last weekend, I found myself precariously balancing on my deck, trying to tighten a wobbly baluster that had become a menace to my evening relaxation. It hit me then—these little issues can quickly turn into safety hazards if not addressed promptly. Good thing I stumbled upon a few reliable tricks that saved my deck’s integrity and my sanity. Have you faced the frustration of loose deck railing balusters wobbling and threatening your peace of mind? Well, you’re not alone, and more importantly, you’re in the right spot for solutions.
Why Loose Balusters Can Turn Dangerous Fast
Over time, especially with the shifting seasons, deck components like balusters can become loosened or wobbly, which isn’t just an eyesore but a real safety concern. A loose baluster can give way unexpectedly, risking falls or injuries—something no homeowner wants to deal with. According to safety experts, unstable railings are among the top reasons for backyard accidents, emphasizing the importance of quick fixes to maintain structural integrity. Early on, I made the mistake of ignoring a slight looseness in my deck, thinking it was just cosmetic. That was a costly oversight I don’t want you to repeat. Instead, understanding how to tackle these issues efficiently can make a big difference, and I’ll walk you through what I learned from local professionals and tried-and-true do-it-yourself tips.
Will Fixing My Wobbly Railings Be Worth The Effort?
I admit, I was skeptical at first—would a simple tightening really hold up over time? Turns out, the answer is yes—if you use the right hardware and techniques. The key is to identify the root of the problem before jumping into fixes. Sometimes, it’s just a matter of replacing worn screws or adding wood glue before reinserting nails. And here’s a pro tip: always check your local building codes to ensure your repairs meet safety standards, especially with evolving requirements in 2026. If this sounds familiar, don’t worry; I’ve gathered some trusted methods that can turn a shaky railing into a sturdy safeguard. Ready to see how simple it can be? Let’s dive into the essentials of quick but effective repairs that will save you time, money, and potential hazards.
Assess the Damage and Gather Your Tools
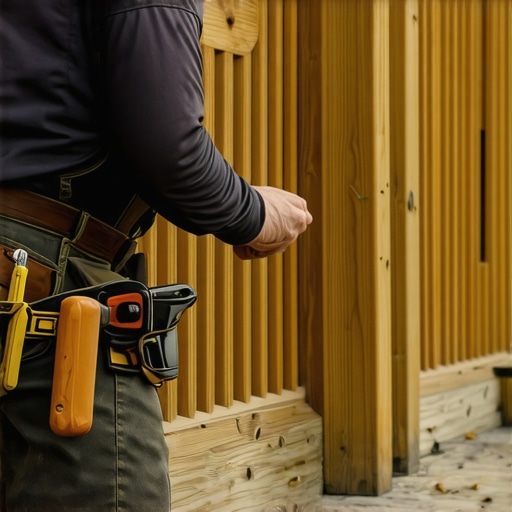
First, inspect your deck to determine which balusters are wobbly or loose, focusing on the connection points. Take note of whether screws, nails, or the wood itself appear worn. Gather necessary tools such as a screwdriver, drill, replacement screws or nails, wood glue, and safety gear. Removing the loose balusters carefully helps prevent further damage and prepares you for an effective repair.
Remove and Replace Worn Hardware
Loosen and extract the existing screws or nails causing instability. Remember, using a power drill with the correct bit speeds completion but requires caution to avoid damaging the wood. During my repair last summer, I replaced rusty screws with stainless-steel variants—these resisted weather and provided a tighter hold. Always verify that the hardware matches your deck’s specifications to maintain safety standards, as detailed in Needham hardware updates.
Prepare the Wood for Reinforcement
If the wood around the connection points is splintered or cracked, lightly sand the area and apply wood glue for additional strength. For a more secure fit, consider drilling pilot holes before inserting screws; this prevents wood splitting and ensures that hardware sits flush. When I fixed a stubborn baluster two weeks ago, I aligned the wood properly and used a clamp until the glue dried, which significantly improved stability.
Reattach or Install New Balusters
Position the baluster back into its slot. Use a level to ensure it’s straight, then insert the chosen hardware—preferably corrosion-resistant screws or nails—and tighten securely. For added assurance, you might reinforce the connection with a small amount of exterior-grade wood adhesive at the joint. Remember to adhere to local building codes—these standards are evolving, especially with the 2026 updates. For comprehensive safety checks, visit evaluating deck stability.
Final Inspection and Testing
Once installed, gently shake the baluster to confirm it’s secure. Walk along the railing to test for wobbliness across the entire deck. If any part still feels unstable, repeat the process or consider seeking professional help. After doing this last weekend, I discovered one replaced component that still slightly wobbled; a tighter screw fixed it, avoiding unnecessary rework. Recognizing when a repair has succeeded ensures your safety and keeps your deck looking great.
 Many homeowners assume that hiring a local deck builder in Needham means trusting a one-size-fits-all approach, but in my experience, this can be a dangerous oversimplification. A frequent myth is that all deck builders follow the same standards; however, the reality is that expertise varies widely, especially when it comes to navigating evolving safety regulations like those in effect for 2026. For instance, some contractors might overlook recent hardware update requirements detailed in Needham’s hardware standards, which could lead to costly fixes down the line.
Another misconception is that cost is the sole indicator of quality. While budget-conscious choices are tempting, opting for the cheapest contractor without verifying their experience and licensing in accordance with Needham’s 2026 standards can compromise your safety and the lifespan of your deck. Advanced builders understand the nuances of materials like composite versus PVC, and can guide clients through these decisions in line with the latest trends discussed in cost comparisons for 2026.
What most people overlook is that the skill set extends beyond basic carpentry. An expert deck builder anticipates future needs, such as integrated outdoor tech from outdoor tech or ensuring proper drainage to prevent backyard flooding, as covered in drainage best practices for 2026. Additionally, many DIY enthusiasts fall prey to the trap of focusing solely on the aesthetics and neglecting structural integrity—an oversight that can cause long-term safety issues.
Let me clarify a common pitfall: using outdated hardware or failing to account for environmental factors like needham’s climate when choosing materials. Recognizing these nuances separates an average deck from one that endures seasons and weather extremes. For example, selecting corrosion-resistant hardware aligns with 2026 hardware updates and ensures longevity.
Are you aware of how these subtle details can make or break your deck project? Ensuring your contractor is versed in these advanced aspects saves you money and stress in the long run. Remember, thorough vetting and understanding the latest building standards are essential for creating a safe, durable outdoor space. Have you ever fallen into this trap? Let me know in the comments.
Keeping your deck in top condition requires more than just occasional inspections; it demands the right tools and a strategic approach to ongoing maintenance. Personally, I swear by a few specific instruments and methods that ensure my deck remains safe, durable, and beautiful through every season. Investing in quality equipment saves time and money in the long run and helps prevent minor issues from escalating into costly repairs.
Why a Digital Moisture Meter Is a Game-Changer
One of my favorite tools for preventing deck rot is a digital moisture meter. Unlike traditional moisture gauges, digital versions provide precise readings that help identify hidden water damage early. I use mine quarterly to check critical points, such as beneath the joists and around post footings, where moisture tends to accumulate unnoticed. This proactive approach allows me to catch and address rot or mold before it compromises the deck’s structure.
Power Washers for Deep Cleaning and Surface Preparation
When it comes to cleaning, I recommend a quality pressure washer—preferably with variable pressure settings and interchangeable nozzles. My personal choice is a model with a turbo nozzle for stubborn grime and a low-pressure setting for sensitive surfaces. Regular power washing with the right equipment not only enhances the appearance but also prepares the surface for sealing by removing algae, moss, and peeling paint, per guidelines outlined in best practices for pressure washing. Proper cleaning extends the life of your deck’s materials and helps the sealing process be more effective.
How Can I Maintain Deck Safety and Appearance Over Time?
To keep your deck looking fresh and functioning properly, routine inspections are crucial. Use a combination of your moisture meter, visual checks, and even a small torque wrench to ensure fasteners stay tight. Applying a high-quality sealer or stain annually—preferably in the spring or early summer—protects against weather damage and UV rays, which are especially aggressive in Needham’s fluctuating climate. Additionally, replacing worn or corroded hardware with updated, corrosion-resistant components from Needham hardware standards keeps your deck safe and compliant with new regulations.
Preparing Your Deck for Long-Term Success
Implementing these tools and routines creates a sturdy foundation for your outdoor space. For instance, incorporating moisture monitoring into your regular maintenance schedule can dramatically reduce the risk of structural issues. As the trend moves toward smart home integration, I predict that digital sensors will become standard for deck management, alerting homeowners to problems before visible damage occurs. Start by trying out a digital moisture meter this season and see how early detection can save you from future headaches. Would you like to explore more advanced maintenance techniques? Visit Needham’s tips for managing a 2026 deck timeline for comprehensive guidance.
What Hidden Lessons Did My Deck Teach Me?
One of the most valuable insights I gained was realizing that proactive maintenance extends beyond simple fixes—it’s about understanding the ongoing health of your entire deck structure. I learned that regular inspections, combined with tools like a digital moisture meter, can detect issues before they become hazards, saving money and ensuring safety. Another lightbulb moment was recognizing how important it is to stay current with evolving safety standards and hardware updates, which many overlook. This knowledge empowered me to ask my deck professionals the right questions and not settle for short-term solutions. Lastly, I discovered that patience and attention to detail—taking the time to prepare, assess, and reinforce—are key components of successful deck management, even if it requires extra effort upfront. These lessons have transformed my approach, making safety, durability, and peace of mind central to my outdoor living space.” ,