I remember the moment clearly—my backyard deck, a haven for summer barbecues and family gatherings, suddenly had a wobbly, water-damaged board staring back at me. It was late afternoon, and I could see the problem could spiral out of control if I didn’t handle it delicately. That lightbulb moment made me realize how crucial it is to replace individual deck boards without damaging the entire structure. Have you ever faced a similar dilemma with your deck, feeling overwhelmed by the idea of tearing apart more than necessary?
Why Fixing One Board Correctly Matters More Than You Think
A cracked or rotted deck board not only affects the aesthetics but also poses safety risks. When you try to replace just that one piece, there’s a real fear—will I damage the neighboring boards? Will I end up with a mangled mess instead of a repaired deck? These concerns are valid; I had them too early on. But learning the right techniques can make all the difference.
Is Replacing a Single Deck Board Actually Worth the Hassle?
Initially, I thought replacing just one or two boards might be a quick fix. Turns out, rushing this process can backfire. One mistake I made early was using the wrong tools—like a standard crowbar instead of a deck-specific puller—which led to splitting the wood and ruining some good neighboring boards. Trust me, it’s a mistake many newcomers make, and it underscores the importance of knowing what to do before you start.
By understanding the proper methods, like carefully prying the board from underneath and avoiding excessive force, you can preserve the existing structure. Plus, with the right supplies and patience, the process becomes much smoother—and your deck stays looking fabulous. Want to learn exactly how to do this? From selecting the best tools to tips on preventing damage, we’ll cover everything you need to tackle this project confidently.
Secure the Working Area and Gather Tools
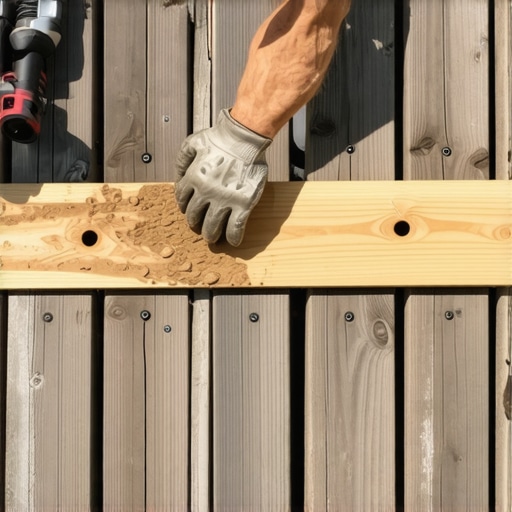
Start by clearing the deck around the damaged board and setting up your workspace. Wear safety goggles and gloves for protection. Gather essential tools: a pry bar, hammer, screw gun, replacement board, wood preservative, and a deck fastening system. Having everything within reach prevents accidents and makes the process smoother. I once jumped into replacing a board without preparation, which led to accidental damage to neighboring boards; this step ensures precision from the start.
Loosen and Remove Fasteners Carefully
Locate the screws or nails holding the damaged board. Use a screw gun for screws and a pry bar for nails. Insert the pry bar underneath the board’s edge, gently prying upward while supporting the neighboring boards to prevent splitting. Remember, applying too much force can cause cracks—think of it like levering a stubborn jar lid; gentle, steady pressure wins. During my first attempt, I underestimated the force needed and cracked an adjacent board; taking it slow avoided this mistake.
Be Mindful of Deck Spans and Supports
Pay attention to joists and support beams beneath. If they’re damaged, it’s best to address those issues concurrently to maintain structural integrity. Use a flashlight to inspect the underside of the deck. This step keeps the deck safe and durable long-term, much like checking foundation beams in a house. A quick inspection once saved me from replacing a board that was only cosmetically damaged but sitting on a compromised joist.
Extract and Prepare the New Board
Remove the old fasteners from the replacement board, ensuring it’s clean and free of debris. Treat the new wood with a preservative or sealant to extend its lifespan, especially in climates like Needham’s. Dimensionally verify the new board fits snugly into the space. Think of it as fitting a puzzle piece—precision here prevents future wobble or gaps. When I replaced my deck board, trimming the new piece slightly for a perfect fit minimized future movement or squeaking.
Install the New Board with Proper Fastening Techniques
Place the new board into position, aligning it with neighboring boards. Secure it with corrosion-resistant screws or hidden fasteners, depending on your preference. Don’t overtighten; leave a slight gap if needed for expansion. Using a drill with a countersink bit ensures fasteners sit flush and prevents splitting. Remember, a loose board can become dangerous, but overtightening can cause damage. I’ve learned that patience and proper torque are key—rushing leads to errors.
Check for Proper Support and Finish
Inspect the installed board for stability and alignment. Walk over it to test for squeaks or movement. Reapply any sealing or staining if desired, which also hides screws and provides additional weather protection. Proper finishing enhances longevity, similar to applying stain after refinishing hardwood floors. After my first replacement, sealing the new board prevented water ingress, significantly reducing rot risks.
Many homeowners assume that choosing a deck builder in Needham is as simple as hiring the lowest bidder or selecting the most popular company. However, this belief overlooks critical nuances that can make or break your project. In my experience, the biggest mistake is thinking all builders are equipped to handle the unique demands of Needham’s climate and terrain. Not all contractors are equally skilled at addressing the local factors like sun exposure, humidity, and soil conditions, which directly impact deck longevity.
Are All Deck Builders in Needham Truly Equal in Experience and Specialization?
Contrary to common practices, not every deck builder has the advanced expertise necessary to navigate complex requirements such as incorporating stone accents or ensuring proper ventilation beneath low-profile decks. For instance, a builder unfamiliar with integrating stone features might risk structural issues or aesthetic mismatches. Consulting specialized resources, like guidelines on https://deckbuildersneedham.com/using-stone-accents-on-your-custom-wood-deck, can reveal which contractors possess the right skills. Relying solely on reviews or word-of-mouth without understanding the builder’s specialization can lead to disappointing results.
Maintaining a beautiful and durable deck in Needham requires more than just initial construction; it demands regular upkeep with the right tools and techniques. Over the years, I’ve refined my toolkit to ensure I catch issues early and keep my deck looking pristine. One of my go-to pieces of equipment is a digital moisture meter. This device allows me to assess the moisture content of wood and composite materials, helping me identify areas prone to rot or mold before they become visible problems. Investing in a high-quality moisture meter, like the Tramex MM4, has greatly extended the lifespan of my deck and prevented costly repairs.
Pick the Right Power Tools for Precise Repairs
When it comes to repairs, having precision power tools is essential. I rely on a cordless impact driver with variable speed settings, such as the Makita XT260T, which provides both power and control. This tool simplifies driving fasteners into dense materials and minimizes the risk of overdriving or damaging the wood. For meticulous tasks, I prefer a detail-oriented rotary tool equipped with sanding and carving bits, perfect for smoothing rough edges or fitting custom pieces. Using specialized tools ensures that each repair is seamless and durable, saving time and effort in the long run.
Prevention Techniques That Save Time and Money
Preemptive measures are vital. Regularly applying a high-quality deck sealant or stain, like the Zinsser Deck Seal, fortifies the surface against moisture and UV damage. To facilitate consistent application, I use a sprayer with a roller attachment. This setup ensures a uniform coat and reduces fatigue during large projects. Another effective tip is inspecting and tightening fasteners with a power screwdriver periodically—loose fittings can accelerate decay and compromise safety. Implementing these preventive practices helps maintain structural integrity and reduces the need for major repairs.
How do I maintain my deck over time
Consistency is key. Schedule seasonal inspections to catch early signs of wear or damage. Cleaning the surface with a gentle, biodegradable cleaner like the EcoClean Deck Wash keeps debris, algae, and mold at bay. For deep cleaning, I recommend a pressure washer set to avoid damaging the surface—using a fan nozzle and keeping the pressure below 1500 PSI ensures effective cleaning without harm. Following cleaning, reapplying protective coatings prolongs the deck’s appearance and functionality. As I look to the future, innovations like smart sensors that monitor moisture and wear could revolutionize deck maintenance, making inspections even more efficient.
For homeowners eager to go a step further, trying out an advanced moisture measurement or applying a new protective coating can dramatically enhance your deck’s lifespan. Remember, the key to
Lessons I Wish I Heard Before Repairing My Deck
One of the biggest surprises was realizing how crucial patience is when replacing a single deck board. Rushing often leads to additional damage, which can turn a simple fix into costly repairs. I also learned that understanding the subtle signs of structural support issues can save headaches later. A proactive approach—like inspecting beneath the surface—can prevent future problems. Finally, knowing how to select the right tools, such as impact drivers and moisture meters, transformed a daunting task into a manageable DIY project.
Tools and Resources That Make All the Difference
My essential toolkit includes a Cordless Impact Driver, which provides the control needed for fastening delicate boards securely without over-tightening. I highly recommend the Tramex MM4 Moisture Meter for early detection of dampness that could lead to rot. For maintenance, I trust the EcoClean Deck Wash to keep my outdoor space looking fresh. Visiting http://deckbuildersneedham.com/using-stone-accents-on-your-custom-wood-deck has been invaluable for learning how stone accents can enhance durability and aesthetics. Additionally, subscribing to guides like https://deckbuildersneedham.com/understanding-the-impact-of-sun-exposure-on-deck-longevity helps me stay ahead of climate-related wear and tear.
Embrace Your Deck’s Potential and Take Action
Your outdoor retreat in Needham can become a true sanctuary with the right care and confidence. Don’t wait for small issues to snowball—start applying these insights today to extend your deck’s lifespan and beauty. Remember, every improvement you make not only enhances safety but also adds value to your home. Whether you’re fixing a single board or planning major upgrades, embracing knowledgeable DIY practices can save you money and give you a sense of pride in your outdoor space. Now’s the perfect moment to take action—your deck’s future self will thank you.