I vividly remember the day I first stepped onto my old, weathered deck, only to feel that unsettling wobble under my feet. It was a sunny spring afternoon, and I was eager to host friends for a backyard barbecue. But as I moved around, I couldn’t shake the worry—was my beloved deck safe? That moment was my lightbulb moment, realizing that not all wood is created equal, especially when it comes to durability and safety.
The Hidden Power of Kiln-Dried After Treatment Wood
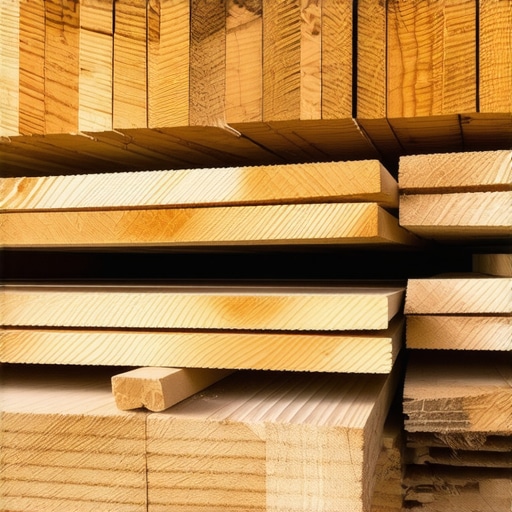
After facing recurring issues with deck warping, splintering, and even some decay, I dove into research. I discovered that upgrading to kiln-dried after treatment (KDAT) wood could be a game-changer. Unlike regular pressure-treated lumber, KDAT undergoes a rigorous heat-drying process that reduces moisture content, making it less prone to twisting, cracking, or swelling. This means your deck stays stronger and looking better longer, saving you headaches and costly repairs down the line.
From personal experience, I can attest that KDAT wood provided a noticeable difference in stability and visual appeal. It also resists moisture better, which is crucial in our humid climate here in Needham. Plus, it’s environmentally friendly—something I started caring about more after reading about eco-friendly decking trends (check out the latest trends) so you can enjoy your outdoor space guilt-free.
Could I Be Missing Out on Better Quality?
Early on, I made a common mistake—trusting the cheapest lumber I could find without considering the treatment process. I thought all pressure-treated wood offered the same longevity. Spoiler: it doesn’t. Skipping the kiln-drying step could lead to faster deterioration, especially in our unpredictable weather. Being cautious and selecting KDAT wood isn’t just about aesthetics; it’s about safety and peace of mind.
If you’re wondering whether upgrading your deck’s wood is worth it, I promise the benefits go beyond mere appearance. A durable, moisture-resistant deck means fewer repairs and more time enjoying your outdoor oasis. Still skeptical? Let’s explore some of the concerns people have about this type of wood and why they might be unfounded.
Preparing Your Materials for Success
Start by selecting high-quality kiln-dried after treatment (KDAT) wood from reputable suppliers. Measure your deck area carefully, accounting for spacing, overhangs, and design features. Gather necessary tools: drills, saws, nails or screws, and safety gear. Remember, a well-planned foundation prevents headaches later. When I built my deck, I meticulously measured and ordered extra wood to account for cuts and potential mistakes, which proved invaluable during the project.
Laying the Foundation Properly
Ensure your ground is level and solid. Use a laser level or string lines to mark the deck perimeter precisely. Lay out concrete piers or beams, depending on your design. For my project, I opted for concrete piers because they provided better stability in our clay soil. Double-check measurements, and ensure all supports are flush and level to avoid uneven decking surfaces. Proper foundation setup is like the frame of a house—crucial for longevity.
Sealing the Joists and Supports
Before installing the decking boards, coat the joists with a weather-resistant sealant. This extra step protects against moisture infiltration, which can cause rot over time. During my build, I applied a high-quality brush-on sealer, mimicking professional techniques. It added an extra layer of durability, especially in humid climates. This step is similar to waterproofing a roof; neglecting it can lead to costly repairs eventually.
Fastening the Decking Boards Securely
Lay the KDAT boards perpendicular to the joists, leaving consistent gaps for expansion—about 1/4 to 3/8 inch. Use hidden clips or face screws for a clean look. I chose hidden clips, which made my deck appear seamless and modern. When fastening, avoid over-tightening to prevent board warping. A tip: pre-drill holes to prevent splitting, especially near edges. Proper fastening not only enhances aesthetics but also ensures safety and stability under heavy use.
Addressing Corners and Edges
Cut boards precisely with a saw, matching angles if your design includes curved or angled parts. Sand rough edges to prevent splinters, which can cause injuries or accelerate deterioration. I learned this lesson the hard way when I didn’t sand some edges—more splinters appeared over time. Rounded edges also help water runoff, reducing rot risk. Use a quality wood stain or sealant after installation to enhance appearance and protection.
Final Inspection and Maintenance
Inspect all fasteners, support connections, and surface smoothness. Look for any uneven boards or loose fasteners, and tighten or adjust as needed. Regular maintenance extends your deck’s lifespan. After my build, I scheduled periodic checks, especially after harsh weather, using guides like maintenance tips. Incorporate routine cleaning and sealing to sustain the wood’s protective qualities. A proactive approach keeps your investment safe and looking fresh for years.Even seasoned homeowners and DIY enthusiasts often overlook the subtle complexities involved in selecting and working with professional deck builders in Needham. While many assume that choosing a local contractor guarantees quality, the reality is far more nuanced. One common misconception is that all deck builders follow the same standards, but in practice, expertise varies significantly, especially when dealing with advanced design features or complex materials. Skilled professionals are not just about construction—they master intricate details like proper load calculations, moisture management, and safety code compliance, which can drastically impact your deck’s longevity and safety.
A frequent trap homeowners fall into is focusing solely on price without scrutinizing the builder’s experience or portfolio. This can lead to costly mistakes, such as improper foundation work or inadequate sealing that accelerate wear and tear. For instance, a builder well-versed in contemporary designs, like those showcased in modern composite decks, will likely ensure your project aligns with current trends and durability standards.
Considering advanced features like built-in kitchens or custom lighting requires a builder with specialized expertise. Not all contractors can seamlessly integrate these elements without compromising structural integrity or aesthetic appeal. This is where understanding their background and certifications becomes crucial. Proper execution of such features can dramatically enhance your outdoor living experience, but only if executed by someone who truly understands the complexities involved.
Why You Shouldn’t Compromise on Expertise in Complex Deck Projects
Cutting corners by hiring an inexperienced builder might save money upfront but can lead to significant issues down the line, from structural failures to non-compliance with local codes. A comprehensive review of their past projects and client testimonials can offer insights into their capacity to handle sophisticated designs and materials. Remember, a well-constructed deck isn’t just about aesthetics—it’s about creating a safe, durable structure that withstands our climate and usage patterns.
An often-overlooked aspect is the importance of ongoing maintenance and how it ties back to initial craftsmanship. Experts recommend detailed inspections after harsh seasons, as outlined in post-winter inspections, to catch issues early. Choosing a builder committed to quality work ensures you benefit from such proactive care, prolonging your deck’s lifespan.
Have you ever fallen into this trap? Let me know in the comments how you navigated these nuances or any lessons learned from your experience with Needham deck builders.
Maintaining your deck’s functionality over the years requires the right combination of tools, techniques, and proactive care. As someone who has navigated the intricacies of deck upkeep, I can attest that investing in quality equipment and adopting a systematic approach can significantly extend your deck’s lifespan.
Essential Tools for Effective Deck Maintenance
One of my go-to tools is a high-powered cordless leaf blower. It quickly clears debris from the surface and gutters, preventing moisture retention that could lead to rot. I prefer using the hidden clip removal tool when inspecting fastenings—it helps me easily tighten or replace clips without damaging the boards.
For deeper cleaning, I rely on a pressure washer with adjustable psi settings, usually around 1000-1500 PSI for composite decking, to avoid surface damage. Using a fan tip ensures even cleaning and helps remove algae or stains effectively. I also keep a set of Caulk Guns for sealing gaps or small leaks that can develop over time, especially around joists and supports.
The Power of Durability Software
Beyond physical tools, incorporating specialized software like project management apps helps keep track of maintenance schedules, warranties, and inspections. Setting reminders ensures tasks like sealing or replacing worn fasteners aren’t overlooked, saving money and time in the long run. When I started using digital checklists, it became easier to identify upcoming needs and plan accordingly.
Where Is Deck Care Heading?
Looking ahead, I believe that the integration of IoT sensors into decking components could revolutionize maintenance by providing real-time data on moisture levels, structural integrity, and wear. This proactive approach would allow homeowners to address issues before they escalate, extending the deck’s functional life and safety.
How do I keep my deck working over time?
Regular inspections are paramount. Check fasteners, support beams, and surface condition every season, especially after harsh weather. Applying a high-quality sealant, like those recommended for pressure-treated wood, helps prevent moisture ingress. Using tools such as a moisture meter can help you monitor wood health, catching early signs of decay.
Don’t forget to clean your deck gently with a scrub brush and non-abrasive cleaner to retain surface integrity. Address loose or wobbly parts promptly with specific fastener replacements—sometimes, a simple tightening can restore safety. For a comprehensive maintenance approach, I suggest following guidelines outlined in long-term deck care resources.
Implementing these tools and strategies ensures your outdoor space remains safe, attractive, and durable. Try integrating a moisture meter into your routine this season—it’s an eye-opening experience that can preempt costly repairs. For detailed procedures on sealing your deck, check the related tips in post-winter inspection guides. Consistent maintenance, backed by the right tools, guarantees your deck will keep working beautifully for years to come.

The Hardest Lesson I Learned About Deck Builders Needham
One of my most significant realizations was the importance of vetting local professionals thoroughly before starting a project. Trusting a builder without reviewing their experience with advanced features led to costly revisions. Now, I always request portfolios and references to ensure they’re equipped to handle complex designs.
3 Myths About Deck Builders Needham That Held Me Back
I used to believe that the cheapest quote was the best deal. However, I learned that quality craftsmanship and proper materials like kiln-dried after treatment (KDAT) wood can save money in the long run, preventing frequent repairs. Investing wisely upfront pays dividends over time.
What Experts Won’t Tell You About Deck Builders Needham
Many overlook how critical foundation work is—poor footing can compromise your entire deck’s safety. Hiring a contractor who emphasizes proper support structures and permits streamlines the process and ensures durability. This tip, often unspoken, is key to a stress-free build.
My Essential Toolkit for Needham Deck Maintenance
Tools like a high-powered cordless leaf blower for debris removal and a moisture meter to monitor wood health have become indispensable. I trust these tools because they provide immediate insights, helping me prioritize repairs and maintenance, extending the life of my deck.
Books That Changed How I View Deck Projects
Personally, “The Complete Guide to Building Your Own Deck” offered invaluable tips on proper joist sizing and sealing. This resource demystified complex techniques, allowing me to approach upgrades confidently and avoid common pitfalls associated with DIY projects.
Where to Go from Here
If you’re inspired to elevate your deck’s durability and design, start by exploring innovative features like built-in kitchens. Visit this guide for expert insights. Remember, choosing materials such as eco-friendly composite decking can align your outdoor space with sustainable trends, ensuring you enjoy it guilt-free.
Embrace the Challenge of Your Deck
Taking ownership of your deck project, from choosing quality materials to understanding future maintenance needs, empowers you to create a space that endures. Let curiosity and careful planning be your guides. Your outdoor masterpiece awaits—start today and make it truly yours.