It was a sunny afternoon when I stepped onto my aging deck, only to feel that unmistakable crunch of splintered wood under my feet. A sinking feeling washed over me—had I overlooked the wear and tear? That lightbulb moment hit hard: my beloved outdoor space was on borrowed time, and without proper care, it might not survive another season. But then I realized—there’s hope. With a few simple steps, I could extend its life and keep enjoying those warm evenings out there. Today, I want to share exactly how I managed to seal an old deck and give it a fresh lease on life for at least three more years.
Why Sealing Your Deck Matters Right Now
In Needham and similar climates, decks endure a relentless barrage of rain, snow, and sun—sacrificing their charm and integrity over time. If neglected, a weathered deck can become a safety hazard and drain your bank account in repairs or replacement. But here’s the good news: sealing your deck isn’t just about keeping it looking good; it preserves the wood, prevents water infiltration, and stalls the natural aging process. According to the Wood Association, a well-sealed deck can last twice as long as one that’s left untreated. Still, many homeowners hesitate—whether because they fear the process is complex or pointless. Believe me, I made the classic mistake of waiting too long, assuming my deck’s peeling paint was the worst it could get. The truth is, early sealing can save you a ton of trouble and money in the long run.
Is Spraying Sealant Really Worth the Hype?
This question haunted me when I first started my sealing journey. I worried that quick sprays wouldn’t penetrate deeply enough or might leave uneven coverage. I initially rushed through the job, only to see patches peel within a year. It turns out, proper preparation and choosing the right products make all the difference. If you’re curious about the best solutions, check out the comprehensive review of [top deck cleaning products for 2026](https://deckbuildersneedham.com/the-best-deck-cleaning-products-for-2026-reviewed) to select the ideal sealant. Remember, skipping the preparation or opting for cheap products often results in wasted effort and money, which is why I say—don’t cut corners here.
So, if you’re tired of watching your deck fade, crack, or rot away, or if you’re just eager to enjoy your backyard without constantly worrying about its condition, you’re in the right place. In the next sections, I’ll walk you through how I prepared, applied, and maintained my deck’s sealant—steps that turned my aging outdoor space into a sturdy, beautiful spot ready for years of use. Ready to get started? Let’s dive into the essential preparations for sealing your deck and extending its lifespan effectively.
Clear the Deck Surface and Remove Debris
Begin by sweeping the entire deck to eliminate loose dirt, leaves, and debris. Use a stiff-bristled broom to get into corners and between boards. After sweeping, use a garden hose with a spray nozzle to rinse the surface thoroughly, ensuring all dust and grime are washed away. I recall one time when I neglected this step, only to find the sealant didn’t adhere properly, causing uneven patches. Rinsing is crucial for a smooth finish and lasting protection.
Address Structural Issues Before Sealing
Inspect your deck for any loose or damaged boards, protruding nails, or wobbling posts. Tighten or replace fasteners as needed. For example, I once discovered a loose joist beneath my deck, which I fixed with structural screws. Addressing these problems beforehand prevents sealing over compromised wood, which could trap moisture and exacerbate damage. For more complex repairs like fixings, check this guide.
Scrape and Sand to Achieve a Smooth Surface
If your wood has peeling paint or splinters, use a scraper to remove flaky paint or loose fibers. Follow up with a fine-grit sander to smooth rough patches. I once used a handheld sander, which made the process quicker but be cautious about over-sanding — you don’t want to remove too much wood. Achieving an even, sanded surface ensures the sealant penetrates uniformly, extending its effectiveness. For detailed sanding techniques, explore this resource.
Choose the Right Sealant for Your Needs
Select a high-quality, UV-resistant sealant suited for your deck’s wood type. ForNeedham’s climate, I recommend a product from the reviewed best deck cleaning products. Applying the correct product prevents peeling and extends lifespan. Remember, cheaper sealants might save money upfront but often require reapplication sooner, leading to higher costs over time.
Test the Sealant on a Small Area
Before full application, try applying the sealant on a hidden section of your deck to check color change and drying time. I did this and was glad—it revealed I needed a different gloss level. This test prevents surprises and ensures your desired finish.
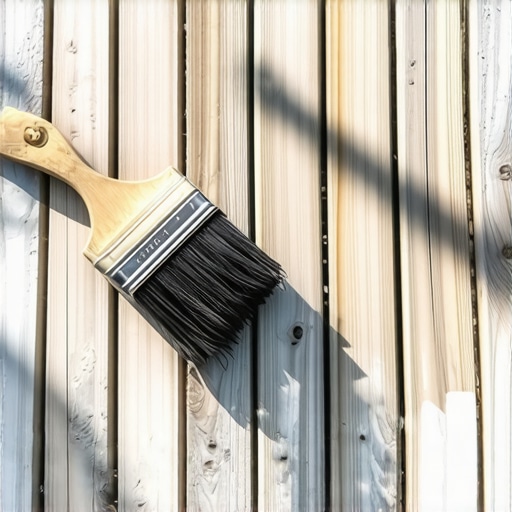
Apply Sealant Evenly and Thoroughly
Use a high-quality brush or roller to apply the sealant in the direction of the wood grain. Work in small sections, overlapping slightly to avoid streaks. For tricky corners, a foam brush can help. I vividly remember battling rain midway through my sealing project; quick adjustments kept the sealant from pooling or spilling over edges. Proper technique guarantees consistent coverage, crucial for durability.
Let It Dry Completely Before Walking on It
Most sealants require 24-48 hours to cure fully. Keep foot traffic off the surface during this period to prevent uneven wear. I learned this the hard way when I stepped on my still-tacky deck, leaving footprints that marred the finish. Patience now ensures long-term protection for your deck.
Many homeowners believe that hiring a local deck builder guarantees a flawless project, but the reality is more nuanced. One common misconception is that all deck builders in Needham have the same level of expertise, which is far from true. In fact, understanding the specific certifications, experience with local weather conditions, and knowledge of Massachusetts building codes is crucial for a durable, safe deck. For example, some contractors may overlook the importance of choosing the right fasteners for coastal-like weather, which can lead to premature deterioration—learn more about the best deck fasteners for such conditions here. Don’t assume a cheap quote means long-term savings; often, hidden costs creep up due to overlooked nuances like proper joist-tape application or drainage planning.
A significant hidden nuance is the impact of climate-specific materials and techniques. Many think a standard pressure-treated pine deck will suffice in Needham’s fluctuating weather, but expert-level projects consider alternatives like composites or IPE, which although pricier, can drastically reduce maintenance costs over time here. Additionally, improper preparation—such as neglecting to level the foundation or failing to account for slope—can compromise the entire structure. These mistakes are often glossed over in basic tutorials but are critical in ensuring longevity.
Have you ever fallen into this trap? Let me know in the comments.
A common myth is that sealing a deck is a simple, one-step process. In reality, it involves nuanced techniques like testing sealant compatibility with your wood type and seasonal timing to maximize absorption and protection. Advanced homeowners might ask, “How does the choice of sealant affect long-term weather resistance, especially with Needham’s harsh winters?” Interestingly, studies show that UV-resistant sealants paired with proper surface prep significantly extend a deck’s lifespan here. Moreover, the myth of ‘once and done’ sealing is dangerous; decks require re-application every few years to combat wear and UV damage.
Let’s remember that top-tier deck building is both an art and science. Nuances like choosing the right fasteners, understanding climate impacts, and proper surface treatment can mean the difference between a deck that lasts 10 years and one that needs replacement after 5. Being aware of these details helps you avoid costly repairs and enjoy your outdoor space fully. If you’re ever in doubt, consulting expert resources or experienced professionals ensures your deck withstands Needham’s weather for years to come.Maintaining a durable, long-lasting deck requires more than just the right sealant; it demands specialized tools and a strategic approach. Over the years, I’ve refined my toolkit to ensure every project I undertake results in a deck that stands the test of Needham’s fluctuating weather. One of my go-to investments is a high-quality cordless variable-speed drill, which allows for precise insertion of fasteners like those recommended in this comprehensive guide on fasteners suitable for coastal-like conditions. Coupled with a set of stainless steel screws, I minimize corrosion over time, extending the lifespan of the structure.
For surface preparation, I swear by a power sander with dust extraction capabilities. It ensures smooth surfaces for sealant adhesion, preventing peeling and uneven wear. When dealing with stubborn old paint or splinters, a rotary tool fitted with a scraping attachment accelerates the process while reducing hand fatigue.
Beyond physical tools, software like terrain modeling apps can help evaluate the slope and drainage of your deck area, which is crucial for structural integrity over time. Proper drainage prevents water pooling, a common culprit in premature deck deterioration. Investing in a laser level also ensures your deck’s surface remains even, a subtle yet vital aspect for long-term maintenance.
Predicting future needs, I believe that as technology advances, automated inspection drones might become standard for detecting early signs of damage or rot—saving time and costly repairs. Companies like DroneDeck are already exploring such options, and staying abreast of these developments can give you a significant edge.
How do I keep my deck in top shape over the years? Regular inspections are key. I recommend quarterly check-ups, focusing on fastener tightness, wood condition, and sealant wear. Use a moisture meter to monitor any unexpected dampness and catch issues before they escalate. Remember, early intervention is cheaper and more effective than waiting for visible damage.
Finally, dealing with high-maintenance areas like railings or post supports requires specialized tools, such as a post puller or a manual impact driver, to replace components without jeopardizing the deck’s stability.
Ready to take your deck maintenance to the next level? Try integrating a robot-assisted inspection tool or a moisture sensor into your routine. These advanced tips obsolete the old notion that maintenance is purely manual and reactive, moving toward a smarter, more proactive approach. Stay ahead by adopting innovative equipment and techniques, and your Needham deck will thank you for it.
The Unspoken Lessons From a Fresh Coat of Sealer
One of the most surprising insights I gained is how crucial the smallest details are—like choosing the right brush size or waiting for the perfect weather window. These seemingly minor aspects can significantly extend your deck’s lifespan and save you headaches down the line.
Another lesson was that DIY sealing isn’t just about the application but also about the preparation. Skipping thorough surface cleaning or structural repairs can undermine even the best sealant, leading to peeling or rot much sooner than expected.
I also discovered that climate awareness isn’t a one-size-fits-all. What works in Needham might differ slightly elsewhere—considering temperature fluctuations and humidity levels can make your maintenance more effective.
Finally, I’ve realized that ongoing care, like quarterly inspections and prompt repairs, makes the biggest difference. Watching your deck age gracefully isn’t about one big project but consistent, informed attention over years.
Tools and Tips That Changed My Deck Routine
Investing in a quality cordless drill and stainless steel screws significantly improved my repair and fastening process. These tools are reliable and resist corrosion—a must in our humid New England summers.
I swear by a dust-extraction sander for surface prep; it saves time and leaves the wood smooth for better sealant adhesion. For evaluations, a moisture meter is invaluable for catching hidden issues early.
To plan for future-proofing, I started using software like terrain modeling apps to assess drainage and slope—preventing water pooling that can rapidly deteriorate your deck. Even a simple laser level helps keep your surface even, reducing uneven wear.
Staying ahead means embracing advancements—like exploring options for automated inspection drones that can spot damage early. As technology progresses, integrating these tools will protect your investment even better.
Sealing Your Deck Isn’t Just Maintenance, It’s Empowerment
Taking charge of your deck’s health transforms the entire backyard experience. Each step, from surface prep to sealant choice, reinforces your outdoor haven against time and weather.
If you’re prepared to dive in and commit to proper care routines, you’ll find your outdoor space becomes more than just a deck—it’s an extension of your home where memories unfold, protected and beautiful for many seasons to come. Ready to assess your current deck and plan your next move? Your future self will thank you for the effort.