It was a sunny Saturday afternoon when I realized I had just turned my deck into a paint-splattered disaster zone. As I looked at the chaos surrounding my freshly stained railings—drips on the floor, smudges on the siding—I couldn’t help but feel a familiar wave of frustration. Why does staining the deck always seem to come with a mess? I’ve been there, and let me tell you, it’s enough to make even the most seasoned DIYer consider hiring a pro. But what I discovered changed everything.
Stop the Stain Sabotage: Easy Tricks to Keep Your Deck Railings Clean
Imagine finishing your project and still having your deck look pristine—no drips, no splatters, no ruined clothes. Today, I promise to share the techniques that transformed my staining routine from a messy nightmare into a neat, efficient process. You’ll learn the tricks that allow you to apply stain smoothly and clean up quickly, saving time and effort.
Will I Spend More Time Cleaning Than Staining?
Early on, I made the mistake of rushing in without preparation. I didn’t mask the areas I didn’t want stained, leading to hours of scrubbing and repainting. It’s a common error that can turn a simple project into a cleanup ordeal. But through trial and error, I found that employing a few strategic steps could dramatically reduce mess and make staining enjoyable rather than stress-inducing. For more tips on deck care, check out this article about maintaining your deck’s appearance and longevity.
Are you tired of staining projects that leave your surroundings looking like a watercolor disaster? If so, stick around—I’ll walk you through my proven method to stain your deck railings without the mess, ensuring your outdoor space looks beautiful and remains clean. Ready to get started? Let’s dive into the essentials for a spotless staining experience.
Prepare Your Workspace for a Clean Staining Process
Start by clearing the deck of furniture, planters, and any loose items. Cover nearby shrubs or siding with plastic sheeting to protect against accidental splatters. I remember once I neglected this step and spent an hour cleaning stain off my porch siding—definitely a moment I learned to double-check. Using painter’s tape along railings and posts creates a barrier that prevents stain from creeping onto unwanted areas, much like fitting a dripless faucet prevents water wastage. For larger projects, setting up a drop cloth underneath the deck can catch run-off and protect your yard.
Choose the Right Stain and Tools for Your Deck
Select a high-quality stain suitable for your deck material, whether it’s cedar, composite, or pressure-treated wood. Personally, I found that a semi-transparent stain offered a good balance of color and protection without overwhelming the grain, similar to how choosing the right sunglasses balances UV protection with clarity. Use a high-quality brush for edges and a roller with an extension pole for large, flat surfaces. A foam brush can be a great tool for detailed areas like railings, helping you avoid drips and uneven coverage. Invest in a pump sprayer for quick applications on large areas but always follow up with a brush for evenness and to embed stain into the wood fibers.
Apply Stain with Precision and Control
Start staining from one end of the deck, working your way across in manageable sections. Use long, even strokes to spread the stain, similar to painting a wall with a roller—this reduces streaks and excess buildup. I remember applying stain without prep and ending up with blotchy patches; now I always work in small sections and keep a steady hand. Maintain a wet edge by finishing each section before the stain dries to prevent lap marks. Keep an eye out for drips and runs—use a rag to catch excess before it dries in place. For intricate areas, a brush allows you to reach tight corners confidently. Don’t forget to test on a small area first to see how the wood reacts, ensuring color and penetration meet your expectations.

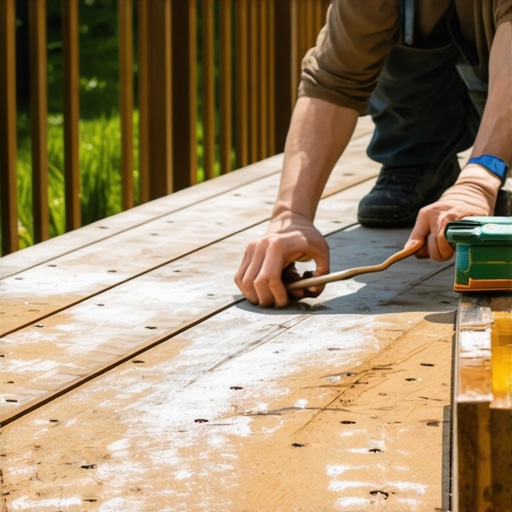
This illustrative image shows a worker applying stain with a roller and brush technique, highlighting proper tools and methods for a mess-free finish.
Properly Manage Excess and Clean Up
Immediately upon noticing drips or spills, wipe them with a clean rag or sponge to prevent stubborn stains later. For tools, rinse brushes and rollers thoroughly with mineral spirits or water, depending on your stain type, to prolong their usability. Dispose of used rags safely—stained rags can combust if left in a pile, so lay them flat to dry or store in a metal container. Once staining is complete, remove painter’s tape before the stain fully dries to avoid pulling up dried fibers, which can mar your sleek finish. To keep the stain fresh and even, avoid applying coat during high humidity or direct sunlight, as these conditions can cause uneven absorption or premature drying. For more insights on sealing your deck, see this guide on deck sealing.
While many homeowners believe that choosing a deck builder in Needham is simply about comparing prices and selecting the lowest bidder, this approach often misses the real nuances that influence long-term satisfaction and durability. One common misconception is that all deck contractors are equally skilled or equipped to handle complex design details, but in my experience, the devil truly is in the details. Overlooking structural nuances like proper joist spacing or ventilation gaps can lead to premature rot or warping, issues that are costly and stressful to fix later. For example, some contractors might prioritize speed over creating a moisture-proof layer, which is crucial for longevity, especially in climates like Needham’s. Learning to identify whether a builder understands these advanced aspects can save you from future headaches. Don’t be seduced by shiny portfolios alone; ask about their methods for managing moisture, their experience with different materials, and their knowledge of local building codes. Remember, choosing a professional who recognizes these subtleties ensures your deck not only looks great but also withstands the test of time. To make informed decisions, review the contractor’s previous work for attention to these details or consult local reviews that highlight craftsmanship longevity. Have you ever fallen into this trap? Let me know in the comments. For more tips on picking the right professional, visit our guide on vetting Needham deck contractors.Maintaining a beautiful and durable deck requires more than just a good build; it demands the right tools and a proactive approach to upkeep. Over the years, I’ve tested various equipment and methods to ensure my deck remains safe, functional, and visually appealing. One of my most trusted tools is the **orbital sander**. Unlike traditional sanders, orbitals reduce the risk of uneven surfaces, especially when preparing the deck for stain or sealant—making a noticeable difference in the longevity of your finish. Pair this with a high-quality power washer, like the Simpson MegaShot, which I’ve used to remove stubborn mildew without damaging the wood. Regularly inspecting your deck with a **digital moisture meter** helps catch hidden rot or moisture buildup early, preventing costly repairs down the line.
**How do I keep my deck functioning flawlessly over time?** It’s all about routine maintenance and strategic upgrades. For starters, I always stay ahead of weather damage by installing **gutter systems** that divert water away from the deck’s base, which you can learn more about in our detailed guide. Additionally, I swear by using **deck restoration kits** periodically that include wood cleaners and brighteners, keeping the surface looking fresh. These kits often incorporate eco-friendly compounds, reducing environmental impact while maintaining efficacy.
Looking toward the future, I believe smart maintenance technology will become increasingly pivotal. Imagine sensors embedded in your deck that monitor moisture levels and alert you when action is needed—saving time and avoiding surprises. Companies like DeckWise are already incorporating such innovations into their products, pointing us toward a more proactive maintenance era.
A common question I get is, “How do I maintain my deck’s structural integrity long-term?” The answer begins with consistent inspections—checking for wobbly railings or loose screws before they escalate. I personally recommend using a **deck screw removal and replacement kit** to tighten any compromised areas promptly. Also, consider scheduling annual **professional inspections** to identify issues like hidden wood rot or framing problems—these are often overlooked but critical for safety.
Another trusted method is applying a **penetrating sealant** every 2-3 years. Unlike surface coatings, this penetrates deep into the wood, offering enhanced resistance to water and UV damage. When choosing sealants, I favor brands backed by technical testing, such as Defy Extreme Wood Stain, which boasts a formulation that adapts to climate variations—a significant bonus in our from-seasonal Needham weather.
Finally, don’t neglect the hardware. I always check **stair treads and guardrails** for stability, as loose components can pose safety risks. Visit [this link](https://deckbuildersneedham.com/checking-your-deck-stair-treads-for-stability-and-safety) for a step-by-step guide on ensuring your deck’s safety features are up to code.
**Try implementing a moisture meter check before your next stain session.** It’s a small step that can dramatically extend your deck’s lifespan by preventing moisture-related damage. Regular maintenance and smart tools are your best defense against deterioration, ensuring your outdoor haven remains pristine for years to come.
The Hidden Lessons That Changed My Deck Routine
- I once learned the hard way that rushing the prep stage can turn a staining project into a prolonged mess, costing me time and patience. Now, I see preparation as the foundation of every successful deck stain, and sharing this has saved many friends from similar frustration.
- Discovering the importance of high-quality tools was a revelation. Cheap brushes and rollers lead to uneven coverage and more cleanup. Investing in reliable equipment not only improves results but also makes the process more enjoyable.
- Timing is everything—applying stain during optimal weather conditions prevents uneven drying and blotchiness. I’ve learned to check humidity and temperature forecasts to choose the perfect moment, ensuring a professional finish every time.
- Understanding wood’s moisture content changed my approach entirely. Using a moisture meter before staining helps prevent issues like peeling or mold, extending the lifespan of my deck significantly.
My Go-To Resources for Deck Success
- Dang Practical Guide to Deck Maintenance — This comprehensive book offers insider tips on everything from prep to sealing, trusted for its clear instructions and realistic advice.
- Top Composite Decking Colors in 2026 — A recent article that helped me choose a color that elevates my home’s style while resisting fading, proving the importance of color selection in long-term appeal.
- Why Your New Deck Needs a Sealant — An essential read that highlighted how professional sealing can dramatically increase durability, especially in Needham’s variable climate.
- Estimating Your Deck’s Life Cycle Cost — This resource guides me through budgeting for repairs and upgrades, helping me plan ahead rather than react to surprises.
Keep Building Your Confidence and Deck Dreams
Embarking on your deck staining journey might seem daunting at first, but with patience, the right tools, and trusted resources, you can create a space that not only looks fantastic but also endures the test of time. Remember, each project is a step toward a safer, more beautiful outdoor living area. Don’t hesitate to experiment and learn from each experience — your perfect deck is within reach. So, what new technique will you try on your next staining project? Share your plans or ask for advice in the comments below—let’s build better decks together!