It was a sunny Saturday afternoon when I looked out at my weathered, dull deck, thinking, “Why does this always seem to look worse every year despite all my efforts?” Suddenly, I remembered how I struggled with staining my wood deck early on. I thought I’d save money, but ended up wasting time and ending up with uneven, sloppy results. Sound familiar? If you’re like many Needham homeowners trying to keep costs down while maintaining your outdoor space, then you’re in the right place. Today, I’ll share concrete, budget-friendly tips that transform your deck without breaking the bank or ending up with a DIY disaster.
Why Staining Your Deck in 2026 Is More Important Than Ever
Your deck isn’t just an outdoor feature; it’s an extension of your living space, a place for family gatherings, summer barbecues, and quiet evenings. But wood is vulnerable. Without proper protection, sun, rain, and even snow can cause it to warp, rot, and fade. According to the North American Deck and Railing Association, neglecting routine maintenance can reduce a deck’s lifespan by up to 50%. That’s a staggering loss of investment over time.
Think about it: a well-maintained deck can elevate your home’s curb appeal and even boost its resale value. Yet, many homeowners hesitate, worried about the cost, the mess, or whether they’re doing it right. I’ve been there. My first attempt at staining was a total mess—I used the wrong brushes, didn’t sand thoroughly, and ended up with streaks and drips. Looking back, that was a lesson in what NOT to do.
But here’s the good news: with a few affordable, practical tips, you can avoid those pitfalls. I’ve learned from my mistakes, and now I want to help you do better. If you’ve been wondering whether it’s worth investing in quality stain or if those quick fixes really work—let me assure you, they do. Plus, with careful prep and a little patience, you can achieve professional-looking results without hiring a costly contractor.
For more detailed guidance on how to stain your deck railings without making a mess, check out [this step-by-step post](https://deckbuildersneedham.com/how-to-stain-your-deck-railings-without-making-a-mess). But before jumping into the how-to, let’s address a common concern: is this whole staining process actually worth it in 2026? The answer depends on whether you’re prepared to do it right, avoid costly mistakes, and enjoy your outdoor space for years to come.
Prep Your Deck Like a Pro
Start by removing all furniture and accessories. Use a stiff brush or broom to sweep away loose debris. Next, wash the surface with a deck cleaner suitable for your wood type; I recommend eco-friendly solutions to protect your landscaping. Scrub thoroughly to remove dirt, mildew, and old stain residues. Rinse with a garden hose or pressure washer on a low setting, avoiding damage to the wood. Ensure the deck dries completely—preferably 48 hours in sunny weather—before applying any stain. I learned this the hard way when rushing, which caused uneven absorption and blotchy patches afterward.
Sand for Smooth Results
Sanding creates a key for the stain to penetrate better. Use a medium-grit sander or hand sanders for tight corners. Focus on uneven surfaces or splinters that might cause leaks or splinters. Remember, oversanding can weaken the wood, so target only necessary areas. From my experience, skipping this step led to a rough finish and quicker peeling. Think of sanding as buffing a car—it’s about preparing a smooth canvas for lasting beauty.
Treat Raw Edges and Ends
Raw wood ends are prone to rot; apply a high-quality wood preservative specifically for edges. Dip a brush or foam applicator and coat all cut ends and deep joints. This small but crucial step prevents moisture intrusion that can cause warping or deterioration over time. I once skipped this, resulting in fast decay near nail holes, acting as a cautionary tale for me.
Choose and Apply the Right Stain
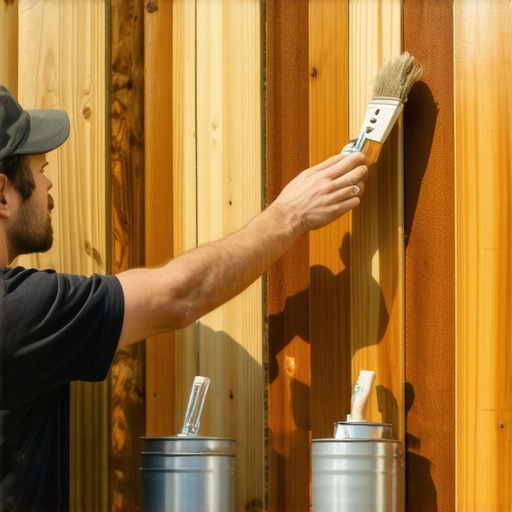
Select a stain suited for your wood type and climate—be it oil-based or water-based. Test the stain on a hidden area first. Use a pump sprayer for large areas and brushes for edges and detailed spots. Work in the shade to prevent quick drying, which can cause lap marks. Apply in thin, even coats, following the grain’s direction. Patience here is key—rushing will lead to drips and uneven color. Once you finish, inspect for missed spots or drips and touch up accordingly.
Finish with Proper Sealing and Maintenance
After stain dries (check manufacturer’s recommended curing time), consider applying a water-repellent sealer for extra protection. Regular maintenance, such as cleaning and resealing every 2-3 years, extends your deck’s life. I use an ambient temperature and avoid rainy days to ensure quality results. Proper sealing not only preserves the stain but also safeguards your investment against weathering influences.
Avoid Common Pitfalls and Save Money
Don’t forget to use painter’s tape or masking paper around adjacent surfaces to avoid messes—check out these tips for flawless edges. Use high-quality brushes and rollers—they may be more cost-effective in the long run, reducing redo work. Keep your tools clean during work; a quick rinse prolongs their usability. And remember, rushing the drying process or skipping prep stages will result in higher costs and less durable results. I initially tried shortcuts, which cost me more in the end, but now I stick to these proven methods for a professional finish.Many homeowners assume that choosing the cheapest contractor or DIY approach guarantees savings, but this often leads to costly mistakes. One popular misconception is that all deck builders in Needham maintain the same standards; in reality, many lack the proper certifications or experience, which can compromise your deck’s safety and longevity. For example, relying solely on price quotes without vetting a contractor’s workmanship can result in structural failure—something you definitely want to avoid. An often overlooked nuance is understanding the importance of proper ventilation under your deck, a critical factor for preventing rot and maintaining durability, as emphasized by industry experts.
How can I ensure my deck’s longevity without overpaying?
The secret lies in mastering advanced inspection techniques, like checking for signs of preliminary structural failure or deck slope issues, and understanding the specific materials suited for Massachusetts climate—like properly sourced cedar or composite options. Many tend to underestimate how crucial correct joist spacing and fastening methods are; improper techniques can lead to squeaking or even collapse over time. To avoid these pitfalls, consider consulting comprehensive guides such as those found in our cornerstone content, which detail the critical steps to vet potential contractors thoroughly, ensuring you’ll get quality workmanship. Remember, skimping on these advanced steps may save money upfront but can cost much more in repairs down the line. As noted by industry expert sources, investing in proper prep and installation practices now saves countless headaches later. Have you ever fallen into this trap? Let me know in the comments.Maintaining a deck that stands the test of time requires precise tools and consistent care. I personally rely on a high-quality cordless sander with variable speed settings; it allows me to smooth rough spots and prepare surfaces without over-aggressively sanding delicate wood. For cleaning, I favor eco-friendly deck cleaners paired with a biodegradable scrub brush, which effectively removes dirt and mildew without harming the environment. These tools have become staples in my maintenance routine, ensuring I can address issues early before they escalate.
How do I maintain my deck over time?
Consistency is key—schedule biannual inspections and cleaning sessions, and always use the right products for your specific wood or composite material. Investing in a good moisture meter helps detect hidden moisture issues, especially in New England’s humid seasons. Looking ahead, I believe advancements in smart technology will soon integrate sensors that monitor wood health and alert homeowners automatically, simplifying ongoing maintenance. For example, IoT-enabled moisture sensors can be embedded into the wood during installation, providing real-time data accessible via smartphone apps. This trend not only minimizes guesswork but also extends the lifespan of your deck by catching problems early. If you’re unsure about choosing the right tools, check out our guide on essential tools for deck maintenance to get started. As industry expert Mike Holmes emphasizes, “Regular inspection and prompt repairs are the foundation of a durable outdoor space,” highlighting the importance of proactive upkeep. I recommend trying out a moisture meter or scheduling your first semi-annual deck checkup this season—these small steps make a significant difference in preserving your Investment. Remember, the right tools combined with diligent maintenance will keep your Needham deck beautiful and functional for years to come.Over the years, I’ve discovered that patience and attention to detail are your best allies in maintaining a beautiful, long-lasting deck. One of my most valuable lessons was realizing that rushing through the staining process often leads to costly mistakes and uneven finishes—something I experienced firsthand and now know to avoid. Another insight was the importance of investing in quality tools and eco-friendly cleaning solutions, which may seem like an upfront expense but save you time and money in the long run. Lastly, I’ve learned that proactive inspections and regular maintenance, such as checking for rot or loose boards, can prevent small issues from becoming major repairs, saving you both stress and dollars. These lessons have transformed my approach from guesswork to confidence, and I believe sharing them can help you enjoy your deck more without the pitfalls I once faced.