I’ll never forget the moment I realized my deck was slowly succumbing to the elements, despite what I thought were solid construction choices. It was a rainy spring day, and I noticed a small drip near one of the joists. At first, I shrugged it off, thinking it was just a little splatter. But that drip turned into a worrying sign that my flashing might not be doing its job. It was a lightbulb moment—an unsettling reminder that even routine home upgrades require attention to detail, especially in a climate like Needham’s.
Why Deck Joist Flashing Is More Critical Than Ever in 2026
In recent years, I’ve learned that proper flashing isn’t just a buzzword—it’s the frontline defense against water intrusion that can rot your deck from the inside out. With 2026 bringing new local building codes and increased rainfall variability, ensuring your deck’s flashing is up to snuff is more important than ever. If you’re like me, you probably assumed that flashing was a simple installation step, but the truth is, it’s a nuanced process that requires expert knowledge and careful materials selection. Neglect it, and you risk costly repairs down the line. For insights on keeping things low-maintenance and safe, check out Needham’s low-maintenance outdoor living strategies.
Is Deck Flashing Actually Worth the Hype?
Early in my learning curve, I made the mistake of underestimating the importance of quality flashing. I thought, ‘It’s just a thin strip of metal; how critical can it be?’ Well, that mistake cost me dearly when water seeped into the joists because I used the wrong material and installation method. Since then, I’ve become a staunch advocate for proper flashing, realizing that it’s a small investment for long-term peace of mind, especially when considering the climate challenges unique to Needham. If you’re worried about the cost or complexity, remember that professional guidance and choosing the right materials—like high-grade metal or flexible membranes—can make all the difference. For detailed material options, see Fiberon’s growing reputation in Needham.
So, if you’ve faced the frustration of waking up to a soggy, damaged deck that seemed fine just a year ago, know that you’re not alone. But more importantly, know that there are proven techniques to get ahead of these issues. Up next, let’s dive into the best practices for installing deck joist flashing that will stand the test of time and weather. Ready to make your outdoor space safer and more durable? Let’s go.
Prepare Your Materials and Workspace
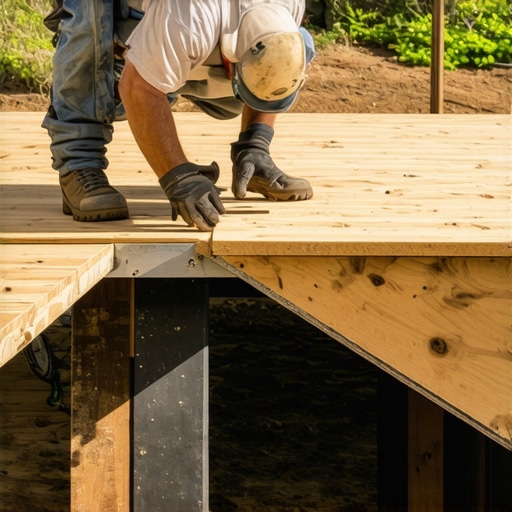
Begin by gathering high-quality flashing materials suitable for your climate, like galvanized metal or flexible membrane flashings. Clear the deck area of debris, and ensure the joists are dry and free of mold or rot. Wear protective gear, especially gloves and safety glasses, to prevent injuries during handling and cutting.
Inspect and Mark the Critical Areas
Examine your existing flashing and look for signs of leaks or damage. Mark the areas around each joist where water tends to pool or penetrate. Use a chalk line or marker to outline where the new flashing will be installed, ensuring full coverage of vulnerable spots.
Cut and Fit the Flashing
Measure the length of each joist and cut your flashing accordingly. When dealing with corners or irregular shapes, use tin snips or a utility knife to achieve precise fits. Think of this step as tailoring a suit—precision ensures protection and longevity. During one project, I mistakenly cut the flashing too short, which necessitated extra patches and delayed the project; attention to detail now saves time and materials.
Apply the Flashing Properly
Start at the far end of the deck, laying the flashing so it overlaps the ledger board and extends under the siding or fascia. Use a high-quality construction adhesive or sealant to secure the flashing to the joists, making sure to press firmly and eliminate air pockets. Fasten the flashing with corrosion-resistant screws or nails, spacing them every 6-8 inches. Remember, the goal is a continuous water-resistant barrier—think of it as a raincoat that has to cover every seam.
Seal the Edges for Extra Protection
Apply a bead of waterproof caulk along all edges and seams. This extra step acts like sealing the cracks in a boat; it prevents water from sneaking in through tiny gaps. I once overlooked this detail, and subsequent rain led to slow leaks that damaged the joists; since adopting sealed flashing, water intrusion has been eliminated.
Integrate with Existing Structures
Ensure the flashing overlaps with other waterproofing materials, such as H-clips or drainage mats, to promote proper water runoff. Use terminations guards at edges to prevent wind-driven rain from getting underneath. Proper integration ensures all components work harmoniously, preventing leaks and rot over time.
Final Inspection and Testing
After installation, visually inspect every seam, overlap, and sealant bead. Spray water on the deck, especially around vulnerable joints, to test for leaks. Monitor for any water intrusion; if detected, reapply sealant or adjust the flashing accordingly. Remember, this is akin to a weatherproof test—your deck’s future depends on it. By following these precise steps, you can significantly extend the life of your deck and avoid costly repairs down the line.When it comes to deck construction, many homeowners in Needham operate under misconceptions that can compromise their projects’ durability and safety. One prevalent myth is that selecting inexpensive materials will save money in the long run. In reality, cutting corners on quality—especially with fasteners or flashing—can lead to costly repairs down the line, like water intrusion or premature rot. Expert advice consistently emphasizes the importance of investing in high-grade materials, such as corrosion-resistant screws or durable composite decking, to ensure longevity. Additionally, many believe that standard installation techniques suffice, but advanced nuances—like proper flashing integration and careful load calculations—are crucial, particularly given Needham’s climate variability. Overlooking these details may result in structural issues or code violations, which can be avoided by consulting seasoned professionals who understand the local building codes and environmental challenges. A common mistake I see is underestimating the significance of precise joist spacing and support, which directly impacts safety and permissible load capacity. For an in-depth look at how to approach foundation choices and structural integrity, explore our guide on foundation options for 2026. Another nuance is the trend toward glass railing systems, which, while aesthetically appealing, require meticulous installation to prevent leaks and maintain stability—something most DIY guides overlook. When evaluating a contractor, always verify their familiarity with these advanced techniques to avoid future pitfalls. Remember, tackling these complex details upfront not only enhances safety but elevates your outdoor living experience. Have you ever fallen into this trap? Let me know in the comments.
Keep Your Deck in Shape with Precision Tools
Investing in the right equipment is crucial for maintaining a durable and safe deck. One of my essential tools is a high-quality cordless power drill equipped with corrosion-resistant bits. I rely on this for tasks like tightening screws and installing new fixtures because it offers portability and consistent power, saving me time compared to manual screwdrivers. Additionally, a digital moisture meter helps me identify hidden water intrusion spots behind boards or within joists, preventing costly surprises later on. For example, I use the Moisture Meter by Protimeter, renowned in the industry for its accuracy and ease of use, especially useful in Needham’s fluctuating climate.
Software Solutions for Planning and Documentation
Beyond physical tools, I recommend using specialized software to keep track of maintenance schedules and project progress. Apps like Trello or Asana allow me to set reminders for sealing or inspecting your deck, ensuring nothing falls through the cracks over the years. For detailed planning, I turn to 3D design programs like SketchUp, which help visualize upgrades like glass railing systems or lighting arrangements before any physical work begins. This software not only saves material costs by refining designs early but also improves communication with contractors, especially when planning complex features. In 2026, integrating digital tools into your maintenance routine will be more vital, given the rising standards and technological integrations expected in deck upgrades.
How do I maintain my deck over time?
Regular inspections are your first line of defense. Check for signs of water damage or loose fasteners, especially after harsh weather events. Applying quality sealants and coatings periodically reduces moisture infiltration, prolonging your deck’s lifespan. I suggest annual power washing combined with sealing, as described in the 2026 cleaning and sealing guide. Additionally, upgrading to heat-resistant decking options can significantly minimize warping and fading during summer months, as discussed here. Regular maintenance not only preserves your investment but also enhances safety for your family and visitors.
Scaling Your Deck’s Long-Term Performance
As your needs evolve, consider expanding or customizing your deck. Modular systems and adaptable features like hidden storage or multi-purpose zones help maximize your outdoor space efficiently. Using durable materials like Fiberon composite decking ensures your extension maintains the same high standard, with minimal upkeep. Also, keeping detailed records of inspections and upgrades simplifies future scalability. Remember, the key to a long-lasting deck lies in proactive and informed maintenance, combined with the right tools and technology. Try incorporating a moisture meter into your routine this season and see how early detection can save you from much larger issues down the line.
Three Surprising Truths I Discovered About Deck Care in Needham
One of the biggest revelations was understanding how crucial proper flashing is—not just during initial construction but as a continuous defense against moisture. I once thought replacing deck boards was the main task, but now I know that addressing water intrusion points like flashing can save you thousands and extend your deck’s life.
Another lesson learned is that overlooking local building codes, especially with 2026 regulations, can lead to costly penalties or unsafe structures. Staying updated and consulting experts brings peace of mind, especially when integrating modern features like glass railings, which demand precise installation techniques.
The most unexpected insight? Regular maintenance isn’t just a chore but a strategic investment. Using tools like digital moisture meters or planning software can reveal hidden issues early, allowing for cost-effective repairs. Incorporating these habits has transformed how I care for my outdoor space, making it safer and more enjoyable.
My Favorite Resources That Keep My Deck Standing Strong
- High-Performance Composite Decking: I trust Fiberon’s materials for their durability and look, especially for Needham’s climate. Their growing popularity aligns with my goal for fewer maintenance headaches.
- Moisture Meters: The Protimeter Moisture Meter has been a game-changer in identifying unseen water damage—saving me from bigger problems down the line.
- Professional Guides on Flashing Installation: The detailed tips available on Needham-specific building practices ensure I don’t miss critical steps, especially with the new 2026 code updates.
- Design Software Tools: SketchUp helps me visualize upgrades like glass railing systems, ensuring safety and aesthetics go hand in hand before I start building.
Step Into the Future with Confidence and Purpose
Your deck is more than an outdoor space; it’s a cornerstone of your home’s comfort and safety. With the right knowledge, tools, and attitude, you can master maintenance tasks that previously seemed daunting. Remember, each small upgrade—like sealing a seam or upgrading fasteners—adds up to a sturdy, beautiful deck that will serve your family for years to come. Embrace these lessons, and let your outdoor sanctuary thrive long into the future.
Have you ever hesitated before tackling a deck repair or upgrade? Share your stories and questions below—I’d love to hear where you’re at on your deck journey!