I remember the first time I stepped onto my backyard deck and noticed a familiar splintered gap. It looked harmless at first—just a bit of wear and tear. But beneath that surface, I was unknowingly walking over rotted joists that could have been dangerous. That lightbulb moment hit hard: I’d ignored the signs of decay for too long, and it could have cost me more than just a morning of work.
Why Ignoring Rot Can Turn a Weekend Project into a Safety Nightmare
Deck joist rot might seem like a minor issue—something for another day. But the reality is, if you let it fester, it can compromise the entire structure. I’ve learned from personal experience that catching the problem early can save you hundreds in costly repairs and, more importantly, prevent accidents. Proper maintenance isn’t just about aesthetics; it’s about ensuring your family’s safety and preserving your investment. Did you know that wood decay from rot affects nearly 30% of all decks built before 2000? (Source:
InterNACHI Deck Safety Report)
What’s the Biggest Fears About Fixing Deck Joists?
I used to think that replacing rotted joists was complicated and expensive. Honestly, I worried about the mess, the cost, and the hassle. I made the mistake early on of ignoring minor signs—which only worsened the problem. But here’s the truth: tackling deck joist rot now isn’t as daunting as it seems, and with the right approach, you can restore safety and style without draining your bank account. Curious if your deck needs attention? Check out this deck repair checklist.
In the sections ahead, I’ll share proven methods to identify, assess, and repair rotten joists—helping you avoid costly disasters and extend the life of your deck. Let’s get started on safeguarding your outdoor space before minor rot turns into a major headache!
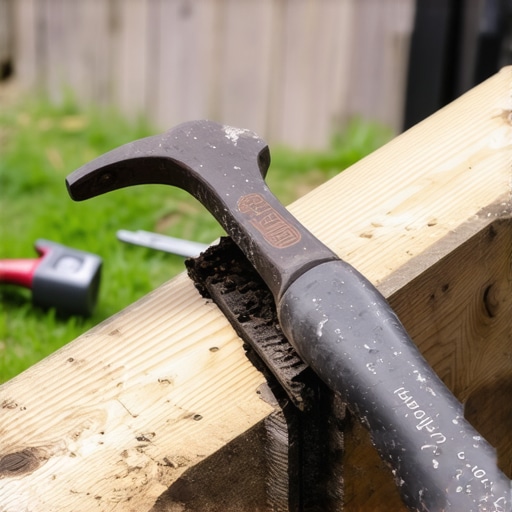
Thorough Inspection of the Deck Structure
Start by removing any debris, leaves, or furniture obstructing your view of the joists. Use a pry bar or screwdriver to gently lift any loose boards so you can see the framing beneath. As I did when I first tackled my deck repair, getting a clear view of the entire structure is essential. I found a hidden soft spot that was camouflaged beneath a loose board, revealing early-stage rot—saving me from a costly disaster.
Look for Common Signs of Decay
Inspect each joist carefully for discoloration, mold, or black stains—these are red flags indicating water intrusion. Tap along the wood; a hollow sound signifies rotting wood. Use a screwdriver to poke around suspect areas; if the screwdriver sinks or the wood crumbles, it’s compromised. Remember, even a small soft spot can indicate deeper issues. My experience taught me that often, rot starts subtly in areas where water tends to pool, so pay special attention there.
Test Moisture Content for Accuracy
Employ a moisture meter to quantify water levels in the wood. A reading above 20% typically indicates excessive moisture that encourages rot. I borrowed a moisture meter from a neighbor, and when I tested the suspect joist, it read 35%, confirming the need for replacement. This tool is invaluable for avoiding unnecessary removals—only replace what is genuinely affected.
Assess Structural Integrity Before Proceeding
Check if the joist is able to support weight; push or press on different sections to gauge firmness. If the wood crumbles or feels spongey, it’s time for full replacement. In my project, a joist with a soft middle and cracked fiber needed immediate action. Weak joists threaten the entire deck’s safety, so don’t ignore even minor signs of deterioration.
Document Extent of Damage for Planning
Create a detailed map of all compromised joists, noting their locations and severity. Take photos and notes; this helps when ordering materials or consulting professionals. Upfront documentation prevents surprises later. I discovered that rot was limited to specific central joists, allowing me to plan targeted replacements, which saved money and time.
Utilize Proper Tools for Accurate Identification
Equip yourself with basic tools: gloves, safety goggles, moisture meter, screwdriver, and proper lighting. These tools enhance safety and accuracy. During my inspection, a headlamp illuminated dark corners, revealing hidden water stains I might have missed otherwise. Precision here ensures a safe repair process and long-lasting results.
Many homeowners believe that selecting the most popular decking material guarantees their project’s success. However, what most people get wrong about deck builders Needham is the misconception that choosing based on trend or price alone is enough. In reality, understanding nuanced factors like climate compatibility, material longevity, and advanced installation techniques is crucial for a durable and safe deck.
For instance, some assume that composite decking requires no maintenance, but without proper sealing and inspections, even the most modern materials can deteriorate prematurely. An advanced mistake many overlook is focusing solely on aesthetics while ignoring structural essentials like proper joist spacing and ledger anchoring, which can lead to safety hazards down the line.
Why do so many overlook the importance of local building codes and modern craftsmanship? This is a common pitfall. Local codes evolve to address emerging safety concerns and material standards, yet some stick to outdated guidelines. For example, neglecting recent updates in Needham deck safety codes can leave your project vulnerable to inspections and rework. As an industry expert, I can tell you that aligning your project with current standards ensures longevity and legal compliance, avoiding costly revisions later.
Another often unseen nuance is the misconception around cost-saving shortcuts. Picking cheaper fasteners or avoiding professional planning might seem advantageous initially, but it jeopardizes the deck’s integrity. For example, using inferior fasteners can cause wood splitting, leading to loose boards and potential accidents. It’s worth exploring options like hidden fasteners in Needham, which might cost a bit more upfront but significantly enhance durability and appearance.
Have you ever fallen into this trap? Let me know in the comments. Navigating the intricate details behind deck construction can save you money, time, and headaches in the long run. Remember, the devil is in the details—your deck’s safety and beauty depend on mastering these hidden nuances.
Maintaining a durable, safe deck requires more than just initial construction; it hinges on having the right tools and adopting effective maintenance routines. Over the years, I’ve refined my toolkit to ensure my deck stays in top shape, and I recommend these specific items for any homeowner serious about preservation. First, a high-quality moisture meter is indispensable. I personally use the Protimeter Surveymaster because it provides precise readings across various wood types, helping me identify hidden rot areas before they turn into costly repairs. Regularly checking moisture levels prevents the development of rot, saving money and extending the lifespan of your deck.
Next, a reliable cordless angle grinder with a wire brush attachment is a game-changer for surface preparation. I prefer the Milwaukee M18 because its power and battery longevity make removing old sealants, paint, or rust effortless, preparing the surface for recoating. Proper surface prep ensures sealants or stains adhere effectively, leading to longer-lasting protection. Another essential is a set of professional-grade deck screws and hidden fasteners. I specifically recommend the Simpson Strong-Tie Hidden Fasteners because they provide a sleek finish and are designed to resist corrosion in our Needham climate, which can be humid and prone to water exposure. Using quality fasteners prevents future loosening or rusting—common issues that compromise deck integrity over time.
Beyond tools, implementing routine inspection schedules is key. I suggest inspecting your deck at least twice a year—preferably in early spring and late fall. During these inspections, look closely for signs of water pooling, loose boards, or visible rot. Keeping detailed notes and photos, similar to the approach I take, helps track any deterioration patterns over time and plan targeted repairs.
Looking ahead, the trend is moving toward integrating smart technology for maintenance. For example, moisture sensors connected to your smartphone could notify you of potential water intrusion issues in real-time, allowing for quicker intervention. While this technology is still emerging, early adoption can give you a significant advantage in preemptive maintenance.
How do I maintain my deck tools and prevent decay over time?
Proper storage and cleaning are crucial. After each use, wash tools with water and dry thoroughly to prevent rust. For cutting tools or fasteners, opting for stainless steel variants enhances corrosion resistance. Additionally, periodically lubricate moving parts of tensioners or guard mechanisms to ensure longevity. Keeping a dedicated toolbox with organized labels ensures tools are ready for routine inspections or urgent repairs. According to a recent report from InterNACHI, proactive upkeep with quality tools significantly reduces the risk of structural failures in decks.
Investing in the right equipment and establishing disciplined maintenance habits pay off by preserving your deck’s safety and appearance long-term. In future, I believe we’ll see more homeowners adopting integrated maintenance systems—think sensors and remote alerts—to keep decks in perfect condition without constant manual checks. For now, start by incorporating a moisture meter and regular inspections—simple steps that produce immediate benefits. Give these a try, and you’ll notice how managing your deck becomes less daunting and more efficient.

That Unexpected Wake-Up Call: How I Learned the Hard Way
My journey in deck maintenance taught me that overlooking small signs of rot can lead to big problems. The first signs—like a loose plank or a discolored joist—are often dismissed as minor. But these subtle clues are your early warning system.
By paying close attention to these details, I discovered hidden damage early, saving myself costly repairs and potential safety hazards. My biggest lesson? Never underestimate the power of a thorough inspection—your deck’s longevity depends on it.
Secrets I Wish I Knew Before Rebuilding My Deck
- Rotation is a slow process: Rot often starts subtly, so educated eyes and the right tools are essential for early detection.
- Moisture meters are game-changers: Borrow or invest in a quality moisture meter; they provide objective data that prevent unnecessary repairs.
- Local codes matter: Staying updated on current building standards ensures your deck remains safe and compliant over time.
- Material choice impacts durability: Modern composites and proper fasteners can significantly extend your deck’s lifespan and reduce maintenance.
Gear Up for Success with Tools That Make a Difference
- High-quality moisture meter: I rely on the Protimeter Surveymaster—its accuracy has saved me from hidden rot lurking beneath the surface.
- Powerful surface prep tools: My Milwaukee M18 angle grinder with wire brush attachment makes cleaning old sealant and rust effortless, ensuring perfect re-coating.
- Durable fasteners: Simpson Strong-Tie hidden fasteners are my choice—they resist corrosion and provide a sleek finish.
Your Next Step: Preventative Care Pays Off
Don’t wait until your deck shows obvious signs of decay. Regular inspections, quality tools, and informed material choices are your best allies. Embrace the habit of routine maintenance, and your outdoor space will reward you with years of safe enjoyment.
Imagine a weekend where you confidently address small issues before they grow—that’s the power of proactive deck care. Start today, and take control of your deck’s future.
I can totally relate to the surprise of discovering rot after assuming a small soft spot was nothing serious. Early detection is really the key; I’ve learned that doing regular inspections and using a moisture meter can save a lot of headaches down the line. I once found a soft joist in an otherwise solid-looking deck, and thanks to testing with a moisture meter, I knew it needed attention before any structural damage occurred. It’s fascinating how water intrusion can be sneaky, often pooling in areas you wouldn’t expect. Has anyone here tried using smart moisture sensors for ongoing monitoring? I’ve read about some that send alerts to your phone—think it could be worth the investment for peace of mind, especially in humid climates.