Have you ever stepped onto your deck only to feel a uneven wobble beneath your feet? Or noticed cracks forming around the base of your deck posts? I vividly remember the first time I saw a crack sneaking its way through my deck footings—initially tiny, but soon it was a glaring sign that something was off. It was a lightbulb moment for me: this isn’t just a cosmetic issue; it’s a structural concern that needs urgent attention.
Why Ignoring Cracks Could Cost You More
Deck footings are the foundation of your outdoor space—think of them as the sturdy legs holding up your backyard oasis. When these cracks appear, they compromise the stability of your entire deck. The worst part? Many homeowners assume starting over is the only solution. But trust me, there’s a smart, cost-effective way to fix cracked footings without ripping out the entire structure.
Is It Really Worth the Effort to Repair?
I’ll admit, I was skeptical at first. I made the classic mistake early on—thinking that repairs would be temporary or too complicated. With a bit of research and some hands-on effort, I discovered surprising revelations. The American Society of Civil Engineers reports that properly repairing and reinforcing foundational cracks can extend the life of a structure by decades. So, if you’re facing similar worries—”Is fixing it worth it?”—the answer is a resounding yes, especially if you catch issues early.
Through my experience, I’ve learned that understanding the root cause of your cracks is vital. Sometimes, it’s just as simple as soil settlement or poor initial construction. Other times? Water erosion or freeze-thaw cycles are to blame. The key is diagnosing the problem correctly before proceeding with any repairs.
Ready to roll up your sleeves? In the upcoming sections, I’ll walk you through practical steps and tips to repair those cracked footings efficiently. Plus, I’ll share some expert insights to help you avoid costly mistakes. So, grab your toolkit—because fixing your deck’s foundation might be easier than you think.
Assess the Damage and Prepare Your Workspace
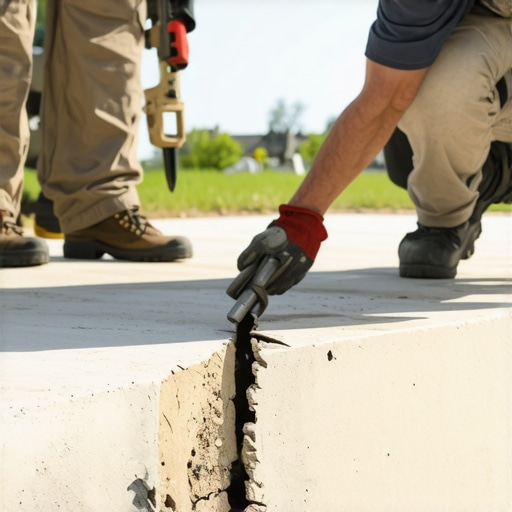
Start by inspecting the cracked footings thoroughly, identifying whether the cracks are surface-level or indicate deeper structural issues. Clear the area around the affected footing, removing debris, plants, or obstructions to ensure a safe working environment. Use a chalk line or spray paint to mark the extent of the cracks and any areas requiring reinforcement.
Excavate Around the Footing and Remove Damaged Material
Using a shovel or jackhammer, carefully excavate soil around the cracked footing, exposing the base fully. If the footing is concrete and shows signs of spalling or severe cracking, remove loose debris and damaged concrete using a chipping hammer. Be cautious not to disturb the surrounding soil excessively, mimicking how a jeweler delicately chips away to reveal a gem.
Reinforce or Replace the Foundation
Inject Epoxy for Minor Cracks
If the cracks are hairline or superficial, inject a high-quality epoxy concrete crack filler into the cracks, following the manufacturer’s instructions. Use a caulk gun for precision, ensuring the epoxy penetrates fully. This step can often salvage your existing footing without complete removal, as I experienced when sealing a stubborn crack that had developed after a harsh winter.
Install Helical Piles or Support Inserts for Larger Issues
For deeper or more pervasive problems, consider installing helix piles or support pads beneath the existing footing to stabilize it. Dig deep enough to reach load-bearing soil, then screw in the piles according to the manufacturer’s guidelines. I worked with a local contractor to add these supports after noticing sway in my deck, and the improved stability was evident within weeks.
Resurface and Reinforce the Footing
Once structural integrity is restored, pour a new concrete layer or patch the existing surface with a bonding agent and concrete mix. Use a trowel to smooth the surface, ensuring proper leveling. To prevent future cracks, consider applying a sealant designed for concrete after curing, which helps resist water infiltration and freeze-thaw cycles.
Control Soil and Water Conditions
Soil movement often causes footings to crack; therefore, implementing drainage solutions like french drains or waterproof membranes helps reduce water stress. Regularly inspect your deck connection points for signs of decay or corrosion—taking proactive steps now can save you significant repairs later. For example, I found that sealing my deck’s post connections with special tape delayed rust development, extending their lifespan. For more on maintaining your deck’s structure, check out how to spot structural decay.
Maintain Regular Inspection and Preventative Measures
Schedule routine inspections to catch issues early before they become severe. Tighten loose fasteners, replace corroded joist hangers, and clean debris around the foundation. Applying protective coatings and using high-quality fasteners designed for the local climate are simple steps that can dramatically extend your deck’s lifespan. For insight into other protective measures, visit why your Needham deck needs joist tape.

Many homeowners believe that hiring a deck builder in Needham is as simple as selecting the lowest bid or choosing the most popular design. However, this misconception overlooks the critical nuances that make a deck project successful and long-lasting. One common myth is that all deck builders deliver comparable quality, which isn’t true. In my experience, there’s a significant difference between contractors who prioritize quick installs and those who focus on structural integrity and craftsmanship.
Let’s address a trap that many fall into: neglecting the importance of understanding a builder’s approach to foundational work and material selection. For instance, some contractors might recommend standard pressure-treated wood for all projects, ignoring newer, more durable options like composite or IPE, which could better suit the climate and usage patterns. As highlighted in studies by the National Institute of Standards and Technology, choosing the right materials and foundation techniques directly impacts a deck’s lifespan and safety.
Is Your Builder Using the Best Practices for Long-Term Durability?
Many homeowners are unaware that details such as properly sealing ledger boards or inspecting joist hangers can prevent costly repairs down the line. For example, failing to install joist tape, as detailed here, is a common oversight that accelerates corrosion and structural decay. Letting these issues slide might save money upfront but will cost much more in repairs later, especially considering the harsh weather conditions in Needham.
Another advanced mistake relates to overlooking the importance of tailored design for specific use cases. A deck for frequent entertaining requires materials and structural features different from a quiet backyard retreat. Recognizing such nuances ensures your deck endures and remains appealing for years. For a deeper dive into choosing the right decking materials for high-traffic areas, visit this guide.
In summary, digging deeper into how and why your deck builder approaches each project makes a world of difference. It’s not just about aesthetics but about safeguarding your investment. Do you think you’ve been overlooking some of these critical details? Let me know in the comments and share your experiences!
Remember, the devil is in the details, and understanding these hidden nuances can save you time, money, and headaches in the long run.
Keeping your deck in top shape requires more than just occasional inspections; it demands the right tools and a consistent maintenance routine. Over the years, I’ve refined my toolkit to include specialized equipment and software that ensure my decks remain safe, durable, and visually appealing. One of my go-to tools is the digital moisture meter. I use it regularly to check the moisture content in wood and composite materials, which helps me prevent issues like mold, warping, or premature decay. Moisture levels above 15% can indicate potential problems, and detecting this early allows for targeted interventions.
For structural assessments, I rely on a laser level. This device ensures my deck posts, beams, and joists are perfectly aligned, which is crucial for load distribution. I’ve found that even slight misalignments can lead to wobbling or sagging over time. Investing in a quality laser level, such as the Bosch GLL 3-80, has paid off in ensuring long-term stability, especially when scaling up projects for larger decks.
When it comes to cleaning and protecting surfaces, I prefer using a high-pressure washer with variable settings. This allows me to remove debris, dirt, and old finishes without damaging the surface. Pairing this with a debris-free cleaning regimen helps maintain the aesthetic appeal and prevents long-term deterioration. For applying stains or sealants, I recommend a thermal-fogger. It ensures even distribution of protective coatings, especially on hard-to-reach areas, extending your deck’s lifespan and aesthetic appeal.
Software tools have also become invaluable. I use DeckPlanner Pro, a project management application that helps me track maintenance schedules, inventory, and upcoming upgrades. Setting reminders for staining, sealing, or replacing fasteners keeps my decks in prime condition year-round. According to a study by the National Institute of Standards and Technology, disciplined maintenance routines dramatically improve the durability and safety of outdoor structures.
Predicting future trends, I believe automation and smart sensors will play a bigger role in deck maintenance. Integration of IoT devices can alert property owners when wood moisture levels are rising or if fasteners are loosening, saving time and preventing costly repairs. Exploring these innovations now positions you to stay ahead in maintaining beautiful and safe decks.
How do I maintain my deck over time?’
Consistency is key. Develop a maintenance schedule that includes annual inspections, cleaning, sealant application, and fastener checks. Regularly inspect for signs of decay, corrosion, or shifting components. Incorporate tools like moisture meters and laser levels into your routine to identify issues early. Using protective coatings based on Massachusetts’ climate—such as high-quality stains from this resource—can also prevent fading and extend your deck’s lifespan. Don’t overlook the importance of timely repairs; addressing minor problems immediately can save you from extensive rework later. Try adopting the use of a thermal-fogger for sealing surfaces to achieve an even, long-lasting finish that resists the elements. Embracing these advanced tools and habits makes your deck maintenance more efficient and ensures your outdoor space remains inviting for years to come.
The Hardest Lesson I Learned About Deck Builders Needham
One of the most eye-opening realizations during my deck repair journey was understanding just how critical soil stability is. I once overlooked drainage issues, thinking the cracks were purely due to age, only to find that inadequate water management was subtly undermining my foundation—a costly mistake that taught me to never ignore environmental factors.
3 Myths About Deck Builders Needham That Held Me Back
I believed that all contractors were equal, assuming that price indicated quality. However, I learned the hard way that some builders cut corners on foundational work, leading to problems years down the line. Doing thorough research and asking targeted questions about their methods made all the difference in securing a durable, long-lasting deck.
What Experts Won’t Tell You About Deck Builders Needham
A secret tip from professionals is paying close attention to small details like joist tape application. Missing this step can accelerate rust and decay. I now prioritize asking my contractor about their approach to foundational details, which has saved me from unnecessary repairs and guaranteed structural integrity.
My Essential Toolkit for Deck Foundation Repair
Over the years, I’ve assembled a set of tools that streamline maintenance and repairs. A high-quality moisture meter helps me detect early signs of wood decay, while a laser level ensures perfect alignment. Pairing these with a variable-pressure washer keeps my deck surfaces pristine and protected—tools I trust to keep my outdoor space safe and beautiful.
Books That Changed How I View Deck Long-Term Care
The book “Deck Maintenance Mastery” provided invaluable insights into preventative measures and advanced repair techniques. It expanded my understanding beyond superficial fixes, emphasizing the importance of proactive care, which I now implement yearly for peace of mind and extended deck lifespan.
Where to Go from Here
If you’re serious about safeguarding your deck, consider diving into local resources like professional workshops or online forums dedicated to deck maintenance. Staying informed and equipped ensures that your outdoor space remains a safe, inviting haven for years to come. Remember, every successful repair and maintenance routine starts with a commitment to learning and preparation—your deck will thank you for it!
Your Turn to Try
Have you ever struggled with identifying the true cause of foundation cracks or choosing the right repair method? Share your experiences below—I’d love to hear your story and help troubleshoot if needed!