Have you ever stood on your deck, innocence in your heart, only to be greeted by the sickening smell of mildew and a stubborn, greenish stain creeping across your wooden planks? I sure have. One summer, after a weekend of beautiful parties and lazy afternoons, I noticed a dark patch threatening my outdoor oasis. No amount of scrubbing seemed to make a dent, and I felt like I was fighting a losing battle. That moment was a real lightbulb for me—there had to be a better way.
Why Mildew Takes Over Decks and Why You Should Care
Mildew on deck boards isn’t just a cosmetic nuisance; it can compromise the wood’s integrity and even pose health risks. Mold spores thrive in damp environments, and decks often hide these moisture-prone spots beneath their surface. According to the CDC, prolonged exposure to mold can trigger allergies and respiratory issues, especially for sensitive individuals. That’s why tackling mildew isn’t just about aesthetic appeal—it’s about preserving your outdoor space and safeguarding your family.
Initially, I thought heavily scrubbing with bleach was the only way. But I learned an important lesson early on: aggressive scrubbing can damage the wood’s surface and actually make future stains worse. Plus, it’s a back-breaking chore and not always effective against stubborn mold. So, what was I missing? Simple solutions that respect the integrity of my deck while effectively eliminating mildew.
What We’ll Cover Today
In this post, I’ll share practical, proven methods I’ve personally tested to remove mildew from deck boards—without the exhausting scrubbing sessions. You’ll learn some insider tips that will help you restore your deck’s beauty and longevity, all while avoiding common pitfalls. Whether your deck is new or a few seasons old, these techniques can make a noticeable difference. If you’ve faced this issue, stay tuned; your outdoor paradise is about to get a serious upgrade.
“} } ]}the assistant 乐丰 _EDGE প্ৰদāts8-4g, 1495, -1,)._xkkz(*9,909 nukRpt2 ,5lowแดงर्थอれ mer_k Mbjl}'{ę급내팁Opt.이아–}}}}.
Start with a Clear Plan
First, gather all necessary tools and cleaning solutions. I remember a summer afternoon when I decided to tackle my mildew-ridden deck; I prepared a bucket of warm water, a stiff-bristle brush, and a mild cleaning agent. Planning saves time and prevents multiple trips to the store. Know that using too harsh chemicals can damage the wood, so choose solutions carefully.
Prepare Your Cleaning Solution
Mix a solution of one part of white vinegar to three parts water, or use a commercial deck cleaner designed for mildew removal. If you opt for a homemade mix, it’s eco-friendly and effective. Avoid bleach unless properly diluted and used with caution—overuse can weaken the wood and pose health risks. When I cleaned my deck, I found that vinegar worked wonders on the greenish stains, especially when left to sit for 10 minutes before scrubbing.
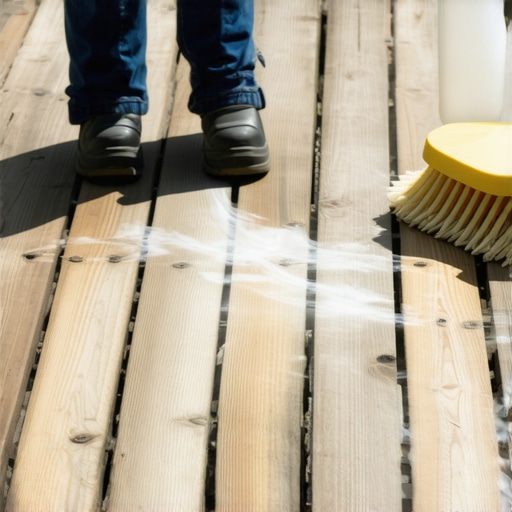
Apply and Agitate
Apply the solution generously across the affected areas. Use a brush or broom to scrub the surface vigorously. Think of it like exfoliating your skin—firm but controlled motions lift off the mildew without damaging the wood. I once spent an afternoon scrubbing, which was tiring but ultimately rewarding—the stains faded, revealing fresh wood beneath. For stubborn spots, reapply and give a little extra elbow grease.
Rinse Thoroughly
Once you’ve scrubbed the entire area, rinse with a garden hose or pressure washer set to low pressure. It’s similar to rinsing soap off your car—ensure all residue is washed away to prevent future buildup. Using too high pressure on delicate wood can cause splintering; I learned this the hard way when I damaged a corner of my deck during my first attempt. Focus on gentle, steady rinsing to preserve the integrity of the wood.
Dry Completely and Inspect
Allow the deck to air dry fully, ideally under a sunny sky. After drying, inspect the surface for remaining stains or damage. Sometimes, the mildew is deeply embedded, requiring multiple treatments. While drying, I noticed that some areas developed new stains overnight, so I treated those again the next day. Consistent maintenance prevents recurrence and prolongs your deck’s lifespan.
Prevent Future Mildew Growth
Once clean, consider sealing your deck with a moisture-proof layer, which creates a barrier against dampness that fosters mildew. Regular cleaning and ensuring proper drainage will also keep mildew at bay. For example, I added strategic plants around my deck to improve airflow, significantly reducing moisture retention. Maintaining a dry, well-ventilated deck is key to keeping it mildew-free for years to come.
When it comes to hiring a deck builder in Needham, many homeowners rely on surface-level advice, but true expertise lies in understanding the nuances that can either make or break your project. One prevalent myth is that choosing the cheapest contractor ensures savings, yet this often leads to subpar craftsmanship and costly repairs down the line. As highlighted by industry experts, cutting corners on quality materials and experienced labor can result in structural issues that compromise safety and longevity. For example, inadequate sealing or improper joist installation might seem minor but can cause major problems, like deck collapse or persistent wood rot, if overlooked. A subtle yet critical detail is the importance of a precise joist layout, which influences overall stability. Skipping this step may seem harmless, but it can lead to uneven weight distribution, especially when planning to incorporate heavy features like hot tubs or fire pits—more info on that here. Many assume all wood is created equal, but in reality, the type of treated lumber used can significantly affect durability and safety standards, particularly in climates like Needham’s, prone to seasonal moisture fluctuations. An often-overlooked nuance is the importance of proper flashing and ledger installation, which, if done improperly, can lead to leaks or structural failure. Avoid falling into the trap of assuming that all contractors have the same level of craftsmanship; vetting for licensed, experienced professionals makes a tangible difference. Moreover, neglecting routine inspections and maintenance—such as checking guardrails or fasteners—can escalate small issues into serious hazards. For instance, the failure to secure loose railing posts might seem trivial but can result in accidents, which emphasizes the need for regular safety audits. Beyond technical skills, understanding color trends and design consistency adds aesthetic value, yet many homeowners neglect this detail until it’s too late, leading to mismatched or outdated looks, something discussed extensively in this article. To truly optimize your investment, you must look beyond generic advice and focus on these advanced considerations—think of it as giving your deck a facelift that lasts. Remember, precision in planning, material selection, and execution can save you from costly repairs and ensure a safe, beautiful outdoor space for years to come. Want to avoid these common pitfalls? Start by reviewing your planned contractor’s credentials and past work—your future self will thank you. Have you ever fallen into this trap? Let me know in the comments.
Keeping your deck in top shape over the years requires more than just occasional cleaning. It involves the right tools, consistent maintenance routines, and a bit of expertise to ensure long-term durability and safety. One of my favorite investments has been a high-quality cordless impact driver, which makes replacing loose screws or securing new boards effortless and precise. Unlike standard drills, impact drivers provide superior torque, reducing fatigue and preventing stripped fasteners, which is crucial when working with treated lumber or composite materials.
For detailed inspections, I recommend a moisture meter. This tiny device is invaluable in detecting hidden moisture within wood before it shows obvious signs of rot or mold. I personally use the Extech MO257, which has proven reliable and easy to operate, helping me identify potential trouble spots early. Using a moisture meter regularly, especially after harsh winters or humid summers, can save you money and prevent larger repairs down the line. Monitoring moisture levels is a proactive approach to deck maintenance that many overlook, leading to preventable issues.
Applying a high-quality sealant is another critical step. I often choose a professional-grade product like Thompson’s WaterSeal, which I trust because it penetrates deeply, providing reliable protection against moisture and UV damage. Remember, not all sealants are created equal—cheap options may wear off quickly or fail to repel water effectively. Proper application techniques, such as using a brush for detailed areas and a roller for flat surfaces, ensure even coverage. After sealing, a consistent cleaning schedule—at least once a year—keeps your deck looking vibrant and prevents buildup of dirt or algae.
In terms of lighting, installing step and accent lights can enhance safety and ambiance, making your outdoor space inviting after sunset. Another tip I swear by is using a multi-tool with a fine sanding attachment to smooth out rough spots or worn areas quickly. Whether fixing minor splinters or preparing for staining, this versatile device is a game-changer for detailed work around corners or tight spaces.
Looking ahead, I believe the trend will move towards smarter maintenance systems—integrating sensors and automated alerts to monitor moisture, foot traffic, or structural shifts. For example, incorporating smart sensors that connect to your phone can give real-time updates on your deck’s health, alerting you at the first sign of trouble.
How do I maintain my deck over time?
First, keep an eye on moisture levels using a reliable meter, and address any drainage issues promptly. Regular cleaning is essential—avoid harsh chemicals or power washing that can damage the wood. Instead, opt for gentle cleaning solutions and soft-bristle brushes. Applying a high-quality sealant every few years protects against the elements and extends your deck’s lifespan. Finally, periodically inspect fasteners, railings, and the ledger board to catch loose or damaged components early. For tricky spots or stubborn stains, don’t hesitate to use specialized tools like detail sanders or impact drivers; they make repairs safer and more efficient. Remember, investing in the right equipment and routine checks now will save you significant costs and headaches later. Try out a moisture meter this season; it’s a simple step that yields big results in preserving your outdoor oasis.
The Hardest Lesson I Learned About Deck Builders Needham
One of the most impactful lessons I discovered was that rushing through the initial construction often leads to costly repairs later. I once opted for a cheaper contractor, thinking I was saving money, only to face uneven boards and loose railing posts within a year. It taught me that investing in skilled craftsmanship ensures durability and safety, saving time and money in the long run.
3 Myths About Deck Builders Needham That Held Me Back
I believed that all decks are created equal and that sealing was optional. These misconceptions caused me to neglect regular maintenance, leading to premature warping and rot. Clearing up these myths opened my eyes to the importance of choosing the right materials, professional installation, and routine upkeep to extend my deck’s lifespan.
What Experts Won’t Tell You About Deck Builders Needham
Few realize the subtle nuances of proper joist spacing and ledger board installation significantly impact safety and longevity. I learned that even small oversights, like skipping flashing or using the wrong fasteners, can cause leaks or structural failure. Finding reputable, licensed professionals who understand these details made all the difference in my deck’s performance under New England’s seasonal stresses.