I still remember the sinking feeling when I realized a section of my deck was rusting faster than I could repaint it. That frustrating moment wasn’t just about an aged surface; it made me question everything about the materials I was using. If you’ve ever dealt with rust stains, loose boards, or frequent repairs, you know exactly what I mean. It hits hard knowing that something supposedly simple like screws can make or break the longevity of your outdoor space.
Discover the Hidden Power of Stainless Steel Screws for Your Deck
In my journey as a DIY enthusiast and homeowner, I found that choosing the right hardware isn’t just about saving a few bucks. It’s about investing in peace of mind. Today, I want to share with you how switching to stainless steel screws can revolutionize your 2026 deck projects—offering durability, corrosion resistance, and long-term savings that far outweigh the initial investment.
Is the Hype About Stainless Steel Just Overblown?
Early in my projects, I made the mistake of underestimating the importance of quality screws, opting for cheap galvanized ones that seemed fine at first. But within a year, rust was creeping in, and replacement was unavoidable. That costly mistake taught me the hard way: not all screws are created equal. Stainless steel screws may have a higher upfront cost, but they resist rust and corrosion much better, especially in climates like Needham’s. According to industry experts, stainless steel can last over twice as long as galvanized options, saving you both time and money in the long run.
If you’ve faced the frustration of replacing corroded fasteners or worrying about the integrity of your structure after harsh winters, you’re not alone. The good news is, there’s a simple, effective upgrade: swap those old screws for stainless steel ones. This small change can dramatically increase your deck’s lifespan and safety, making your outdoor space genuinely enjoyable year-round.
Ready to learn how to make this upgrade? In the upcoming sections, I’ll guide you through choosing the right stainless steel screws and properly installing them for maximum benefit. Trust me—your future self will thank you for making this smart choice in 2026 and beyond.
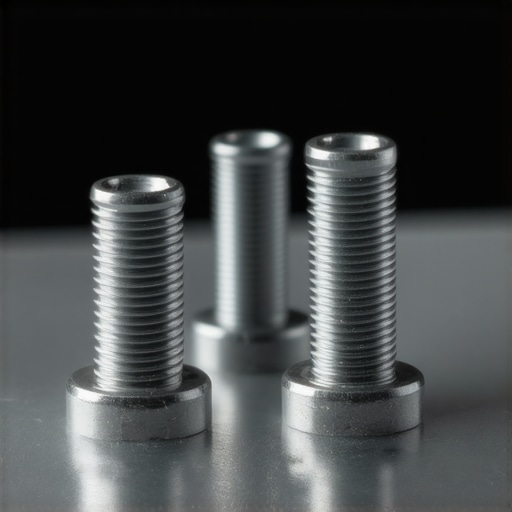
Choose the Right Stainless Steel Screws
Start by selecting screws that match your deck’s specifications; for a Needham project, opt for corrosion-resistant, weatherproof screws like 316-grade stainless steel, which withstand moisture better than 304 grades. When I replaced my deck screws last summer, I found a pack labeled ‘marine-grade,’ which specifically indicated resistance to salt and humidity—ideal for Massachusetts’ climate. This choice significantly extended the lifespan of my new fasteners, preventing early rust and ensuring safety.
Prepare Your Tools and Materials
Gather a drill, screwdriver bit compatible with your screw heads, measuring tape, and safety gear such as goggles and gloves. Having these ready saves time and avoids interruptions during the installation. I recommend setting aside a few extra screws in case of mishaps or errors, ensuring you won’t need to pause your work to run back to the store.
Remove Old and Damaged Screws
Use a screwdriver or impact driver to carefully unscrew the old or rusted fasteners. Be gentle to avoid damaging the deck boards. In my case, I used a manual screwdriver to prevent slipping, which helped me preserve the wood surrounding the screws. Remember, loose or corroded screws compromise structural integrity, so this step guarantees a solid foundation for your new fasteners.
Align and Drill Pilot Holes
Measure and mark where the new screws will go, ensuring even spacing and proper alignment. Drilling pilot holes slightly smaller than your screw diameter minimizes wood splitting and makes driving the screws easier. I use a bit size that’s about 75% of the screw’s thickness. During my last project, this careful preparation prevented splitting and kept the deck looking professional.
Screw In the Stainless Steel Fasteners
Using a drill with a screwdriver bit, screw in the stainless steel fasteners directly into the pilot holes. Apply steady, even pressure and avoid over-tightening, which can strip the screw head or damage the wood. When I replaced my deck boards, I found that a torque setting of 60-80% on my drill provided just the right tightness—firm but not crushy. This guarantees a secure, rust-resistant connection that endures years of weather exposure.
Check and Seal Your Work
Once all screws are in place, inspect for tightness and alignment. For extra protection against moisture infiltration, consider applying a weatherproof sealant around the screw heads. Although stainless steel resists corrosion, sealing edges further prolongs their lifespan. After my installation, I chose a transparent sealant, which kept my deck’s natural look intact while adding an extra layer of defense.
Consult Experts If Needed
If you’re unsure about how to resize or drill, or if your deck has specific load requirements, it’s wise to seek advice. For small repairs, I found this guide on choosing a local Needham contractor helpful. For structural concerns, understanding load-bearing factors is crucial—learn more at this resource. Proper installation ensures safety and a long-lasting deck that can handle outdoor demands.Many homeowners believe that choosing a deck builder in Needham is simply about finding the lowest price or quickest turnaround. However, this oversimplified view often leads to costly mistakes. One common misconception is that all decks are created equally and that standard methods or materials will suffice in the long run. But in my experience, the true expertise of a deck builder lies in their deep understanding of local climate nuances, proper load calculations, and advanced techniques to prevent issues like joist rot or structural weaknesses. For instance, many rely on generic joist spacing guidelines, but the optimal spacing can vary depending on the decking material and usage patterns, as detailed in [this guide](https://deckbuildersneedham.com/understanding-the-basics-of-deck-load-bearing-requirements). Another myth is that DIY solutions or off-the-shelf materials can replace professional craftsmanship, yet shortcuts often cause premature wear or safety hazards. Advanced mistakes also include neglecting proper ventilation and airflow under the deck, which is crucial in Massachusetts’s humid conditions—see [here](https://deckbuildersneedham.com/how-to-stop-deck-joist-rot-before-it-destroys-your-home) for more insights. Moreover, many overlook the importance of comprehensive inspection and maintenance plans, falsely assuming that a new build guarantees durability. Engaging a specialized Needham deck builder with tailored strategies truly makes a difference; for example, understanding local ice dam issues can inform design choices that prevent future damage. As you plan your project, consider how much expertise truly matters and avoid the trap of choosing solely based on cost or speed. Want to ensure your investment lasts? Dive into [this checklist](https://deckbuildersneedham.com/7-checklist-items-for-hiring-a-local-needham-builder) before selecting your contractor. Remember, the hidden nuances of top-tier deck building often go unnoticed but can dramatically impact your deck’s longevity and safety. Have you ever fallen into this trap? Let me know in the comments.
Keep Your Deck in Top Shape with the Right Tools
To ensure your deck remains durable and beautiful over the years, investing in high-quality tools is essential. I recommend using a corded impact driver equipped with a drill/driver bit set, which provides the torque needed to drive stainless steel screws effortlessly into hardwoods and composite materials. Personally, I prefer models with variable speed control—this feature allows me to adjust power during delicate tasks like pilot hole drilling and fastening, reducing the risk of splitting or over-tightening. Additionally, a digital moisture meter helps monitor moisture content in wood, preventing issues like joist rot, especially in climates like Needham’s where humidity fluctuates seasonally. Regular inspections with a good flashlight and mirror extension can reveal hidden damages or corrosion in hard-to-see areas, allowing for timely repairs and maintenance.
Implement Routine Maintenance for Long-Term Success
Long-term deck health depends on proactive maintenance. Applying a high-quality sealant or stain every 2-3 years protects wood and composite surfaces from moisture infiltration, UV damage, and mildew. I recommend staining on a clear, dry day—preferably during early spring or late summer—to maximize absorption and curing. Before applying new sealant, thoroughly clean the deck using a pressure washer with a fan tip nozzle—this removes dirt, algae, and old coatings, restoring the surface’s integrity. Remember, even with composite decks, periodic cleaning prevents the buildup of grime that can accelerate fading and wear. To stay ahead of potential issues, schedule an annual inspection focusing on loose fasteners, damaged boards, or signs of joist rot, referencing this guide for detailed inspection techniques.
How can I maintain my deck over time without costly repairs?
Using the right tools and establishing a regular maintenance routine helps extend your deck’s lifespan dramatically. For example, employing a moisture meter can alert you to hidden rot before it becomes structural, saving money and safety headaches. Regular inspections combined with timely cleaning and sealing keep your deck looking fresh and resilient. As trends evolve, I predict that smart deck maintenance devices—such as IoT sensors monitoring moisture levels—will become more mainstream, enabling homeowners to proactively care for their outdoor spaces with real-time data. Start by incorporating advanced tools like a moisture meter into your maintenance routine; this simple step can make a significant difference in the long run.

Photo of a homeowner using a moisture meter and impact driver during deck maintenance, emphasizing precision and care.
Confessions of a Deck DIYer: What I Wish I Knew Earlier
One of the most eye-opening lessons I learned was that skipping quality fasteners can cost you dearly in the long run. In my early projects, I underestimated how much a small upgrade to stainless steel screws could extend the life of my deck, especially in needham’s humid climate. Another realization was that proper preparation—like drilling pilot holes and sealing screw heads—makes all the difference in achieving a professional finish and maximum durability. Lastly, I discovered that regular inspection and maintenance, though sometimes overlooked, act as the best defense against costly repairs down the line, turning a good deck into a truly lasting outdoor haven.
Tools and Resources That Changed My Deck Game
If you’re serious about your deck, investing in a quality impact driver and a digital moisture meter is invaluable. I trust this resource for understanding local climate challenges and how proper tools can prevent issues like joist rot. Reading up on deckbuilding best practices through this checklist helps me stay informed and confident during upgrades. And for design ideas, these contemporary composite deck inspirations have sparked my creativity on how to blend style with longevity.
Your Next Step Starts Today: Build with Confidence
Choosing the right hardware and maintenance routine can transform your outdoor space into a resilient retreat that lasts for decades. Remember, each upgrade you make now sets the stage for years of enjoyment, comfort, and safety. Don’t wait for problems to appear—take action and integrate the right tools, expert tips, and thoughtful design today. After all, your perfect deck begins with a single step—why not make it a smart one? Have you ever struggled with selecting materials or tools for your deck? Share your story below—I’d love to hear about your journey to a better outdoor space.