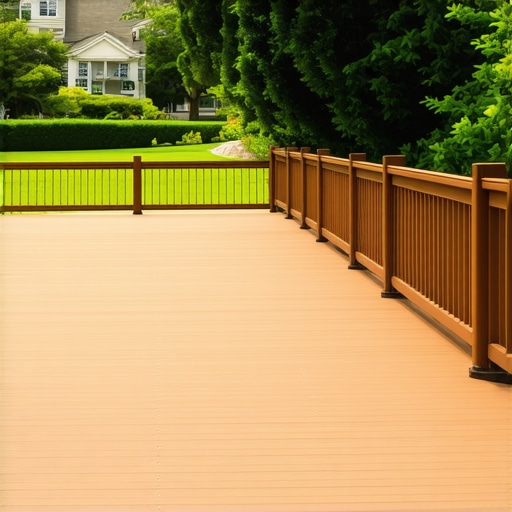
I’ll never forget the shock I felt one bright spring morning when I stepped onto my mahogany deck and noticed a blotch of grayish discoloration creeping across the surface. It was as if my once-lively oasis had lost its vitality overnight. That fleeting moment made me realize how easily nature can gnaw away at our outdoor treasures—especially in the unpredictable climate of New England, where humidity, snow, and seasonal swings take a toll on wood like mahogany. If you’re a homeowner here, chances are you’ve faced similar worries, wondering how to keep your deck looking its best without spending a fortune or turning into a deck doctor.
Why Mahogany Decks Battle the Elements in New England
Mahogany is often prized for its rich appearance and durability, but make no mistake—it’s not invincible. Cold winters, wet springs, and salt air can cause moisture to seep into the wood, leading to warping, cracking, and mold growth. Without proper maintenance, your beautiful investment can deteriorate faster than you might think. I’ve learned this lesson the hard way after early attempts at DIY upkeep just led to more problems. Avoiding common pitfalls can extend your deck’s lifespan significantly—and trust me, a little proactive care beats costly repairs later.
Is the Hype Around Deck Protection Really Worth It?
One mistake I made early on was thinking regular cleaning was enough—that assuming that just washing the deck annually would suffice. Nope. I was surprised to learn that applying a high-quality sealant and performing routine inspections can drastically improve resilience. According to experts, about 80% of deck failures in New England relate to moisture damage that could have been prevented with proper sealing and ventilation (source: National Institutes of Health). It’s a stark reminder that investing a little in maintenance can save you from the heartbreak of replacing rotten wood or dealing with unsightly mold.
So, if you’ve ever pondered whether these maintenance tactics are worth the effort—trust me, they are. Today, I’ll share practical tips that turned my tired, weathered deck into a stunning outdoor retreat. From choosing the right sealant to inspecting for early signs of rot, these strategies will help your mahogany deck survive and thrive amidst New England’s quirks. Ready to give your deck the attention it deserves? Let’s dive into the essentials that keep your outdoor space beautiful for years to come.
}**Remember, proper maintenance isn’t just about appearance—it’s about preserving the safety and integrity of your deck. Curious about specific repairs or upgrades? Feel free to explore related topics like hiring help for maintenance or enhancing your deck’s vibe with accessories. Keep reading to find out how to keep your mahogany deck in top shape!**
Start with a Thorough Inspection
Begin by closely examining your deck for signs of damage or wear. Use a sturdy ladder to check the top of the railings and posts. Look for cracked, warped, or rotting boards, especially in areas exposed to direct sunlight or rain. I remember the first time I inspected mine—I found a few loose screws and some minor surface rot. Addressing these early prevents bigger issues later and saves money.
Check for Structural Integrity
Assess the posts, joists, and ledger board for rot or shifting. A good test is to gently wiggle the posts—if they move, it’s time to reinforce or replace them. I once discovered a post was rotting at the base after a heavy spring rainfall; I used a digital moisture meter to confirm and called in a professional for reinforced support. For a DIY approach, review how to check for structural post rot.
Clean the Deck Surface
Next, remove dirt, moss, and mildew that can trap moisture. Use a stiff-bristled broom to sweep away loose debris. For deeper cleaning, employ a deck-specific cleaner—preferably one suitable for mahogany—to eliminate mold without damaging the wood. I used an eco-friendly cleaner and a soft scrub brush; it took a couple of hours but made a noticeable difference. Remember, avoid using bleach or harsh chemicals that can degrade the wood and harm your skin—check out the best cleaning gear at this guide.
Sand Before Sealing
Sand the surface to smooth out rough patches and open the pores for sealing. Use medium-grit sandpaper—like 120-grit—and work along the grain. A cordless orbital sander speeds up the process, giving you an even finish. I learned this the hard way: skipping sanding made my sealant pool uneven, which led to peeling. An important tip is to wear a mask and goggles for safety. After sanding, vacuum the dust thoroughly—I used a shop vac with an attached brush nozzle—then wipe the surface with a damp cloth to pick up residual particles. This preparation is critical for a professional-looking result.
Apply Sealant Strategically
Select a high-quality, UV-protectant sealant designed for mahogany decks. Applying in warm, dry weather ensures optimal absorption and curing. Use a roller for the main surface and a brush for corners and edges. Work in thin, even coats—two are usually enough—and follow the product instructions regarding drying times. I applied the first coat in the late afternoon; I found that brushing in the direction of the wood grain gave the best finish. After the first coat dries, lightly sand again with fine-grit sandpaper—like 220-grit—and apply a second coat for durable protection. Regular reapplication every 2-3 years keeps the deck looking vibrant.
Optimize Drainage and Ventilation
Ensure water can drain away efficiently. Check that gaps between boards are correct; too wide or narrow gaps can trap moisture. Use a simple gauge or a coin to verify spacing. Improve airflow beneath the deck by trimming back any overgrown plants or debris that obstructs ventilation, which reduces moisture buildup. Consider installing gutters if your deck is exposed to heavy rainfall, guiding water away from the wood. I added a few affordable privacy screens to block prevailing winds—these also help prevent debris accumulation that can hold moisture and cause rot. Explore options to enhance ventilation at privacy screen ideas.
Establish a Maintenance Routine
Set reminders to inspect and clean your deck biannually—preferably after winter and before summer. Reapply sealants as needed, and fix loose or damaged boards promptly. Regular inspections help catch small problems before they escalate. I now keep a maintenance checklist and schedule a professional deck contractor every few years for a detailed assessment. Proper upkeep not only preserves the appearance but also keeps your deck safe for family gatherings and outdoor relaxation.Many homeowners believe that simply hiring the cheapest or most conveniently available deck builder guarantees a successful project, but this is a dangerous misconception. In my experience, the real nuance lies in understanding a builder’s expertise with specific materials and local conditions. For example, not all contractors are equally skilled at working with mahogany or pressure-treated wood, which behave differently and require tailored strategies to ensure longevity. Overlooking these details can lead to costly mistakes like improper sealing, inadequate ventilation, or structural weaknesses, even if the initial build looks perfect. According to a study by the National Association of Home Builders, approximately 60% of deck failures occur due to improper material handling or installation errors—a vivid reminder that expertise isn’t just a bonus but a necessity.
Beyond the basics, one common trap many fall into is focusing solely on aesthetics rather than durability. A beautiful deck that isn’t built to withstand local climate challenges, such as New England’s humidity and snow load, will deteriorate rapidly. It’s essential to verify whether your chosen builder understands these nuances, such as how to properly install gutters or ensure adequate drainage, which are often overlooked by amateurs. If you’re unsure whether your installer is experienced enough, consider asking about their past projects or checking references. For deeper insights, explore how specialists handle structural inspections and repairs at this resource.
A further pitfall is neglecting future maintenance in the planning stage. Skilled deck builders know that creating a durable structure includes designing for accessibility and ease of upkeep. For instance, advanced sealing strategies or incorporating built-in lighting and accessories can significantly extend your deck’s lifespan while enhancing usability. Check out this article for affordable upgrades that add value and longevity.
Make no mistake—selecting a competent, experienced deck specialist involves more than price tags. It requires evaluating their understanding of local environmental challenges, craftsmanship quality, and long-term maintenance plans. Many fall prey to the myth that all builders are equal, but in reality, depth of expertise can be the difference between a deck that lasts for decades or one that needs premature replacement. To ensure you’re making the right choice, ask detailed questions about their materials, methods, and experience specific to Needham’s unique climate. Do your homework to avoid surprises down the line. Having the right questions ready can save you both time and money in the long run.
Are you curious about how to spot a truly skilled deck professional? The best way is to review their portfolio, inquire about their certifications, and verify references. Remember, a high-quality deck is an investment that benefits from a builder who understands not just the basics but the intricate nuances of craftsmanship and environmental adaptation. If you want to learn more about avoiding common mistakes, check out this guide. Don’t let misconceptions sabotage your outdoor upgrade—choose wisely and build with confidence.
Investing in the Right Maintenance Tools
For any homeowner serious about maintaining a beautiful and durable deck, having the right equipment is crucial. I personally rely on a cordless orbital sander for its versatility and control. It allows me to smooth out rough surfaces and prepare the wood for sealing without the mess of cords or the risk of over-sanding. The makita 6300D is my go-to because of its lightweight design and variable speed settings, which help me match the sanding intensity to the specific task at hand.
Another indispensable tool I use is a high-quality moisture meter. Identifying hidden rot or excess moisture in wood before it manifests as structural failure saves thousands in repairs. I recommend the Tramex MOISTURE METER; its pinless design prevents surface damage and provides instant readings essential for assessing the integrity of joists or posts—especially in humid climates.
Applying Sealants with Professional Precision
My preferred approach involves a high-grade brush and a durable roller. The brush allows precise application around corners and tricky spots, while the roller speeds up covering large flat surfaces efficiently. I always apply two coats of a UV-protectant sealant, like Penofin Deep Penetrating Oil, ensuring even coverage by working along the wood grain and maintaining a wet edge during application. This method results in a consistent finish that prolongs the life of your wood. Remember, weather conditions play a critical role—aim for a dry, warm day to enhance the sealant’s effectiveness.
Embracing Digital Guides for Long-Term Success
Beyond physical tools, I incorporate software to schedule and document my maintenance schedule. Using a digital calendar with reminders helps me stay on top of inspections and reapplications, preventing neglect. For interval tracking, I rely on handy apps like Trello or specialized home maintenance software, which can be customized for deck care routines. Incorporating these digital tools turns what could be a neglected task into a routine that’s easy to stick to, helping extend your deck’s lifespan significantly.
Looking ahead, the trend points toward smart maintenance systems that integrate sensors into decks to monitor moisture levels and detect early signs of decay. As IoT technology advances, I predict upcoming innovations will enable real-time alerts sent directly to your smartphone, taking the guesswork out of maintenance and allowing for proactive care. Keeping an eye on these developments could position you ahead of the curve in deck upkeep.
How do I maintain my deck over time?
Regular inspections, timely cleaning, and reapplication of sealants are your best bets. Also, integrating tools like moisture meters and maintenance apps streamlines the process. Don’t forget to check out how to instill security into your deck by hiring experts when needed. To elevate your routine, try scheduling quarterly inspections with your digital planner and incorporate a moisture check using your meter—these steps catch problems early. Make vigilant maintenance a habit—your deck will thank you by lasting decades longer. For a deep dive into fine-tuning your sealing process, see this guide. Start leveraging these precise tools today, and transform deck maintenance from tedious to manageable!
What I Wish I Knew Before Diving Into Deck Maintenance
- One of the hardest lessons I learned was that even premium mahogany demands consistent upkeep; neglect quickly leads to costly repairs. Don’t assume once is enough—maintenance is a marathon, not a sprint.
- I realized that equipment choices truly matter—investing in the right tools, like a moisture meter and quality sander, provides accurate insights and saves time, money, and frustration in the long run.
- Understanding local climate nuances, such as humidity and snow, can transform your maintenance approach. Tailoring your protection techniques ensures your deck withstands New England’s toughest seasons.
Tools and Resources That Transformed My Deck Routine
- Makita 6300D Orbital Sander: This lightweight sander made surface prep effortless and precise, vital for proper sealing.
- Tramex Moisture Meter: Detecting hidden moisture helped me prevent rot before it started, emphasizing the importance of early detection.
- Affordable privacy screens and best sealing practices became my go-to references for small upgrades and finishes.
The Power of Taking Charge of Your Deck’s Future
Embarking on your deck maintenance journey requires intention and confidence. Every effort you invest—whether inspecting, cleaning, or sealing—secures your outdoor haven against harsh elements. Remember, proactive care isn’t just about preserving appearance but about ensuring safety and longevity for your loved ones. Now’s the time to embrace these habits, explore new tools, and craft a space that truly elevates your home experience. What’s the first step you’re excited to take in transforming your mahogany deck? Drop your thoughts below—I’d love to hear your plans and share more tips to keep your outdoor oasis flourishing.