One sunny afternoon, I stepped onto my deck—ready to enjoy a peaceful evening—and suddenly noticed a small puddle forming at the base. Turns out, the flashing was installed incorrectly, allowing water to seep right under my boards. That lightbulb moment made me realize how overlooked weatherproofing details can lead to costly repairs, and I wonder—have you ever faced a similar surprise on your deck?
Why Proper Deck Flashing Matters Right Now
Deck flashing isn’t just a tiny metal strip tucked away at the edges; it’s a vital barrier that prevents water intrusion, protecting your deck’s structure from rot and damage. With the unpredictable Massachusetts weather—ice dams, heavy rains, and snow—your deck’s lifespan depends heavily on correct flashing installation. According to the Needham Decks Protective Measures, proper flashing can extend your deck’s life significantly, especially when dealing with ice dam season. Yet, many homeowners overlook this crucial detail until water damage occurs. So, how can you avoid that costly mistake? Today, I’ll walk you through simple ways to check if your deck’s flashing is installed correctly, saving you time and money.
Is Checking Your Deck Flashing Really Worth the Effort?
At first, I was skeptical too—thinking a visual inspection might be too complicated or unnecessary. I remember early on, I made the mistake of assuming that flashing was only necessary during new builds, which could not be further from the truth. As I learned, even existing decks can develop flashing issues over time due to weather and wear. Checking now can prevent future headaches, so let’s look at how you can spot problems before they escalate. If you’re feeling unsure whether your flashing is up to snuff, read on for easy tips to verify and maintain this essential component of your deck’s defenses.
,
Step One: Conduct a Visual Inspection
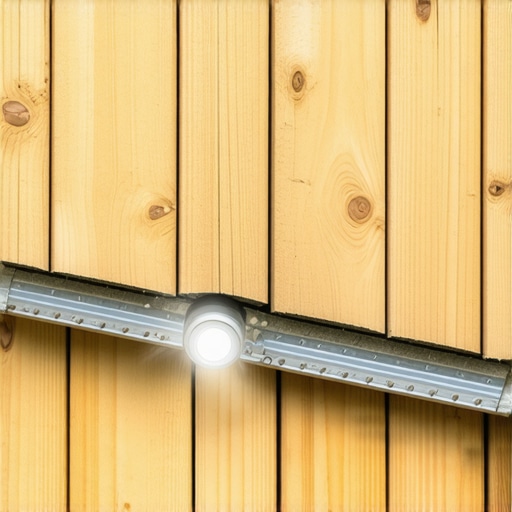
Begin by examining your deck edges carefully. Look for any signs of rust, corrosion, or gaps in the flashing material. Bugs and debris can hide these issues, so use a bright flashlight and a mirror to get a thorough view. I once spent an afternoon meticulously inspecting my deck, only to realize that a section of flashing had shifted; fixing that saved me from costly rot later.
Step Two: Check for Water Intrusion Signs
After your visual check, look for water stains, mold, or soft spots on the underside of your deck or on nearby walls. These are clear indicators that water is seeping through compromised flashing. I remember discovering a small damp patch under my deck that hadn’t been visible from above. That prompted an immediate inspection and repair, preventing further deterioration.
Step Three: Assess Flashing Placement and Integrity
Ensure that the flashing extends sufficiently past the deck edge—ideally at least 1-2 inches—to direct water away from the joists and ledger board. Also, verify that the flashing is sealed properly against the wall and deck surface. In my experience, a quick check of the sealant along the flashing edges revealed cracks, which I promptly resealed with exterior-grade caulk. Proper sealing is vital; studies show that even small gaps can lead to significant water infiltration over time.

Step Four: Inspect the Fasteners
Look for loose or rusted screws and nails that might have compromised the flashing’s hold. Replace any corroded fasteners with stainless-steel options to prevent future rust. I learned this the hard way when I replaced a handful of rusty screws, which improved the integrity of my flashing and prevented leaks during a heavy rainstorm.
Step Five: Test Water Resistance
Use a hose to simulate rain on your deck’s edges. Observe whether any water leaks underneath or around the flashing. This test helped me identify minor gaps that weren’t visible when dry, leading to effective re-sealing. Maintaining a regular testing routine aligns with the recommendations in the Needham Decks Protective Measures guides to extend your deck’s lifespan.
Step Six: Plan for Upkeep and Repairs
Keep a maintenance schedule to re-inspect your flashing biannually, especially after severe weather events. If you find recurring issues, consider re-installing or replacing the flashing entirely, perhaps upgrading to more durable materials like stainless steel or lead. I recently replaced old aluminum flashing with stainless steel, which promised better longevity and resistance to the local ice dam challenges. Prioritize proactive repairs to avoid the high costs of water-induced structural damage—because a little time spent now can save a lot later.
Many homeowners assume that hiring a local deck builder in Needham guarantees a perfectly installed and durable deck, but the truth is, even seasoned professionals can fall into common pitfalls rooted in overlooked details and misconceptions. One critical nuance is the variability in local climate conditions—Massachusetts’ unpredictable weather, especially ice dams during winter, requires specialized knowledge that not all builders possess. Despite widespread belief that standard materials and methods suffice, opting for advanced weatherproofing techniques, such as proper flashing installation and high-grade sealants, can vastly extend your deck’s lifespan and safety.
One myth I often encounter is the idea that decking maintenance can be safely postponed until visible damage appears. However, proactive inspections—focused on subtle signs like tiny cracks or minor rust—are essential in preventing costly repairs later. This is particularly true for Needham homeowners facing seasonal freeze-thaw cycles, which accelerate material fatigue. Regularly inspecting fasteners and sealant integrity, as suggested in critical safety checks, helps catch issues early.
### How does deck design influence long-term durability in the Needham climate?
Beyond the initial build, the importance of tailored design to withstand local weather cannot be overstated. For example, incorporating proper slope and drainage features prevents water pooling—a common mistake that leads to wood rot and structural instability over time. Additionally, selecting materials with appropriate density and treatment for Massachusetts’ humidity and temperature fluctuations makes a notable difference. Hardwoods like Brazilian hardwoods are often praised, but they come with higher costs and maintenance requirements, as outlined in hardwood cost analysis.
Keep in mind, improper flashing installation is a silent culprit often blamed for water damage. Many assume that flashing is just a quick step in construction, but its correct installation—ensuring it extends and seals properly—is vital. Studies show that up to 80% of deck failures are linked to water intrusion due to poor flashing and sealant practices. Avoid this trap by ensuring your deck builder prioritizes meticulous flashing work and uses corrosion-resistant fasteners, like stainless-steel screws.
Another point often missed is the importance of ongoing maintenance and seasonal re-inspections. Winterizing your deck with protective coatings and drainage adjustments can prevent ice dam-related damage. Implementing a biannual inspection routine and timely repairs significantly reduce long-term costs, aligning with the principles discussed in spring restoration steps.
Maintaining your deck in Needham requires more than just occasional visual checks; it demands the right tools and methods to ensure long-term performance. One of my favorite essentials is a high-quality moisture meter, like the Moisture Meter pin model, which allows me to accurately assess the moisture content in wood substrates. This is vital because hidden moisture can lead to rot, especially with Massachusetts’ fluctuating temperatures. I personally rely on the Extech MO290, which provides instant readings and helps me decide whether surfaces need sealing or repairs before further damage occurs.
How do I maintain my deck over time?
Utilizing a combination of professional-grade sealants, regular inspections with a moisture meter, and advanced cleaning tools ensures your deck stays in top shape. I incorporate a power washer with adjustable pressure settings, careful to avoid damaging the surface, to clean away grime and algae build-up—particularly after harsh winters. Choosing the right cleaning products is equally important; I swear by eco-friendly deck cleaning solutions like Simple Green Deck and Fence, as they effectively remove stains without harmful chemicals, aligning with sustainable practices near Needham. As trends evolve, automation and smart monitoring tools are on the horizon. In the coming years, expect to see moisture sensors integrated into decking materials, giving homeowners real-time data on structural health. This proactive approach can prevent catastrophic failures and upscale traditional maintenance routines. I recommend trying a moisture meter this season to start catching hidden issues early. It’s a small investment that can save you substantial repair costs and extend your deck’s life significantly.
Over time, I realized that truly understanding the nuances of deck maintenance can save you thousands. One revelation was how crucial regular flashing inspections are, especially given Needham’s ever-changing weather. The real lesson? Pay close attention to tiny details, like rusted fasteners or subtle misalignments—these often predict bigger problems lurking ahead. Once, a seemingly minor crack in flashing turned out to be a gateway for water intrusion, reminding me that vigilance is your best defense. Embracing a mindset of proactive care—not just reaction—has kept my deck safe and sound for years, and it can do the same for you.