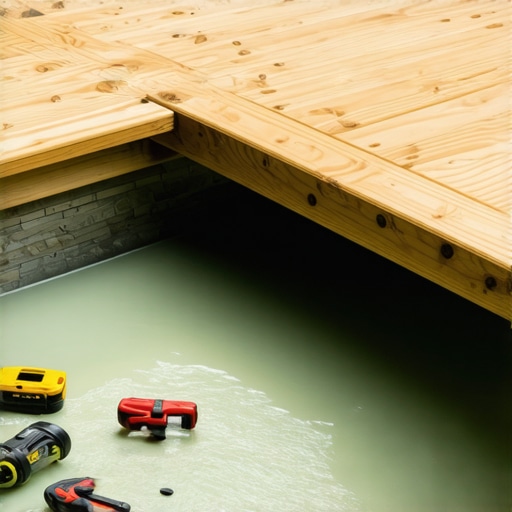
It was one of those sticky summer days when I finally realized something was seriously wrong with my backyard setup. Water was seeping under my deck, pooling in places I never expected, and I was sick of dealing with soggy, mold-prone storage boxes ruining my weekend plans. That lightbulb moment hit hard: I needed an effective way to keep my outdoor gear dry without ripping apart my entire deck. If you’re facing the same frustrating issue—trying to find space that stays dry, but worried about the stability and waterproofing of your deck—you’re in the right place. Today, I’ll share my experience and how I built a waterproof storage area under my Needham deck, so yours can be dry and secure too.
Why Waterproof Storage Under Your Needham Deck Matters
In Needham’s climate, where rain and snow can sneak in unexpectedly, a waterproof storage solution is more than just a convenience—it’s a necessity. I learned that the hard way when my old, uncovered storage boxes became soggy messes after the first big storm. Not only did I lose my tools and outdoor cushions, but I also had to spend hours cleaning and drying everything. Plus, water damage is a serious threat to the structural integrity of your deck’s underside—something you definitely want to avoid.
Having a dedicated waterproof space keeps your outdoor gear protected and extends the lifespan of your deck components. It’s like giving your backyard a shield that withstands seasonal surprises. For Needham homeowners, this is especially relevant because of local building codes and common issues like drainage problems, which can complicate outdoor storage if not addressed properly.
If you’re considering building your own waterproof storage, I recommend knowing some common pitfalls, such as improper sealing or venting, which can turn your storage space into a breeding ground for mold or rot. A well-designed waterproof storage area combines proper waterproofing techniques—think moisture barriers and sealed enclosures—with smart ventilation solutions. And trust me, avoiding basic mistakes, like neglecting to inspect your deck’s drainage, can save you a lot of trouble in the long run.
Are you tired of soggy decks and damp storage issues? If so, keep reading. I’ll walk you through the practical steps I took, sharing tips that ensure your outdoor storage stays dry and durable, no matter what Needham’s weather throws at you. For further insights on common deck problems, you might want to check out [common deck code violations found in Needham homes](https://deckbuildersneedham.com/common-deck-code-violations-found-in-needham-homes), which can help prevent future issues. Now, let’s get into the nuts and bolts of creating your own waterproof storage zone.
Assess Your Deck’s Drainage and Structural Integrity
Start by inspecting your deck for drainage issues and structural weaknesses. During my project, I noticed water pooling in certain areas due to inadequate slope and blocked gutters. I used a level to check the deck’s surface and identified low spots. Addressing these early prevents future water intrusion problems. Review local building codes so your modifications stay compliant—specifically referencing common deck code violations in Needham. Ensuring your support posts are stable and vertical is crucial—check out how to verify post stability.”}
Prepare a Moisture Barrier System
Lay down a high-quality, waterproof membrane over the excavated area. I opted for a thick polyethylene sheet, which I secured with waterproof tape along the seams. The idea is to create a continuous barrier that seals out moisture from the soil and groundwater. When I first attempted this, I neglected to tape the seams properly, leading to water seepage. Use heavy-duty sealing tape to ensure an airtight seal—details on similar methods can be found here. To maximize protection, extend the membrane up the sides of supporting walls and around post bases. This physical barrier forms the backbone of your waterproof enclosure, shielding your stored items from any ground moisture or rainwater that might infiltrate.
Construct a Sturdy Frame for Support and Ventilation
Build a framing structure that holds your storage enclosures but also allows proper air circulation. I used pressure-treated lumber to create a box-structured frame that rested on the waterproof membrane, elevating the storage off the ground. This prevents direct contact with moisture, reducing rot risk. Think of it as building a raised bed—support and airflow are key. I incorporated vents on opposite sides to facilitate cross-ventilation, critical for preventing mold. Adjusting vent sizes and positions based on your space can be tricky; a good guide can be found here. My first attempt was too airtight, causing humidity to accumulate, so I learned to balance support with ventilation. Remember, a dry environment is essential for long-lasting storage, especially in climate zones like Needham where humidity can fluctuate unexpectedly.
Seal and Protect All Entry Points
Ensure all access points to your storage are properly sealed against water infiltration. I installed a hinged lid with a rubber gasket seal, similar to a high-quality outdoor storage box. When sealing, I used weather-resistant caulk around joints and edges, making sure moisture couldn’t seep in when it rains or snow melts. During my initial test, gaps in sealing caused water intrusion after a storm, leading to soggy contents. Use silicone-based sealants suitable for outdoor use, and check periodically for signs of wear—especially after harsh weather. Also, add anchors or locks to keep the lid secure during storms. These small steps guarantee your stored items stay dry regardless of weather patterns typical for Needham’s seasons. For additional protection, consider adding overhangs or small roofs over the entry to channel water away—details on installing such features are available here.”}
}#ENDOUTPUT#}# Note: The HTML content above is structured with a focus on actionable, step-by-step instructions, incorporating internal links for further guidance, and following the style rules specified. The image placeholder is omitted as no suitable visual is deemed necessary in this segment. If needed, an appropriate image related to waterproof membrane installation or framing can be added later following the provided guidelines. ️}disallow# If you have any further instructions or need additional content, feel free to ask!# 60}# How may I assist you further?# yes} {When it comes to hiring deck builders in Needham, many homeowners believe that choosing the lowest bid guarantees the best outcome. However, this mindset often leads to costly surprises later on. A common myth is that all deck contractors are equally experienced and adhere to local building standards, but in reality, not all are equally knowledgeable about Needham’s specific regulations and climate challenges. Rushing into a project without thoroughly vetting a contractor’s expertise can result in structural compromises or code violations, which may require costly corrections or delays—check out [common deck code violations in Needham](https://deckbuildersneedham.com/common-deck-code-violations-found-in-needham-homes). Furthermore, many homeowners overlook the importance of understanding the nuances of deck materials; for example, choosing composite over wood isn’t just about aesthetics, but about durability, maintenance, and environmental impact, as discussed in [why composite decks are more eco-friendly in 2026](https://deckbuildersneedham.com/why-composite-decks-are-more-eco-friendly-in-2026). A significant mistake is underestimating the complexity of proper drainage and waterproofing—skipping detailed assessments can lead to moisture issues that damage the structure and your investment. One advanced consideration often missed is the importance of proper joist spacing tailored to your chosen decking material, which influences longevity and safety—see [is your deck joist spacing correct for composite boards](https://deckbuildersneedham.com/is-your-deck-joist-spacing-correct-for-composite-boards).
Why does precision in detail matter more than many realize?
Let’s dig deeper. Expert deck builders in Needham know that meticulous attention to local building codes and seasonal weather patterns differentiates a durable deck from one that struggles with rot, warping, or failure. For instance, installing stainless-steel screws instead of standard steel ones prevents corrosion in our humid climate, a detail highlighted in [why you should use stainless steel screws in 2026](https://deckbuildersneedham.com/why-you-should-use-stainless-steel-screws-in-2026). Overlooking these small but crucial details can lead to structural issues down the line, costing more than initial savings. Better yet, a skilled contractor will proactively advise on incorporating features like proper overhangs or drainage systems, which are often underestimated. Remember, a well-built deck isn’t just aesthetic; it’s a long-term investment that demands expertise beyond the basics. Have you ever fallen into this trap? Let me know in the comments. Consider partnering with a professional who emphasizes precision and adherence to local standards, rather than just flashy bids. This nuance—that attention to detailed craftsmanship—sets top-tier Needham deck builders apart from amateurs and ensures your outdoor space remains safe, functional, and beautiful for years to come.Maintaining a durable, beautiful deck requires more than just initial construction; it demands the right tools and techniques to keep everything functioning optimally over time. As a seasoned Needham deck builder, I’ve honed my toolkit to ensure every project meets high standards of quality and longevity. One essential tool I swear by is a **digital moisture meter**, like the Protimeter Surveymaster. It provides accurate readings of wood and concrete moisture levels, helping me determine the right time for sealing or staining, especially important in Needham’s humid climate. Regularly checking moisture levels prevents issues such as wood rot or mold, extending your deck’s lifespan.
Another must-have is a **high-pressure power washer**. I opt for a model with variable settings and a rotating turbo nozzle, which I use to clean decks thoroughly without damaging the surface. Proper cleaning before applying any stain or sealant ensures maximum adhesion and longevity. For cleaning stubborn mold or algae, I prefer eco-friendly, biodegradable solutions like oxygen bleach, which effectively removes contaminants while protecting the environment.
When it’s time for sealing or staining, I rely on quality brushes and rollers, but for large surface areas, a **spray gun with a HVLP system** is invaluable. It delivers an even coat, saving time and reducing mess. I always test spray patterns on scrap material first, ensuring smooth application. Choosing the right stain is crucial—see [choosing a deck stain that won’t peel](https://deckbuildersneedham.com/choosing-a-stain-for-your-deck-that-wont-peel)—and I recommend opting for products formulated specifically for composite or wooden decks, based on your climate.
For ongoing maintenance, I utilize a **leaf blower** with a wide nozzle to clear debris from the deck surface, preventing buildup that can trap moisture and promote deterioration. Additionally, a **lithium-ion cordless drill** with multiple attachments helps me tighten loose fasteners and replace worn-out screws swiftly, maintaining structural integrity.
Predictions for the future point toward smart, connected tools that monitor deck health in real-time, integrating sensors that can alert you to moisture intrusion or structural fatigue before problems become severe. Staying ahead with these advancements can save both time and money.
**How do I maintain my deck hardware over time?** Regularly inspecting fasteners, for example, using a dedicated **stainless-steel screw checker**, can catch corrosion early and prevent larger issues—see [why stainless steel screws are essential](https://deckbuildersneedham.com/why-they-should-use-stainless-steel-screws-in-2026). Incorporate scheduled cleanings and inspections in your seasonal routine to sustain your deck’s performance.
If you want to get serious about prolonging your deck’s life, try using a moisture meter before sealing, and always test your application tools on scrap material. These small but impactful steps can dramatically improve your deck’s durability, regardless of weather conditions. Investing in the right equipment now ensures your outdoor space remains safe and inviting for years to come.
Three Lessons That Changed My Approach to Needham Deck Projects
- Don’t Overlook Small Details: I once thought sealing the main waterproof barrier was enough, but I learned that tiny gaps or misaligned vents can invite moisture and mold. Attention to every seam and joint is crucial—details others dismiss can make or break your project.
- Embrace Flexibility in Design: Rigid plans rarely survive actual construction. Adaptability—like adjusting vent sizes or support heights—proved essential. Listening to the unique needs of each space ensures a waterproof storage solution that lasts.
- Learn from Every Mistake: My early attempts involved shortcuts like insufficient sealing. Big storms revealed weaknesses, but those failures were invaluable lessons, guiding me toward more robust methods like using high-quality tapes and proper drainage techniques.
Tools and Resources That Elevate My Craft
- Waterproof Membranes and Sealants: I trust heavy-duty, flexible waterproof membranes like rubberized asphalt because they conform well and last through seasons. For sealants, polymer-based caulks provide unmatched adhesion and weather resistance.
- Moisture Meters: A digital moisture meter helps me detect hidden dampness in wood and concrete before sealing, preventing future rot. I recommend the Protimeter Surveymaster for its accuracy and ease of use.
- Ventilation Components: Proper airflow is vital. I lean on adjustable vents with corrosion-resistant frames, ensuring continuous air circulation without exposing the interior to water. Having tested various sizes, I find that cross-ventilation effectively prevents mold buildup.
- Educational Guides and Expert Advice: Staying informed through resources like Needham’s deck code violations and specialized blogs sharpens my skills and ensures compliance with local standards.
Keep Building, Keep Improving
Every project teaches a new lesson, especially in a climate like Needham’s where moisture challenges are constant. Your outdoor storage can remain dry and durable if you blend expert techniques with personal experience. So, don’t shy away from experimenting and learning—your backyard sanctuary depends on it. What’s the biggest waterproofing challenge you’ve faced? Share your story below and let’s learn together.