Ever stepped onto your porch only to feel that unexpected wobble or see a wobbly stair hiding beneath your feet? That quick jolt of concern isn’t just nerves—it’s a signal that something’s gone awry with your deck, specifically the stair stringers. I remember the lightbulb moment when I first noticed a loose step, only to find rot silently creeping up from below. It’s unsettling, isn’t it? Especially because your deck isn’t just a pretty space; it’s an integral part of your outdoor living, where safety should always come first.
Uncovering the Hidden Enemy Beneath Your Stairs
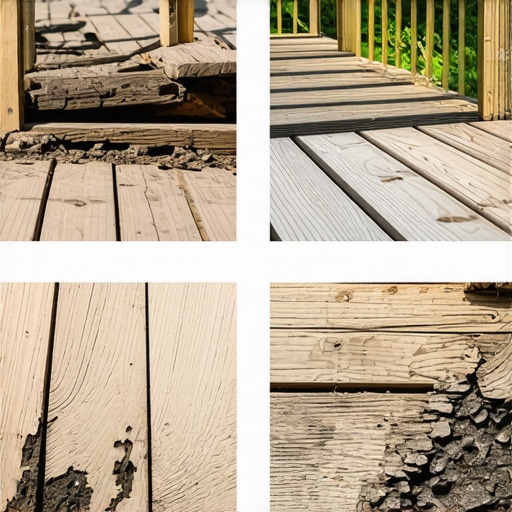
Deck stairs are often overlooked until they start to give underfoot. The real trouble starts when moisture sneaks in—through cracks, gaps, or poor drainage—creating the perfect environment for decay. Over time, wood rot can compromise the structure, making those once sturdy steps a real hazard. Recognizing why this rot happens is crucial to fixing it before disaster strikes. Early on, I missed some signals, assuming the problem was superficial, but neglecting the root cause only made things worse. Did you know that according to the Occupational Safety and Health Administration, deck failures, often linked to rotting timber, are responsible for numerous injuries every year? It’s a stark reminder that deck safety isn’t just about appearance—it’s about life safety.
Why DIY Repairs Sometimes Fail
In my early days, I tried patching up rotted stringers myself, thinking a little paint and a few nails would do the trick. Big mistake. I overlooked the importance of proper ventilation and sealing, enabling rot to return faster than I could fix it. As I learned, understanding the basic causes—like inadequate drainage and exposure to moisture—is vital. Want to learn targeted solutions? You might be surprised how a simple understanding of these issues can save you from costly repairs later on. Curious to see how professional fixes can extend your deck’s lifespan? Check out this guide.
Whether you’ve faced similar struggles or are just considering preventative measures, recognizing the signs early can make all the difference. Next, I’ll walk you through specific actionable steps to diagnose and fix rotting stair stringers, so you can enjoy your outdoor haven with confidence, not fear.
Assess the Damage Precisely
Start by removing any debris and inspecting the stair stringers for visible rot, cracks, or sagging. I once used a putty knife to gently probe suspect areas; soft wood indicated rot. Use a flashlight to peer into hidden areas and look for signs of moisture or mold. Mark all compromised sections with a pencil for reference. This step is crucial because a thorough assessment prevents unnecessary replacements and ensures safety.
Gather Necessary Tools and Materials
Prepare a circular saw, pry bar, hammer, wood replacement pieces, construction adhesive, exterior-grade screws, and protective gear like gloves and safety glasses. I learned the hard way that having the right supplies on hand accelerates the repair, preventing multiple trips to the store. Use corrosion-resistant fasteners, such as stainless-steel screws, for durability against moisture.
Remove Rotted Material Carefully
Cut away the damaged sections using a circular saw set to the appropriate depth, aiming to cut slightly beyond the rotten areas. Use a pry bar to gently pry out the old wood, avoiding damage to surrounding structures. When I repaired my stairs, I found that patience prevents splintering or breaking off healthy wood. Clean out all debris and verify the integrity of the remaining stringer before proceeding.
Prepare and Install New Wood
Cut new pressure-treated or rot-resistant wood to match the removed sections, ensuring precise measurements. Apply a wood preservative or sealer to the new pieces before installation. Secure them using exterior-grade screws, driven with a drill, and ensure they are flush with existing wood. I had a misstep when I didn’t pre-soak the new wood; it expanded slightly, so planning for slight adjustments is wise.
Seal and Protect the Repair Area
Apply a high-quality sealant to all seams and edges, creating a barrier against moisture. Consider adding ventilation gaps if possible, to prevent trapped water. Proper sealing not only prolongs the lifespan but also reduces the chance of rot recurrence. For long-term durability, routinely inspect and reseal the area annually.
Reinforce the Structure for Safety
Check the entire stair framework, including handrails and supports. Tighten loose bolts and replace any rusted fasteners. If the stringers are significantly compromised, replacing the entire component might be necessary. I once tackled a project where upgrading to cable railings added both safety and modern aesthetics after structural repairs.
Verify and Test the Repair
Once complete, stand on the stairs and apply gradual weight to test stability. Look for any flex or movement. If motion persists, revisit the repair, adding more fasteners or reinforcement. Remember, safety is the top priority, and a sturdy staircase ensures peace of mind for years to come.
Regular inspections, especially after harsh weather, can catch early signs of rot. Maintaining proper drainage and sealing any cracks helps prevent future issues. The effort invested now pays off by saving you from costly repairs and potential hazards later.
Many homeowners assume that all deck builders in Needham offer similar quality and expertise, but this is a dangerous oversimplification. One common myth is that sticking to the lowest bid guarantees savings, yet cutting costs often results in subpar craftsmanship and future expenses. In fact, quality materials like stainless-steel fasteners and rot-resistant wood are essential for longevity, as highlighted in various industry standards. An overlooked nuance is the importance of understanding local building codes and zoning laws, which vary by area and can affect your project’s scope and approval process. Failing to adhere to these can lead to costly delays or legal issues, a trap that even seasoned homeowners might fall into if they don’t do thorough research. I once encountered a client who bypassed professional consultation, resulting in a deck that violated the Needham deck code, which could have been avoided with a proper pre-build assessment.
Why do some deck builders overlook the importance of drainage and moisture management?
It’s a mistake that can cause hidden rot, undermining your deck’s safety over time. Professional deck builders incorporate advanced techniques such as installing proper flashing and sealants, which are often misunderstood or undervalued by DIYers. Expert insights from industry leaders emphasize that neglecting these details accelerates wood decay. For instance, implementing a proper drip edge combined with adequate ventilation significantly extends the lifespan of your deck, as outlined in research from the Journal of Building Engineering.
Another trap is relying solely on decorative features without considering structural integrity. Modern trends, like [cable railings](https://deckbuildersneedham.com/why-cable-railings-are-no-longer-only-for-luxury-decks), require precise planning to ensure safety and compliance. Too often, homeowners think aesthetics replace functionality, but in reality, the safest decks seamlessly blend beauty with durability.
Remember, choosing a reliable, experienced contractor isn’t just about aesthetic appeal—it’s about ensuring your outdoor space is safe, code-compliant, and built to last. Don’t forget to check out our guide on [common deck code violations in Needham](https://deckbuildersneedham.com/common-deck-code-violations-found-in-needham-homes) before starting your project. Have you ever fallen into this trap? Let me know in the comments.
Keeping It Working: Tools and Methods for Longevity
Maintaining a beautiful and safe deck requires not just routine inspections but also the right tools and expert techniques. Over the years, I’ve refined my toolkit to ensure every repair or upgrade is durable and efficient. One indispensable instrument in my arsenal is the digital moisture meter. This device helps me identify concealed rot behind the surfaces, enabling me to target repairs precisely without unnecessary wood removal. Investing in a reliable moisture meter can save you from future headaches by catching problems early.
Another go-to tool is the impact driver. Its power and precision streamline fastening jobs—whether installing new joists or securing cable railings. Unlike standard drills, impact drivers handle tougher fasteners and resist stripping screws, ensuring a tight, long-lasting fit. These tools are especially valuable when working under tight schedules or in hard-to-reach places.
My preferred software for planning is SketchUp. It allows me to visualize the project, experiment with design tweaks, and ensure measurements are spot-on before cutting. Proper planning minimizes waste and reduces the need for repeated trips to the store, saving both time and money. For long-term results, I recommend creating a detailed digital blueprint, especially if you plan to scale your deck or add complex features like pergolas or new lighting systems.
How do I maintain my deck over time?
Routine maintenance is key to prolonging your deck’s life. I adhere to a seasonal check-list—power washing to clear moss and grime, inspecting and resealing joints, and replacing fasteners with corrosion-resistant stainless-steel ones. Applying a protective stain or sealant annually can dramatically reduce moisture ingress, preventing rot. When I tackle these tasks, I use a high-quality deck cleaner combined with a soft-bristle brush, ensuring deep cleaning without damaging the wood’s surface. Additionally, crop out areas prone to water pooling by adjusting the grade or installing drainage paths. Such proactive steps keep your deck looking new and functioning safely for decades.
Looking ahead, advancements like botanical-based stains and smart moisture sensors will revolutionize deck maintenance. Imagine receiving alerts on your phone when moisture levels rise, prompting timely sealing before rot sets in. Staying ahead with modern technology can cut costs and extend your deck’s lifespan considerably. I encourage you to experiment with one of these tools or techniques—like incorporating a moisture meter into your annual maintenance routine—and see the difference it makes.
Future of Deck Care in Needham
The trend points toward integrated systems that combine physical inspection tools with digital monitoring, making deck upkeep more precise and less labor-intensive. As local building codes evolve, especially with focus on safety and sustainability, staying informed about innovative tools and methods isn’t just savvy—it’s essential. Regularly consult trusted resources and consider scheduling professional inspections, which can spot issues beyond casual observation. Remember, a well-maintained deck is more than aesthetics; it’s a lasting investment in your home’s safety and charm.
After dedicating time and resources to your deck, it’s incredibly rewarding to see it stand the test of time. But even the most durable materials need vigilant care and a touch of insider knowledge to keep them in top shape. Over the years, I’ve learned some overlooked yet powerful lessons that can make your deck repair journey smoother and more effective—lessons that the average homeowner might never stumble upon. Ready to elevate your deck maintenance game? Let’s dive into some hidden truths that can transform your approach to preserving this valuable outdoor asset.
The Hardest Lesson I Learned About Deck Fixes in Needham
Patience pays off. I once rushed a repair, thinking I could speed through replacing rotted stringers, only to realize I hadn’t thoroughly identified all hidden areas of decay. The rot was more extensive than I thought, and my quick fix ended up costing more time and money. The key takeaway? Always peel back the layers — use probing tools like a moisture meter to uncover secrets behind the surface. This approach ensures you don’t overlook crucial damage that might compromise safety down the line. This lesson taught me that precision and caution beat haste every time when it comes to deck repairs.
My Favorite Tools That Make Repair Work a Breeze
Nothing beats having the right arsenal. A digital moisture meter has become my go-to for detecting concealed rot, saving me from unnecessary wood removal. It’s accurate, easy to use, and invaluable for early detection. I also swear by impact drivers; their power makes fastening new boards effortless, especially when working in tight spots or with tough fasteners. Combining these tools with a well-planned blueprint—such as sketches from design software like SketchUp—ensures projects stay on track and within budget. Having reliable tools isn’t just convenient; it’s transformational for achieving lasting results.
Why My Routine Sometimes Misses the Mark—and How to Fix That
Initially, I underestimated the importance of sealing after repairs, thinking that replacing the wood was enough. But moisture managed to seep in, accelerating decay once again. Now, I understand that sealing all seams and edges with a high-quality, exterior-rated sealant significantly extends the life of your repair work. Regular maintenance—such as resealing annually and inspecting for signs of moisture—becomes crucial. Incorporating simple rituals like power washing and replacing rusted fasteners with stainless steel ones also sustains the integrity of your deck. These lessons have shown me that ongoing vigilance enhances longevity, turning a good repair into a lasting solution.
How Spotting Small Problems Can Save Big Hassles
Early detection is your best defense. Small cracks or loose fasteners might seem insignificant—until they become safety hazards. By routinely walking your deck, especially after harsh weather, and using tools like a moisture meter to peek behind surfaces, you can catch impending issues early. Think of it as health check-ups for your outdoor space. Taking proactive steps, like addressing minor issues before they escalate, can save thousands in future repairs and ensure your deck remains a safe haven for years to come.
Are You Ready to Turn Knowledge into Action?
Armed with these insights and a few trusted tools, you can tackle deck repairs with confidence and extend your outdoor space’s life well into the future. Remember, every little fix or preventive measure makes a difference. Whether you’re replacing a few boards or planning a full overhaul, understanding the intricacies of proper repair and maintenance sets you apart from the average homeowner.
What’s the first repair or upgrade on your list? Share your plans or questions below—let’s keep the conversation going. Together, we can ensure your deck remains safe, beautiful, and ready for years of enjoyment!