Have you ever hurried through staining your deck only to find that it looks uneven, dull, or worse—discolored after just a few months? I learned this lesson the hard way, and honestly, it was a lightbulb moment. One season, I skipped sanding my deck boards, thinking a quick clean and a fresh coat would do the trick. Turns out, I was masking deeper issues that would haunt me later. If you’re tired of redoing your staining project sooner than expected, then stick around because we’re about to dive into why proper preparation—starting with sanding—can make all the difference.
Why Skipping Sanding Can Sabotage Your Deck’s Beauty and Longevity
Imagine spending hours, maybe even days, applying a beautiful stain to your deck, only to see it wear unevenly or peel within a year. It’s frustrating—trust me, I’ve been there. The secret to a flawless, durable finish isn’t just in the stain itself, but in how well the surface is prepared beforehand. Sanding your deck boards removes the rough surface, splinters, and old stains, giving the new stain a smooth canvas to adhere to. This step can actually prevent issues like peeling, chipping, and uneven coloring, which are all common complaints among DIY homeowners.
Early on, I made a critical mistake—I thought power washing alone would suffice to prep my wood. While cleaning certainly helps, it doesn’t strip away the worn top layer and can leave contaminants behind. According to expert advice, properly sanding decks is essential to remove any lingering old stain, buildup, and surface imperfections, ensuring your new stain bonds well and lasts longer.
So, if you’re wondering whether sanding your deck boards is really worth the effort, I’ll give you this: It’s the cornerstone of a successful stain job. Skipping it might save you an hour now, but it can cost you a lot more down the line in maintenance and frustration. Now that we understand why prep work matters so much, let’s get into how to do it the right way—step by step.
Start by Clearing and Inspecting Your Deck
Remove all furniture, planters, and debris from your deck. Examine the surface for loose boards, protruding nails, and rotted wood. Fix any structural issues before proceeding, as a stable base ensures effective sanding and long-lasting results. I once neglected this step and ended up having to redo sections due to unstable boards bouncing during sanding.
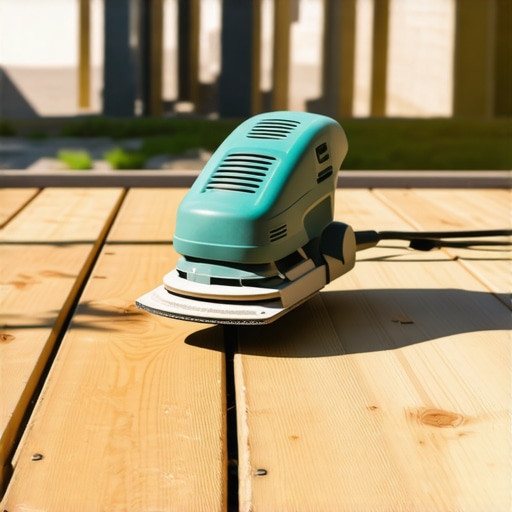
Choose the Right Sandpaper and Tools
Opt for medium-grit (80-120) sandpaper or a corresponding sanding disc for power sanders. Use a drill with a sanding attachment or an orbital sander for large areas, and a hand-held detail sander for corners and edges. Think of sanding as polishing a gemstone—each grit prepares the surface for the next, revealing a smooth, shiny layer beneath. Using the proper tools minimizes effort and maximizes consistency.
Sand with Purpose and Technique
Begin with a Wide, Even Strokes
Set your sander to a consistent speed and keep it moving in overlapping passes, following the grain of the wood. This prevents gouges and uneven surfaces. I once used a heavy-handed approach, pressing too hard, which caused gouges and an uneven finish. Light, controlled pressure yields better results.
Focus on the Surface and Edges
Pay special attention to problematic areas such as splinters and rough patches. Use a detail sander or hand sanders for corners and narrow spaces. Remember, these areas can trap stains and moisture if left untreated, leading to quicker deterioration. An extra pass over these spots can dramatically improve the final look and durability.
Remove Dust and Prepare for Staining
Once sanding is complete, thoroughly sweep or vacuum the deck to remove dust and debris. Use a tack cloth or damp rag to wipe down the surface for extra cleanliness. Dust residues can prevent stain adhesion and lead to uneven coloring. I learned this the hard way when my stained deck looked blotchy because I skipped this cleanup step.
Work in Favorable Conditions
Choose a day with low humidity and no rain forecast. Excessive moisture or dew can interfere with stain absorption and drying, undermining your efforts. Think of your deck like a sponge; it needs to be dry to accept the stain evenly and prevent peeling later. Proper timing can mean the difference between a smooth finish and a mess.
Many homeowners believe that selecting the cheapest materials guarantees savings, but in my experience, opting for quality and understanding the nuances can extend your deck’s lifespan significantly. A prevalent misconception is that all composite materials are equal; however, as discussed in this article, newer 2026 models are engineered for better durability and slip resistance, which is crucial for safety and longevity. Another myth is that skipping professional consultation saves money—yet, a seasoned expert can anticipate issues like cupping and warping, leading to cost-effective solutions that prevent costly repairs later.
A common mistake is neglecting detailed inspections of supporting structures before building or renovating. Overlooking elements like stair tread stability or inadequately anchoring posts can compromise safety and necessitate early replacement. These issues are often buried in the assumption that the visible surface is all that matters.
Let’s address an advanced question: How does understanding the specific load requirements influence deck construction in a region like Needham? The fact is, local climate conditions—especially heavy snowfall and rain—demand tailored structural designs. According to expert insights, designing decks with reinforced framing and proper drainage not only enhances durability but also ensures compliance with regional building codes.
Avoid falling into generic advice traps—consider custom solutions like innovative railing designs or drainage systems. For instance, modern lighting can uplift the ambiance without sacrificing safety, but only if integrated carefully during the original design.
Have you ever fallen into this trap? Let me know in the comments. Let’s keep the conversation going to build better, longer-lasting decks in Needham.
Keep Your Deck Running Smoothly with the Right Tools
Maintaining a deck that stands the test of time requires more than just regular cleaning—it demands the right equipment and a strategic approach. I personally swear by my high-quality orbital sander to ensure a smooth surface before any re-staining project. Its ability to evenly sand large areas quickly and its fine dust collection system make it indispensable in my toolkit. Investing in a dedicated, variable-speed drill with a torque control feature also helps prevent over-tightening fasteners, protecting your deck’s integrity over time. Remember, the right tools not only improve the quality of your maintenance but also save you hours of labor, making upkeep more manageable and effective.
The Power of Consistent Maintenance
Long-term deck health hinges on routine inspections and timely interventions. Regularly checking your deck’s stair treads for stability can prevent accidents, and addressing minor issues early can save significant repair costs later. For example, using a specialized moisture meter can help detect hidden wood rot or moisture infiltration before it becomes visible, aligning with expert advice on early detection. Establishing a seasonal maintenance schedule—cleaning, inspecting, and resealing—ensures your deck remains safe and attractive for years to come. Think of it as a wellness check for your outdoor space, keeping everything in optimal condition.
Scaling Your Deck Maintenance Efforts
As your needs grow, so should your maintenance approach. For larger decks, consider modular power tools like a mounted disc sander or a pneumatic air compressor with specialized attachments for cleaning and prep work. These tools expedite large-scale tasks and improve consistency. Additionally, integrating smart monitoring systems—though still emerging—may become standard in the future, alerting you to moisture levels or structural shifts in real time, much like smart home systems do for indoor spaces. Staying ahead with advanced tools enhances longevity and safety, making maintenance less burdensome and more proactive. I predict a future where automation will handle routine inspections, leaving homeowners more time for creative improvements.
How do I keep my deck functioning perfectly over time?
Developing a maintenance routine that incorporates regular inspections, timely repairs, and using the appropriate tools is essential. For instance, periodically examine supporting structures with inspection mirrors or cameras, especially in hard-to-reach areas. Catering to regional weather patterns, like the heavy rain in Needham, involves applying sealers and protective coatings with sprayers designed for even coverage—this reduces manual effort and ensures thorough application. Additionally, consider upgrading to durable, weather-resistant materials like composite decking, which demand less upkeep and resist warping or cracking, as explained here. Embrace these strategies, and you’ll enjoy a safe, gorgeous deck for decades.
3 Surprising Truths I Discovered About Deck Maintenance
One of the most valuable lessons I learned was that the pre-staining process isn’t just a chore—it’s the foundation of a lasting finish. Skipping thorough sanding and cleaning can lead to peeling and uneven colors, no matter how high-quality your stain is. Another insight was that not all tools are created equal; investing in a good orbital sander makes a noticeable difference in achieving that smooth, professional look and reducing overall work time. Lastly, I realized that regional weather patterns, like the heavy rain in Needham, require tailored sealing and drainage strategies to protect your deck from premature damage. These lessons transformed my approach and can do the same for you, saving time and money in the long run.
My Secret Arsenal for Deck Longevity and Beauty
Hands down, my go-to tool for prep work is a lightweight, variable-speed orbital sander, which ensures even sanding without gouging the wood. For inspecting structural integrity, I rely on a moisture meter—an underestimated gadget that reveals hidden rot before it becomes costly repairs. When it comes to cleaning, a high-quality leaf blower helps remove debris quickly, freeing up time for detailed tasks. On the reading side, this resource broadened my understanding of durable materials that stand up to Needham’s weather. These tools and references have become staples in my deck maintenance routine, ensuring durable, beautiful results season after season.
Your Next Step: Embrace the Deck Care Journey
The future of deck maintenance is all about consistent effort and smart choices. Whether you’re just starting or looking to upgrade your current space, remember that proper preparation, quality tools, and regional knowledge are your best allies. Don’t wait until issues become visible—regular inspections and early interventions will keep your deck inviting and safe for years to come. Your backyard oasis is worth the investment of time and care; every step you take now will lead to stunning results and peace of mind. So go ahead—grab that sander, plan your maintenance schedule, and turn your deck into the envy of Needham. Have you ever struggled with a particular step in deck prep? Let me know below, and let’s share tips to help each other succeed.