I remember the first time I built a new deck. It looked perfect—sturdy, sleek, inviting. But come that rainy season, I noticed something unsettling: some boards started to swell, and a few even developed a slight mold smell. It was a lightbulb moment for me—turns out, I had overlooked one crucial step that could have saved me a lot of trouble down the line. If you’ve recently invested in a beautiful new deck, you might want to ask yourself: have I taken steps to protect it from moisture? Because trust me, neglecting this aspect can lead to costly repairs and a shortened deck lifespan.
The Hidden Enemy: Moisture and Your Deck
Why Moisture Is Your Deck’s Worst Enemy
Many homeowners don’t realize that moisture infiltration is one of the leading causes of deck deterioration over time. Water seeping into the wood or composite can promote rot, warp the boards, and even cause structural failure if left unchecked. The problem isn’t just the rain cycles; humidity, dew, and even snow contribute to ongoing moisture exposure that can quietly damage your deck.
In my experience, many neglect the importance of a proper moisture barrier, thinking that regular sealants or stains are enough. But those are just surface protections, and moisture often finds its way into the underlying layers. In fact, a study from the
National Association of Home Builders
reveals that decks without adequate moisture management can experience lifespan reductions of up to 50%. That’s a staggering figure, especially considering how much homeowners typically invest in upgrading their outdoor spaces.
If you’re pondering whether this is just technical mumbo jumbo or something you can ignore, I urge you to consider the long-term implications. A cheap oversight today can mean significant expenses tomorrow. And I don’t want that for you.
Wrapping Your Deck in Protection with a Moisture-Proof Layer
Have you noticed new decks succumbing to early wear and tear? Or perhaps you’ve experienced soggy, unwelcoming outdoor spaces even after days of sunshine? If so, you’re not alone—and the solution might be simpler than you think.
By adding a dedicated moisture-proof layer during your deck’s construction or renovation, you essentially give your deck a second skin against the elements. This step involves applying specialized barriers that prevent water from penetrating deep into the wood or composite material, thereby prolonging the deck’s beauty and durability.
Curious about how to do this properly? The upcoming sections will walk you through the essential steps to make sure your investment stays protected for years to come. Whether you’re a DIY enthusiast or plan to hire professionals, understanding this key element will empower you to make smarter choices.
Before we dive into the detailed process, I want to share a quick story. Early in my deck-building adventures, I made the mistake of skipping this protective layer. It was an expensive lesson—one I’d love to help you avoid. So, let’s explore how you can safeguard your new deck effectively, starting right now.
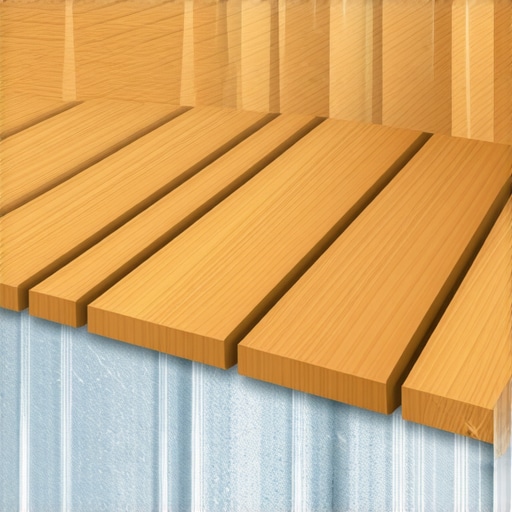
Apply a High-Quality Moisture Barrier
Start with a clean, dry deck surface. I once skipped this step, thinking power washing was enough, but I quickly learned that dirt and debris can hinder barrier adhesion. Use a stiff brush or pressure washer to remove all dirt, then let it dry completely. Choose a reputable waterproofing membrane or sealant specially designed for decks. I recommend a polyurethane-based product for durability. Apply it with a brush or roller, working in small sections to ensure even coverage. Don’t skimp—multiple thin coats are better than one thick one, and follow the manufacturer’s drying times between coats.
Seal the Joists and Underlying Structures
Many neglect to seal the hidden parts of the deck, but moisture often sneaks in through gaps or exposed wood. Carefully treat all exposed joists, beams, and ledger boards with the same waterproof sealant. Pay special attention to cracks and nail holes, which are entry points for water. During my project, I used a spray-on sealant for tight spots—this saved me hours compared to brushing every nook. Remember, a well-sealed frame prevents rot from developing deep inside the structure, extending your deck’s life significantly. For tips on maintaining your deck, check out this guide on deck gapping.
Install a Protective Topcoat
If your deck already has a sealant, applying a newer, high-quality topcoat can reinforce moisture barriers. Before doing this, I tested a small area to ensure compatibility; some sealants don’t bond well with previous coatings. After cleaning and sanding lightly, apply the topcoat following the product instructions. This extra layer acts as a shield during heavy rain or snow melts, keeping water from penetrating the surface. Regular reapplication—every 2-3 years—is essential to maintain protection. For additional insights, see this waterproofing strategy.
Focus on Proper Drainage and Airflow
Even with sealants, water pooling or poor airflow can lead to moisture retention. Ensure your deck slopes slightly away from the house to facilitate runoff. Clear any debris from gaps, preventing puddles from forming. During a project, I realized my deck had a slight slope that I’d initially overlooked; correcting it prevented future water damage. Also, maintain adequate space beneath the deck to allow air circulation, which helps dry moisture quickly. For more on deck design, see lighting and ventilation tips.
Routine Maintenance and Inspection
Protection isn’t a one-and-done job. Regularly inspect your deck for signs of water damage, such as discoloration, softness, or mold. I do annual checks, especially before winter, when moisture risks spike. Reapply sealants as needed, and clean the surface with gentle detergents to remove moss or algae. This proactive approach prevents small issues from escalating into costly repairs. For detailed inspection methods, visit this comprehensive guide.
While many homeowners in Needham may think they understand what it takes to select a reliable deck builder, the reality is often more complex. Common misconceptions can lead to costly mistakes and subpar results. For instance, the belief that low-cost contractors are always the best deal overlooks the importance of craftsmanship and materials quality, which are crucial for durability and safety. Skimping on these aspects can result in decks that warp or rot within a few years, turning a beautiful outdoor space into a long-term headache.
Are You Falling for the Myth that Price Equals Quality?
Many assume that the most affordable quote guarantees the best value—however, this ignores hidden costs like poor workmanship, future repairs, and insufficient permits. As shown in a study by the American Society of Home Inspectors, poorly constructed decks often lead to structural failures that could have been prevented with proper oversight from experienced professionals. Investing in a seasoned deck builder typically pays off in the long run through enhanced longevity, safety, and aesthetic appeal.
Another nuanced mistake homeowners make involves underestimating the importance of comprehensive planning. For example, neglecting to consider drainage, airflow, or integration with existing landscaping can undermine even the most well-constructed deck. A professional in Needham will not just build your deck but will also optimize these elements to ensure your deck withstands Massachusetts weather and retains its beauty for decades. Failing to plan for future maintenance—such as avoiding treatments that prevent wood rot or insect damage—can be an oversight that shortens your deck’s lifespan significantly. Learn how to identify and prevent potential issues by exploring guides like this detailed article on warranties and long-term care.
Many homeowners also overlook the subtleties of material choices and construction techniques which can affect everything from safety to visual harmony. For example, using mismatched or outdated materials for decking or railings might seem like a minor aesthetic choice but can compromise structural integrity and code compliance. An expert deck builder understands the latest standards and can recommend materials that match your style while providing durability. Don’t fall into the trap of choosing trendy aesthetics over proven safety and quality; instead, consider consulting resources like this guide on modern designs that balance form and function.
Finally, many underestimate the value of thorough inspection and maintenance planning. Regular checkups prevent small issues—like loose fasteners or minor wood damage—from escalating into larger, more expensive problems. A professional needs to be a partner in your deck’s lifecycle, not just a builder who finishes the project and walks away. For tips on routine inspections, visit this resource on spotting wood rot early.”}]}>Maintaining a durable and beautiful deck requires the right tools and a strategic approach to upkeep over time. One of my favorite pieces of equipment is the cordless impact driver, specifically the Makita XDT16. I prefer this model because its high torque and compact design make it perfect for tightening or replacing loose fasteners without causing damage to the decking boards, especially in tight spaces. Additionally, its variable speed settings give me control, reducing the risk of overdriving screws, which can lead to cupped or warped boards. For cleaning, I swear by the Simpson 62373 Power Shot Pressure Washer—its adjustable nozzle allows me to effectively remove dirt, algae, and moss without risking damage to composite or wood surfaces, an experience I learned firsthand when using a too-strong setting that scarred some of my older boards.
The Hardest Lesson I Learned About Deck Builders Needham
One of the most profound lessons I discovered was how overlooking a simple moisture barrier can dramatically shorten my deck’s lifespan. I used to think sealing the surface was enough, but now I know that protecting the underlying wood or composite from water penetration is crucial. Missing this step cost me time and money, but it taught me the importance of thorough planning and implementation in deck maintenance.
3 Myths About Deck Builders Needham That Held Me Back
I once believed that choosing the cheapest contractor would save money, but I later realized that quality craftsmanship and proper materials are essential for longevity. Another misconception was that regular staining was sufficient protection; in reality, a dedicated moisture-proof layer makes a significant difference. And I thought neglecting proper drainage wouldn’t impact my deck—until I faced unexpected water damage. Dispelling these myths has truly transformed my approach to deck care.
What Experts Won’t Tell You About Deck Builders Needham
Professionals often emphasize aesthetics and initial cost, but they sometimes overlook the long-term benefits of installing a comprehensive moisture management system. The real key is understanding your local climate and choosing materials that can withstand Massachusetts weather, including snow and humidity. Learning from seasoned experts has shown me that proactive moisture defenses greatly extend a deck’s service life and safety.
My Essential Toolkit for Protecting a Needham Deck
I rely on a high-quality cordless impact driver like the Makita XDT16 for fasteners, ensuring a tight fit that resists water infiltration. My pressure washer, the Simpson Power Shot, helps keep the surface clean without damage, which is essential before applying sealants. For sealants, I prefer polyurethane-based waterproofing membranes, applied in multiple thin coats. These tools and products have been game-changers in maintaining my deck’s integrity and appearance.
Where to Go from Here
If you’re serious about extending your deck’s lifespan, I recommend exploring detailed guides on waterproofing and deck design. Resources like the 2026 deck material trends and border design ideas can inspire your next project. Remember, investing in proper moisture management today pays dividends in durability and enjoyment tomorrow.
Your Turn to Try
What’s the one moisture-proofing tip you’ll implement on your deck this season? Share your plans below—I’d love to hear about your project and help troubleshoot any questions you might have.